Showing posts with label heat and stick. Show all posts

Thursday, July 08, 2010

Inklings Christmas in July Blog Hop


Welcome to The INKlings’ Team’s Christmas in July blog hop. You may have arrived here from Dani's blog or just be visiting my blog, whichever way once you’ve checked out my creations you can continue the hop through the links at the end of this post to the next team member.

How quick is this year going! Have you started to think about your Christmas cards and projects yet? The INKlings team has and we thought that this month was the perfect time to host a Christmas in July blog hop. You'll find lots of great ideas provided by 17 team members’ fantastic blogs.

Want to win some Blog Candy? Simply leave a comment on each blog and then email Christie Wallace and let her know you’ve done so and you’ll be in the running for a fantastic prize of 17 handmade cards plus other goodies.

Sorry Blog Candy prize not available to SU! demonstrators but you're more than welcome to leave us a comment!

For my Christmas in July project I thought I would show you a Christmas card made using a non-Christmas set. Not surprisingly it's not a traditionally styled Christmas card, but it works!
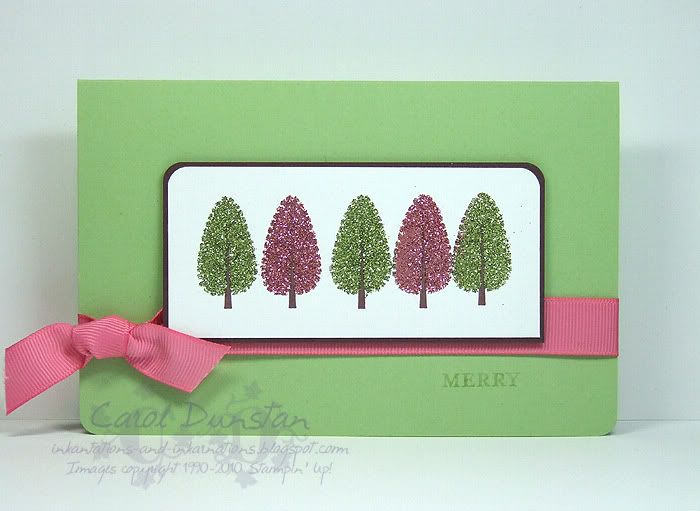
I have used the Trendy Trees set in conjunction with Heat & Stick powder and the Supernova glitter to make this fun and funky card. I started by stamping the tree trunks, and then each tree top was done individually. The tree top is first stamped with VersaMark then sprinkled with Heat & Stick powder, and the excess powder tipped off before heating with a heat gun - just like embossing powder. When the Heat & Stick powder has just melted it will be tacky, so turn off the heat gun and cover the image with the glitter of your choice, once again tipping off the excess (and it can be returned to the container). Reheat the Heat & Stick with the heat gun and the glitter will set, and very little glitter will then come off to haunt you, or the card recipient, for the rest of your days...

All supplies by Stampin' Up!
Cardstock: Certainly Celery, Chocolate Chip, Whisper White
Stamp Sets: Trendy Trees, Punches Three
Inks:Certainly Celery, Chocolate Chip, VersaMark
Accessories: Heat & Stick powder, Fine Supernova glitter, 3/16" corner rounder, Regal Rose 5/6" grosgrain

That’s it from me. Your next stop on the INKlings’ Team Blog Hop is Michelle. Have fun and don't forget to leave a comment on each blog to win some great Blog Candy.

Bloghop for Christmas in July
1. Christie
2. Dani H
3. Carol
4. Michelle D
5. Jayne
6. Kylie
7. Kari
8. Dani F
9. Beth
10. Nicky A
11. Clare
12. Amy
13. Fiona B.
14. Michelle F-S
15. Fiona
16. Divya
17. Rachel

Sunday, November 08, 2009

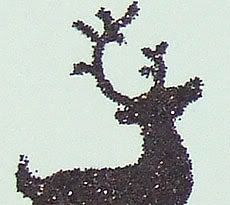
Chocolate Reindeers

Above is a snippet from the card I just uploaded over at the Elite Challenges blog. When working on this card I decided early on that I wanted the reindeers to be the feature, and to help them stand out even more I would use the Chocolate glitter from the Supernova glitter set. Chocolate reindeers reminds me of Lindt chocolate, we usually include a pack for each of the girls amongst their Christmas stuff. And now that I have got you all thinking about chocolate, I'm off! I'll be back tomorrow with a very different card to the one I have shared tonight biggrin

PS my tweak of the double-ball ornament didn't turn out, and now that I have attempted it I have a feeling I may have even tried it last year! Oh well

Wednesday, May 20, 2009

More Trendy Trees and Chocolate Seahorses

This morning I've posted two new cards over at the Elite Challenges blog.
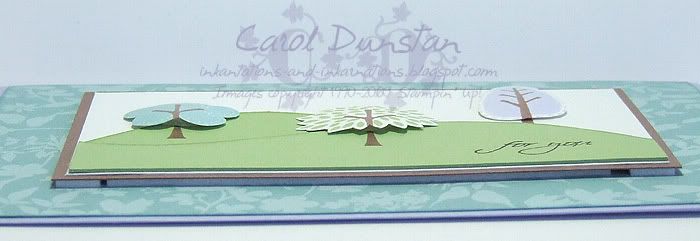
For this first one I used Trendy Trees again, and in a similar layout to the card I posted the other day. However, each tree top was cut out and shaped, as I hope you can see in the shot above. I've attached the tree tops with pop-up glue dots rather than my standard dimensionals so they will retain the rounded shape. Check out a full image of the card and all it's details at the Elite Challenges blog.

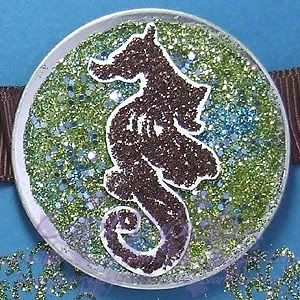
My second card ended up using a lot of glitter, and I even mixed the Chunky Sprinkles with the Fine Supernova. I filled the inside of the aluminium-edged tag with Tombow, sprinkled on some Iris Chunky Sprinkles, a little Celery Chunky Sprinkles, a few areas of Fine Turquoise and then filled the rest with Fine Olive. A little mess but quite effective! The glitter on the seahorse and seaweed (you can just see it in the bottom of the picture above) were attached using Heat & Stick powder. Check out the full card image and details over at the Elite Challenges blog.

Friday, January 30, 2009

Cinema Saturday #16 part 2

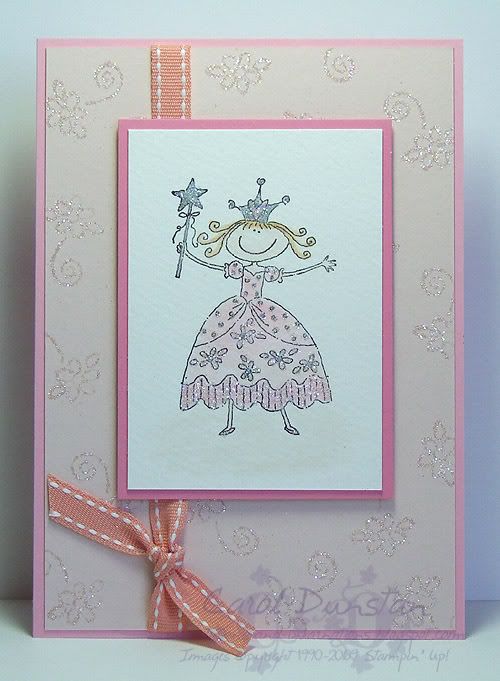
Here's my second card for this week's Cinema Saturday inspiration, Wizard of Oz. I had this idea pretty much straight away, but wanted to do something for the whole movie first. The image is more like a little girl dressing up as Glinda rather than Glinda herself (maybe Glinda in her youth?), but you get the idea. The main image has been stamped on watercolour paper (using StazOn) then coloured with aquapainter and ink except for the silver, for that I used a blender pen a the tiniest drop of silver reinker. For the glitter on the dress I simply went over the desired areas with the 2-way glue pen and sprinkled on the glitter. The background has been achieved by stamping with VersaMark, applying & heating Heat and Stick powder, applying the glitter and reheating. It makes for a very sparkly card, and of course some of it got on me and is floating around the house now... the girls love it though!

All supplies by Stampin' Up!
Cardstock: Pretty In Pink, Blush Blossom, Regal Rose, watercolout paper
Stamp Set: Pretty Princess
Inks: StazOn, VersaMark; Blush Blossom, Pretty In Pink, Creamy Caramel, So Saffron, Groovy Guava and silver used for colouring
Accessories: Groovy Guava double-stitched ribbon, aquapainter, blender pen, 2-way glue pen, heat & stick powder, Dazzling Diamonds glitter, dimensionals
Show watched while stamping: LOST

Friday, January 16, 2009

Cinema Saturday #14 part 7

Yet more Arwen cards for Cinema Saturday #14. These ones are inspired by the "bridge dress", seen when Arwen approaches Aragorn by the shards of Narsil and later when they kiss on the bridge (hence the name) and Arwen gives Aragorn Evenstar. Lots of white on white, which is good because I have been wanting to do another monochromatic white card for some time (though technically this isn't monochromatic as I've used silver, but close enough in this instance). For both cards I have used the So Swirly wheel for the background, stamping in VersaMark then applying Heat & Stick powder, heating that, applying Dazzling Diamonds glitter and then heating it again to fix it. This was to represent Arwen's dress, which was so covered in beads it was very noisy when Liv Tyler moved in it! I've also used a flower from the Pretties because it is pretty and has a similar shape the main part of Evenstar. I've also drawn on her head-dress for the crystals, though I have incorporated the hatpin differently in the two cards.
This second card has an additional scallop edge and is missing the Styled Silver ribbon slide. I wanted the hatpin and clead beads to appear a lot more dangle-y on this card

All supplies by Stampin' Up!
Cardstock: Whisper White, vellum, textured Whisper White
Stamp set: So Swirly
Ink: VersaMark
Accessories: heat & stick powder, Dazzling Diamonds glitter, Pretties Kit, Whisper White taffeta ribbon, Styled Silver Hodgepodge, scallop edge punch, dimensionals
Show watched while creating: Fellowship of course!