
Showing posts with label card. Show all posts
Showing posts with label card. Show all posts
Tuesday, April 28, 2015
Catching Up With The Captain
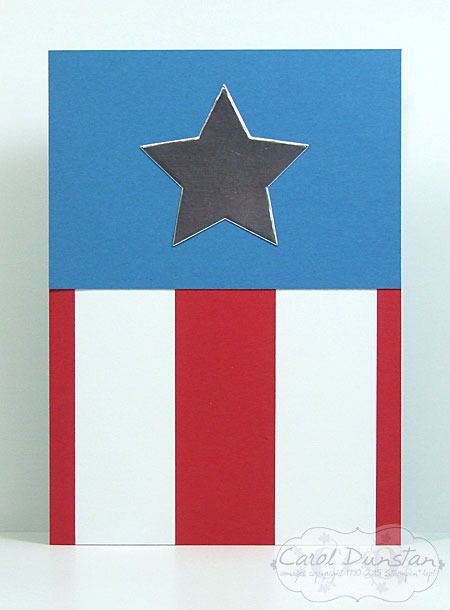
I know, I know, it's been a bit of a break again! Got tied up with some other things and really haven't done a lot of creating of late. But I do have this to share, a Captain America inspired card:
 I had actually made this a little while ago, indeed I made a few Captain America cards but this one is quite different to the others, so I thought I'd share this now and maybe share the others another day. With The Avengers: Age Of Ultron hitting cinemas - or already hit depending on where you are in the world - there'll probably be a new wave of Cap fans and maybe you can find some inspiration here. And it doesn't take a lot if you are looking to re-create this card! I will have another Avengers card to share soon, but tomorrow I am heading off for Stampin' Up! Convention on the Gold Coast, so my next post will be of a little something I will be giving to some other demos.

Saturday, January 03, 2015
Irresistibly Rainbow
Happy New Year everyone! Hope your year is off to a great start :D
I've shared a couple of projects that use the Celebrate Today set from the up-coming Occasions catalogue, and now it's time to show you something from the Sale-a-bration catalogue that also launches on January 6th.
 I have once again used Celebrate Today, but how about that background paper? It's from a pack called Irresistibly Yours, which you can get for free during Sale-a-bration when you place a qualifying order. The fantastic thing about this paper is it is clear glossy designs printed on white, so you can colour it any way you want to coordinate with whatever colours you have in your project (essentially, you can do emboss resist without the embossing!). Although for this I sponged the background first and then sorted out what I was going to put with it, hehehehe. I decided I didn't want much on the front, to let the background show off... and the background is pretty busy, so I kept it pretty simple again. It's probably hard to tell from the photo (had a bit of trouble getting a good shot!), but the dots on the balloon are rhinestones that I coloured with Blendabilities.
When I make a card I usually make two at the same time, I feel it's a bit quicker than creating two cards from scratch. Invariably I am making a card for an up-coming need, and by making two I have one to use straight away and then one on hand. This time however, the card was actually the secondary idea for this background. My original thought was this:

Yay, awesome new phone cover! When I first got my phone years ago I got a clear case for it with the idea that I could use patterned paper under it and have something unique (and a bit fancy). I hadn't changed it for a while, but once I saw this paper in the Sale-a-bration catalogues I thought I would just have to do it now, and have something truly unique (well, unless someone CASEs it!)
All supplies by Stampin' Up!
Cardstock: Whisper White
Stamp set: Celebrate Today
Ink: Rich Razzleberry, Rose Red, Melon Mambo, Calypso Coral, Daffodil Delight, So Saffron, Pear Pizzazz, Coastal Cabana, Bermuda Bay, Tempting Turquoise, Marina Mist, Wisteria Wonder, Elegant Eggplant (phew!)
Accessories: Irresistibly Yours DSP, Balloon Framelit dies, Rhinestone jewels, Rich Razzleberry Blendabilities, Melon Mambo Blendabilities, Daffodil Delight Blendabilities, Wild Wasabi Blendabilities, Coastal Cabana Blendabilities, Marina Mist Blendabilities, Wisteria Wonder Blendabilities, sponge dauber, dimensionals,Whisper White Baker's Twine (again, phew!)
I've shared a couple of projects that use the Celebrate Today set from the up-coming Occasions catalogue, and now it's time to show you something from the Sale-a-bration catalogue that also launches on January 6th.
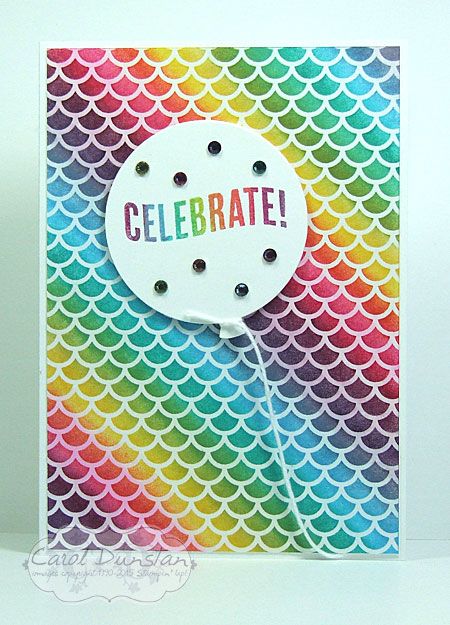
When I make a card I usually make two at the same time, I feel it's a bit quicker than creating two cards from scratch. Invariably I am making a card for an up-coming need, and by making two I have one to use straight away and then one on hand. This time however, the card was actually the secondary idea for this background. My original thought was this:
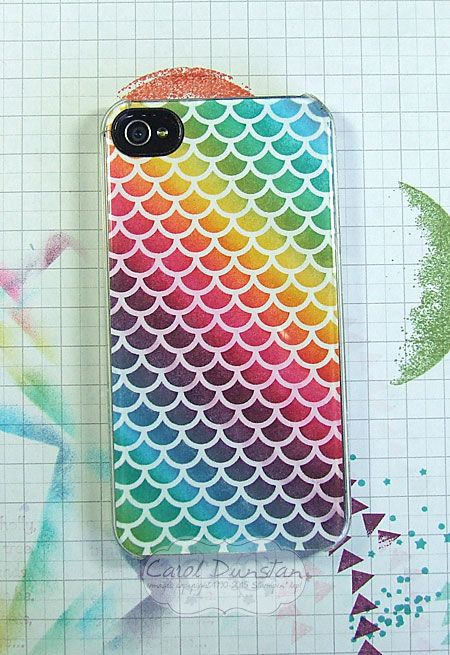
Yay, awesome new phone cover! When I first got my phone years ago I got a clear case for it with the idea that I could use patterned paper under it and have something unique (and a bit fancy). I hadn't changed it for a while, but once I saw this paper in the Sale-a-bration catalogues I thought I would just have to do it now, and have something truly unique (well, unless someone CASEs it!)
All supplies by Stampin' Up!
Cardstock: Whisper White
Stamp set: Celebrate Today
Ink: Rich Razzleberry, Rose Red, Melon Mambo, Calypso Coral, Daffodil Delight, So Saffron, Pear Pizzazz, Coastal Cabana, Bermuda Bay, Tempting Turquoise, Marina Mist, Wisteria Wonder, Elegant Eggplant (phew!)
Accessories: Irresistibly Yours DSP, Balloon Framelit dies, Rhinestone jewels, Rich Razzleberry Blendabilities, Melon Mambo Blendabilities, Daffodil Delight Blendabilities, Wild Wasabi Blendabilities, Coastal Cabana Blendabilities, Marina Mist Blendabilities, Wisteria Wonder Blendabilities, sponge dauber, dimensionals,Whisper White Baker's Twine (again, phew!)
Tuesday, December 30, 2014
Celebrate With Balloons
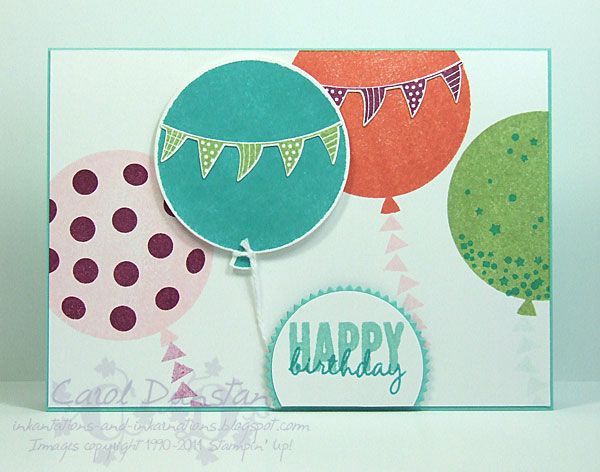
I'm having a lot of fun creating things with the upcoming Celebrate Today set. This colourful card was inspired by a card from a Stampin' Up! demonstrator publication. As is often the case when something inspires me, when I start creating more ideas come to me and sometimes the finished result can come out completely different to the idea I had at the start! With this card I hadn't planned changing too much, but I had come up with this colour scheme so had to tweak things to work that in and ultimately it became a bit of a stepped-up version, with more steps and embellishments than the original.
All supplies by Stampin' Up!
Cardstock: Coastal Cabana, Whisper White
Stamp set: Celebrate Today
Ink: Pink Pirouette, Rich Razzleberry, Bermuda Bay, Pear Pizzazz, Calypso Coral, Coastal Cabana
Accessories: 1 3/4" circle punch, Balloon Framelit dies, Starburst dies, dimensionals,Whisper White Baker's Twine
Saturday, December 27, 2014
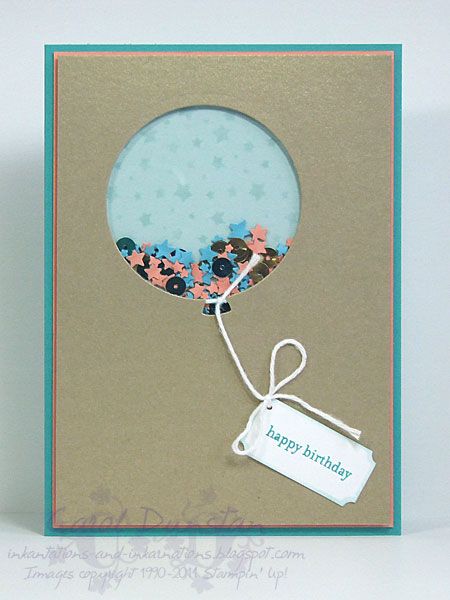
Shaker Balloon
The new year is fast approaching, and with it come new Stampin' Up! goodies! The new Occasions and Sale-a-bration catalogues launch on the 6th of January. To whet your appetites I have a few things to share during the lead up.
 It's been a while since I bought a versatile birthday set, so from the get go I was very keen on Celebrate Today and it's coordinating dies. I had the idea for a shaker card pretty quickly, then I had to waaaaaiiiit for my box of goodies to arrive... and then things were ramping up toward Christmas and I wasn't sure if I would find time to try out my ideas. I always find this so frustrating, ideas come to mind and you struggle to remember them when you sit down to create! Thankfully this idea wasn't one that was forgotten. I wanted to keep the rest of the card pretty simple to keep the focus on the balloon, though the brushed metallic cardstock has a slight texture to it which gives things a subtle interest.
All supplies by Stampin' Up!
Cardstock: Bermuda Bay, Crisp Canteloup, Soft Sky, Tempting Turquoise, Whisper White, Window Sheet, brushed gold
Stamp set: Teeny Tiny Sentiments
Ink: Bermuda Bay, Soft Sky
Accessories: gold sequin trim, Bermuda Bay sequin trim, Confetti Stars punch, Ticket Duo punch, Balloon Framelit dies, dimensionals, Whisper White Baker's Twine, dauber
All supplies by Stampin' Up!
Cardstock: Bermuda Bay, Crisp Canteloup, Soft Sky, Tempting Turquoise, Whisper White, Window Sheet, brushed gold
Stamp set: Teeny Tiny Sentiments
Ink: Bermuda Bay, Soft Sky
Accessories: gold sequin trim, Bermuda Bay sequin trim, Confetti Stars punch, Ticket Duo punch, Balloon Framelit dies, dimensionals, Whisper White Baker's Twine, dauber
Sunday, December 14, 2014
Christmas Break
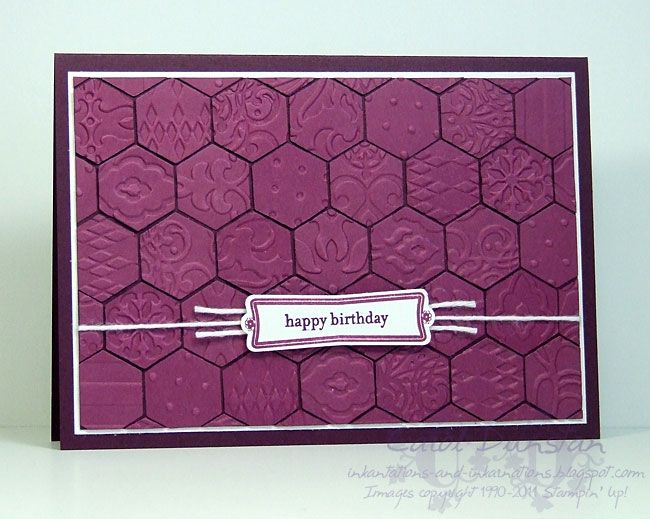
All supplies by Stampin' Up!
Cardstock: Blackberry Bliss, Rich Razzleberry, Whisper White
Stamp sets: Label Something, Teeny Tiny Sentiments
Ink: Blackberry Bliss, Rich Razzleberry
Accessories: Whisper White Baker's Twine, Modern Label punch, dimensionals, Beautifully Baroque embossing folder, Perfect Polka Dots embossing folder, Vintage Wallpaper embossing folder, Argyle embossing folder, Lacy Brocade embossing folder, Elegant Lines embossing folder, Hexagon Hive die
Thursday, December 11, 2014
TBT - Fancy Visions

All supplies by Stampin' Up!
Cardstock: Wild Wasabi, textured Wild Wasabi, Pistachio Pudding, Whisper White
Stamp set: Visions of Santa
Ink: Memento Black
Accessories: Crumb Cake Blendabilities, Skin Tone Blendabilities, Decorative Dots embossing folder, Decorative Label punch, Oval Accent Bigz die, Brights Collection DSP stack (retired design)
Show watched while creating: Castle, Sleepy Hollow
Thursday, October 30, 2014
TBT - Frosty Mosaics
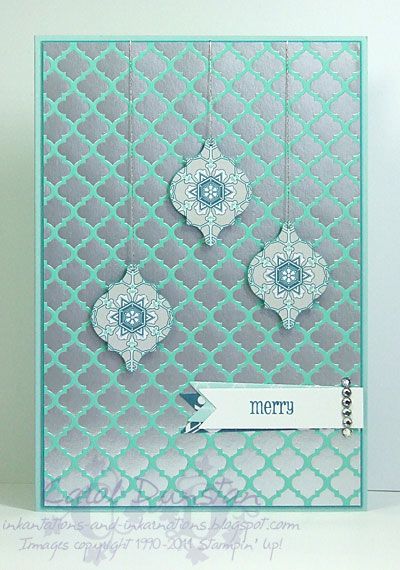
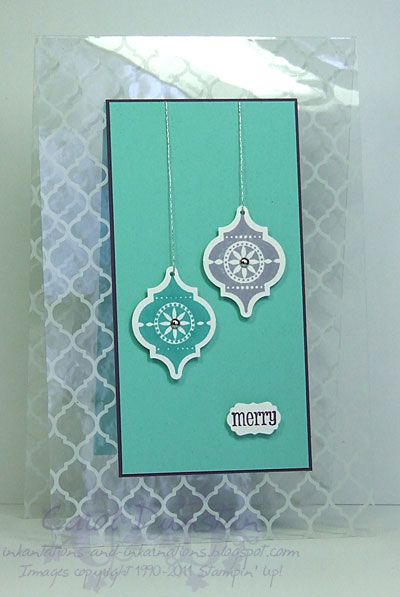
Yep... more cards using the Winter Frost paper! These two cards really highlight the "specialty" aspect of this paper, with a foil print design and a printed acetate sheet. The motif on both of these is similar to the Mosaic punch, so I focused on that. The top card just uses the punch with another design from the Winter Frost paper, while the bottom uses a stamp from the "Very Merry Tags" set.
Winter Frost foil card
Most supplies by Stampin' Up!
Cardstock: Coastal Cabana, Bermuda Bay, Whisper White
Stamp set: Pennant Parade
Ink: Island Indigo
Accessories: Mosaic punch, Bitty Banners dies, dimensionals, Rhinestone Basic Jewels, silver embroidery thread
Winter Frost acetate card
Most supplies by Stampin' Up!
Cardstock: Elegant Eggplant, Coastal Cabana, Whisper White
Stamp set: Very Merry Tags, Pennant Parade
Ink: Bermuda Bay, Wisteria Wonder, Elegant Eggplant
Accessories: Mosaic punch, Little Labels Punch Pack, dimensionals, mini brads, silver embroidery thread
Thursday, October 23, 2014
TBT - Festive Frost
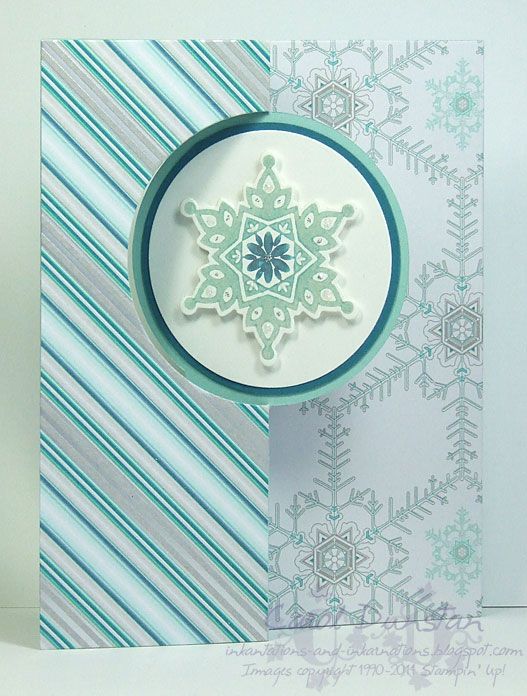
All supplies by Stampin' Up!
Cardstock: Pool Party, Island Indigo, Whisper White
Stamp set: Festive Flurry
Ink: none technically...
Accessories: Frost White Shimmer Paint, Island Indigo reinker, Coastal Cabana reinker, Pool Party reinker, dimensionals, sponge daubers, Festive Flurry dies, Circle Card die, Winter Frost DSP, Dazzling Details
Thursday, September 25, 2014
TBT - Doctor Who cards
For my third Throw-Back Thursday post I thought I would share a couple of Doctor Who cards I made last year.

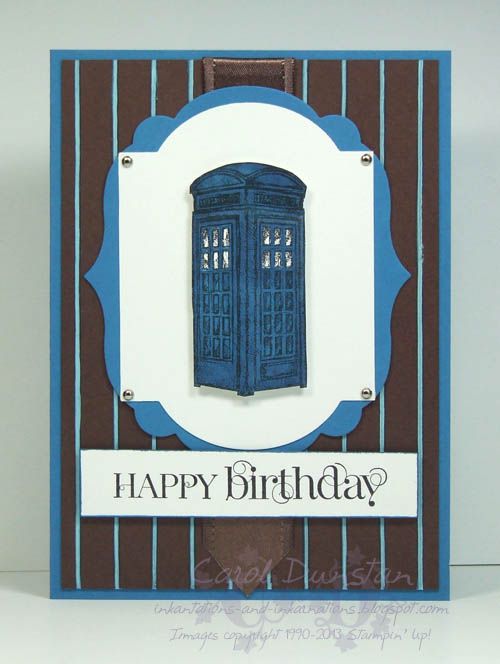
 I know a lot of fellow crafting Whovians were ecstatic about last years Sale-a-bration set "Feeling Sentimental" with it's old-style phone booth stamp... I think I only saw one card made with it where it was a proper phone box and not a TARDIS/Police Call box!
TARDIS card
All supplies by Stampin' Up!
Cardstock: Pacific Point, Chocolate Chip, Whisper White, watercolour paper
Stamp set: Feeling Sentimental, Curly Cute
Ink: StazOn black, Chocolate Chip
Accessories: aquapainter, white gel pen, Pacific Point marker, dimensionals, Chocolate Chip satin ribbon, Simply Scored tool, 1/8" mini brads, Labels Collection dies, Window Frames Collection dies
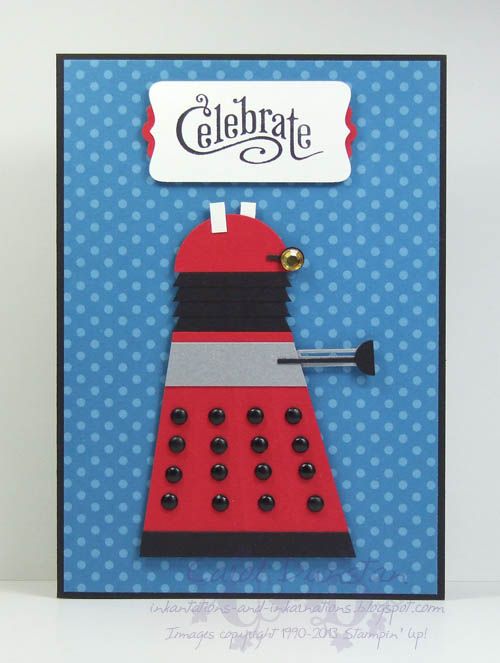
Dalek card
All supplies by Stampin' Up!
Cardstock: Basic Black, Real Red, brushed silver, Whisper White
Stamp set: Perfectly Penned
Ink: StazOn black
Accessories: Decorative Label punch, Modern Label punch, dimensionals, Neutrals brads, Circle Fire Rhinestone brads, Brights Patterns DSP stack
TARDIS card
All supplies by Stampin' Up!
Cardstock: Pacific Point, Chocolate Chip, Whisper White, watercolour paper
Stamp set: Feeling Sentimental, Curly Cute
Ink: StazOn black, Chocolate Chip
Accessories: aquapainter, white gel pen, Pacific Point marker, dimensionals, Chocolate Chip satin ribbon, Simply Scored tool, 1/8" mini brads, Labels Collection dies, Window Frames Collection dies
Dalek card
All supplies by Stampin' Up!
Cardstock: Basic Black, Real Red, brushed silver, Whisper White
Stamp set: Perfectly Penned
Ink: StazOn black
Accessories: Decorative Label punch, Modern Label punch, dimensionals, Neutrals brads, Circle Fire Rhinestone brads, Brights Patterns DSP stack
Thursday, September 11, 2014
TBT - Paisley Father's Day
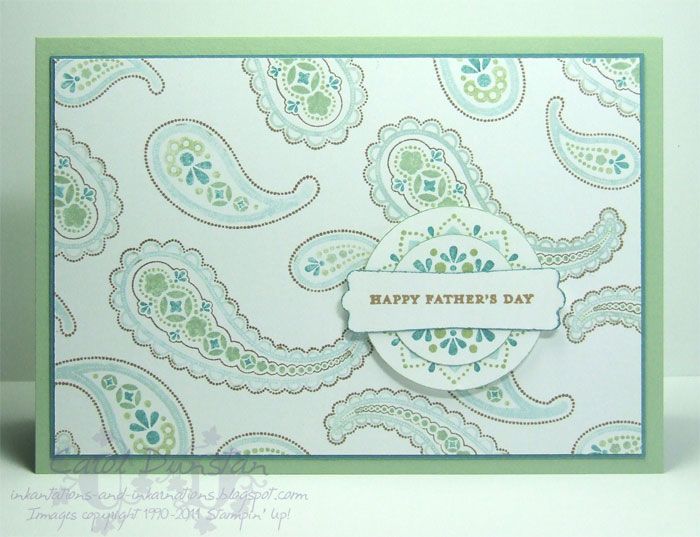
I thought I would incorporate TBT - Throw-Back Thursday - in my blog as a way of sharing things using retired products. Hopefully you might get some ideas for long-lost items tucked away in your stash, pull them out and make use of them! Quite a few of my TBT posts over the next few weeks will be things I made during my blogging absence, but to kick it off I am sharing a card from Father's Day just past. The retired product here is the Spiced Paisley set. I'm a bit of a fan of paisley, but I just didn't use it much while it was available, so I am making up for lost time now. The stamps were inked with markers, one of my favourite techniques. Some images are quite detailed and it can be tricky to avoid getting the colours in the wrong spot, something I wasn't compeltely successful with here but I knew I could stamp this background ten times and still not get it perfect, so I decided there was no point sweating it - it was still well received!
All supplies by Stampin' Up!
Cardstock: Pear Pizzazz, Island Indigo, Whisper White
Stamp set: Spiced Paisley, Teeny Tiny Sentiments
Ink: Soft Suede
Accessories: Pear Pizzazz marker, Wild Wasabi marker, Soft Sky marker, Island Indigo marker, Soft Suede marker, Moderm Label punch, 1 1/4" circle punch, 1 3/4" circle punch
Wednesday, May 30, 2012
It's punching Jim, but not as we know it
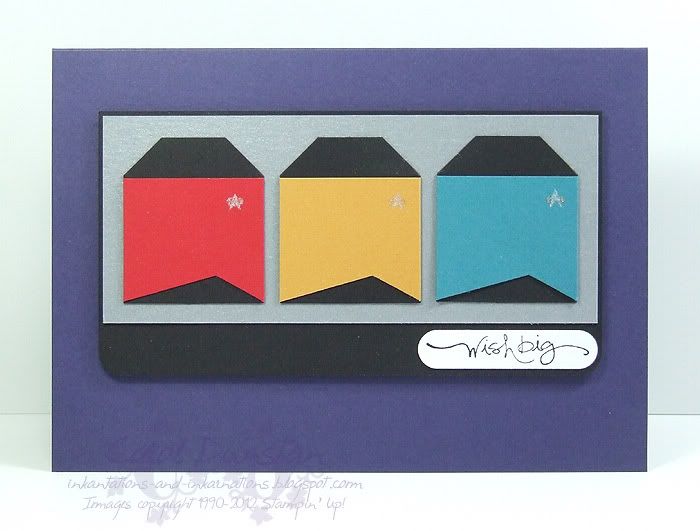
Last week a friend of mine was talking about a card she was making, a punch art Spock, and the following discussion about Red Shirts got me to thinking about doing my own Star Trek card. After a little thinking I realised I had the perfect colours to do the three different shirt colours that they used in the latter series, and with punch art still in my mind I thought of using the tag punch to creat the body of the shirt. And, well, this card was born:
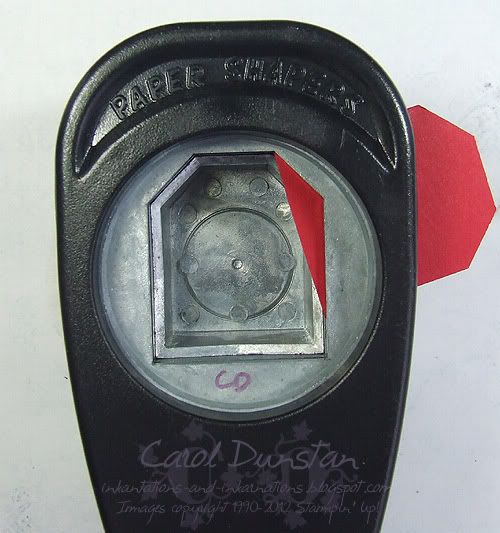
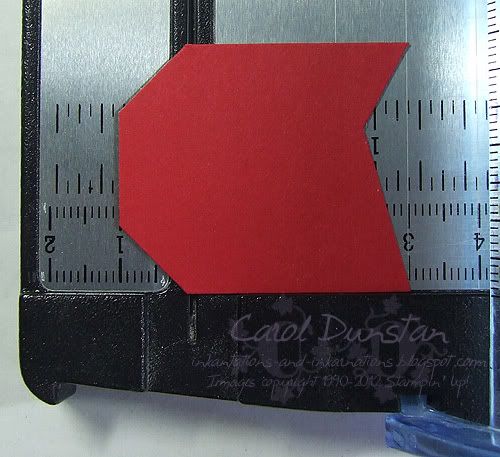
 The card is pretty simple, although I suspect some are thinking that it looks like a lot of fiddling around. Creating the shirts was actually really easy, I stamped a Large Tag punch in black and the one in colour for each shirt. To get the triangle of black at the bottom I used the Large Tag punch to cut the section out of the coloured tag, as you can see below:
 I then cut about 1cm off the top of the tag, cutting just below the point where the tag tapers to the top.

The communicator badge was painted on using a blender pen and shimmer paint.
All supplies by Stampin' Up!
Cardstock: Whisper White, Concord Crush, Basic Black, brushed Silver, Real Red, More Mustard, Island Indigo
Stamp set: Short & Sweet
Ink: Basic Black
Accessories: Large Tag punch, Word Window punch, 3/16" corner rounder punch, blender pen, white shimmer paint, gold shimmer paint, dimensionals
The communicator badge was painted on using a blender pen and shimmer paint.
All supplies by Stampin' Up!
Cardstock: Whisper White, Concord Crush, Basic Black, brushed Silver, Real Red, More Mustard, Island Indigo
Stamp set: Short & Sweet
Ink: Basic Black
Accessories: Large Tag punch, Word Window punch, 3/16" corner rounder punch, blender pen, white shimmer paint, gold shimmer paint, dimensionals
Saturday, May 26, 2012
Rainbow Chevrons
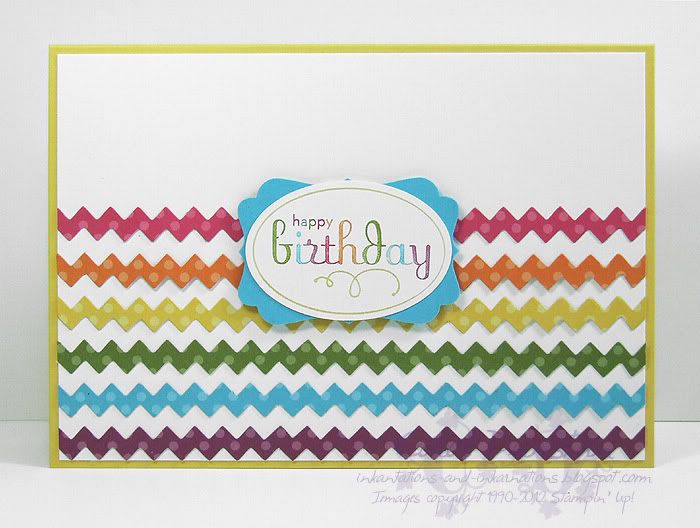
As I promised I'm moving on from the Lace Ribbon punch, but I am returning to the rainbows! This time though I've gone for chevrons, which are pretty trendy at the moment.
 All supplies by Stampin' Up!
Cardstock: Whisper White, Daffodil Delight, Tempting Turquoise
Stamp set: Perfect Punches
Ink: none!
Accessories: Decorative Label punch, Extra Large Oval punch, markers in Rich Razzleberry, Tempting Turquoise, Old Olive, Daffodil Delight, Pumpkin Pie, Melon Mambo,, Tasteful Trims die, dimensionals
Cardstock: Whisper White, Daffodil Delight, Tempting Turquoise
Stamp set: Perfect Punches
Ink: none!
Accessories: Decorative Label punch, Extra Large Oval punch, markers in Rich Razzleberry, Tempting Turquoise, Old Olive, Daffodil Delight, Pumpkin Pie, Melon Mambo,, Tasteful Trims die, dimensionals
Wednesday, May 23, 2012
More Lace Ribbon
I promise, last of the Lace Ribbon cards for a while! Just a few variations for re-using the scraps :-)
 All supplies by Stampin' Up!
Cardstock: Whisper White, Concord Crush, Pear Pizzazz, textured cardstock in Concord Crush, Elegant Eggplant, Rich Razzleberry, Perfect Plum, Daffodil Delight, So Saffron, Pear Pizzazz
Stamp set: Perfect Punches
Ink: none!
Accessories: Lace Ribbon punch, Decorative Label punch, Extra Large Oval punch, markers in Rich Razzleberry, Daffodil Delight, Sticky Strip, Subtles brads, Regals brads, dimensionals
Show watched while creating: Sherlock
 All supplies by Stampin' Up!
Cardstock: Whisper White, Poppy Parade, So Saffron, textured cardstock in Real Red, Poppy Parade, Tangerine Tango, Pumpkin Pie, So Saffron, Pacific Point, Tempting Turquoise
Stamp set: Perfect Punches
Ink: none!
Accessories: Lace Ribbon punch, Decorative Label punch, Extra Large Oval punch, markers in Poppy Parade, Tempting Turquoise, Sticky Strip, Brights brads, dimensionals
Show watched while creating: Sherlock
 All supplies by Stampin' Up!
Cardstock: Whisper White, Marina Mist, Pacific Point, Bashful Blue, textured cardstock in Whisper White, Pacific Point, Marina Mist, Bashful Blue
Stamp set: Create A Cupcake
Ink: Pacific Point
Accessories: Lace Ribbon punch, Modern Label punch, Word Window punch, Sticky Strip, dimensionals
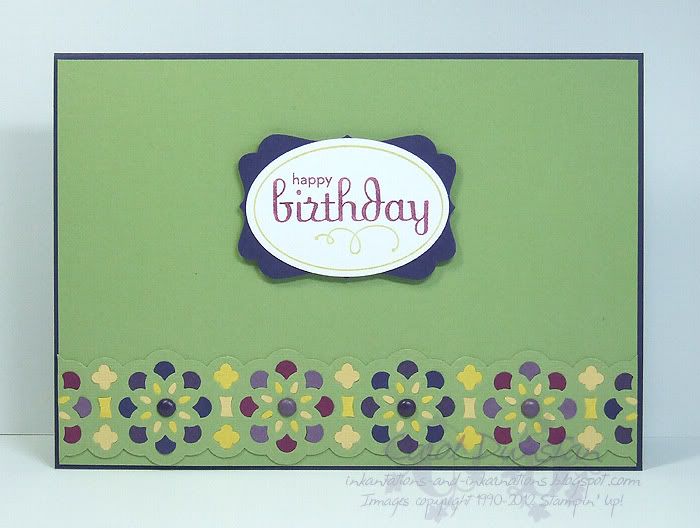
Cardstock: Whisper White, Concord Crush, Pear Pizzazz, textured cardstock in Concord Crush, Elegant Eggplant, Rich Razzleberry, Perfect Plum, Daffodil Delight, So Saffron, Pear Pizzazz
Stamp set: Perfect Punches
Ink: none!
Accessories: Lace Ribbon punch, Decorative Label punch, Extra Large Oval punch, markers in Rich Razzleberry, Daffodil Delight, Sticky Strip, Subtles brads, Regals brads, dimensionals
Show watched while creating: Sherlock
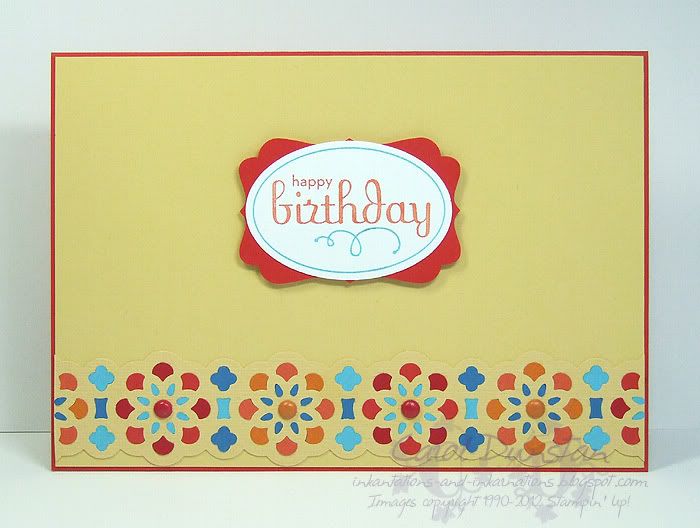
Cardstock: Whisper White, Poppy Parade, So Saffron, textured cardstock in Real Red, Poppy Parade, Tangerine Tango, Pumpkin Pie, So Saffron, Pacific Point, Tempting Turquoise
Stamp set: Perfect Punches
Ink: none!
Accessories: Lace Ribbon punch, Decorative Label punch, Extra Large Oval punch, markers in Poppy Parade, Tempting Turquoise, Sticky Strip, Brights brads, dimensionals
Show watched while creating: Sherlock
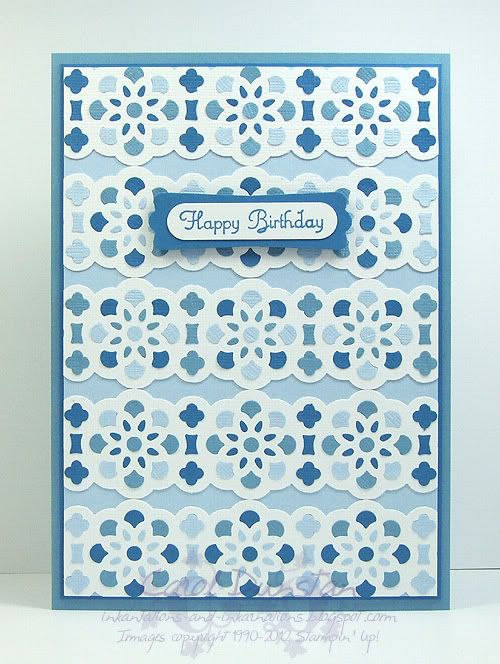
Cardstock: Whisper White, Marina Mist, Pacific Point, Bashful Blue, textured cardstock in Whisper White, Pacific Point, Marina Mist, Bashful Blue
Stamp set: Create A Cupcake
Ink: Pacific Point
Accessories: Lace Ribbon punch, Modern Label punch, Word Window punch, Sticky Strip, dimensionals
Sunday, May 13, 2012
Happy Mother's Day
Happy Mother's Day to all the Mums out there :)
Before I get onto the main part of my post I'd like to say thanks to all of you who have posted comments about the Lace Ribbon card I posted the other day, and special thanks to Kim for linking to me from Paper Punch Addiction. To all of you who have mentioned a tutorial, yes I will be working on one! Hopefully I'll have it up soon :)
Now, back to Mother's Day!
 Wanting, of course, to make a special card for my Mum I went for specialty paper and used Mocha Morning. The black floral pattern is flocked and lucious, cut with one of the new Framelits dies, layered with Crumb Cake cut with another Framelits die (2 sizes smaller), some beautiful black satin ribbon and we have what I hope my Mum thinks is a classy card :)
All supplies by Stampin' Up!
Cardstock: Basic Black, Crumb Cake
Stamp set: Lovely Letters
Ink: Basic Black
Accessories: Mocha Morning specialty DSP, Framelits Labels Collection dies, Neutrals brads, Basic Black Satin Ribbon, Basic Black marker, dimensionals
Before I get onto the main part of my post I'd like to say thanks to all of you who have posted comments about the Lace Ribbon card I posted the other day, and special thanks to Kim for linking to me from Paper Punch Addiction. To all of you who have mentioned a tutorial, yes I will be working on one! Hopefully I'll have it up soon :)
Now, back to Mother's Day!
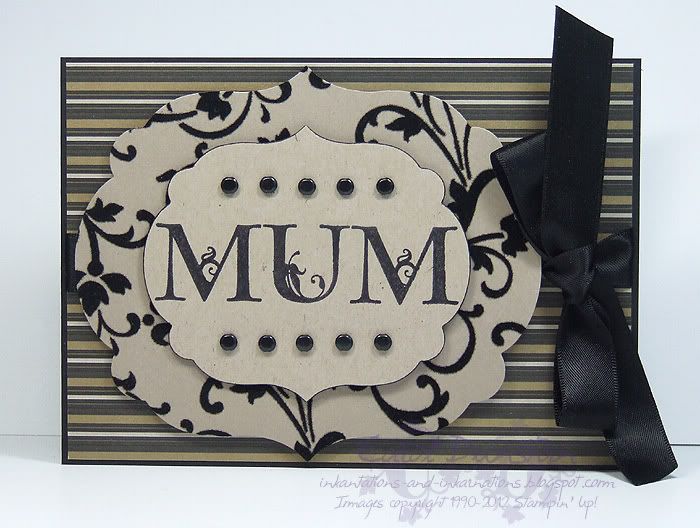
All supplies by Stampin' Up!
Cardstock: Basic Black, Crumb Cake
Stamp set: Lovely Letters
Ink: Basic Black
Accessories: Mocha Morning specialty DSP, Framelits Labels Collection dies, Neutrals brads, Basic Black Satin Ribbon, Basic Black marker, dimensionals
Wednesday, May 09, 2012
Lace Ribbon Rainbow
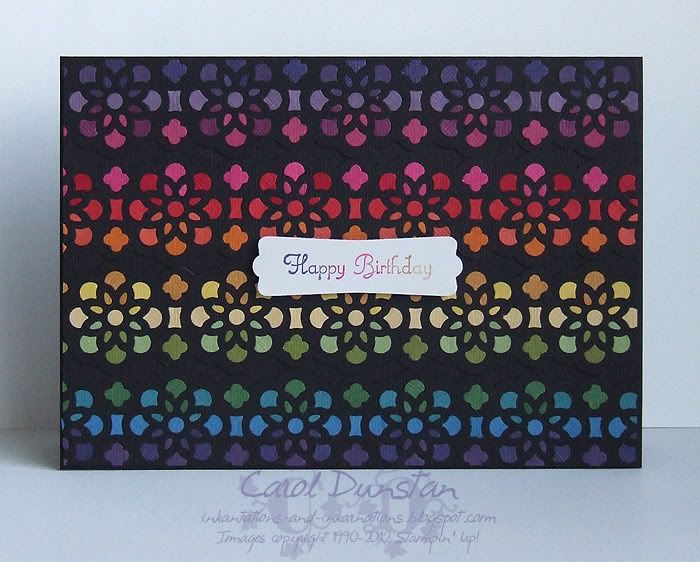
Have you ever got half way through a project only to find that you don't have all the supplies you need, or want (or thought you had)? It happens to me from time to time, but often I am able to work around the absence of supplies and still get my project finished without too much trouble. However, this time that didn't happen. This time I already had it half stuck together before realising I didn't have textured cardstock in three colours I had planned on using, and there really was no way to work around it. So I have been ina bit of a rut waiting for the cardstock so I could finish my piece, and because I prefer to photograph a few projects together it's made the wait seem extra long... but I am quite pleased with the results! It was really had to photograph with my usual lighting set up, so I had to do away with my desk lights and just go with the fading afternoon sun for this shot:
 I'm a late comer to the Lace Ribbon punch party, but I've got into it in a big way recently and I think this is my best use of it yet! All those little coloured sections were punched out of other pieces of cardstock and transplanted to this one. To make the sticking easier I ran a few strips of Sticky Strip along the back of each lace ribbon piece so I just had to pop the pieces in place and they were stuck! It was a little fiddly, but I am sure I have spent similar amounts of time colouring images so not as time consuming as you might think. When I do this again (yes when not if, I love the results so much!) I won't be using Daffodil Delight or So Saffron for the sentiment :/
All supplies by Stampin' Up!
Cardstock: Whisper White, textured cardstock in Basic Black, Concord Crush, Elegant Eggplant, Perfect Plum, Rich Razzleberry, Regal Rose, Melon Mambo, Real Red, Poppy Parade, Tangerine Tango, Pumpkin Pie, More Mustard, Daffodil Delight, So Saffron, Pear Pizzazz, Old Olive, Garden Green, Island Indigo, Pacific Point
Stamp set: Create A Cupcake
Ink: none!
Accessories: Lace Ribbon punch, Modern Label punch, markers in Concord Crush, Elegant Eggplant, Perfect Plum, Rich Razzleberry, Regal Rose, Melon Mambo, Real Red, Poppy Parade, Tangerine Tango, Pumpkin Pie, More Mustard, Daffodil Delight, So Saffron, Sticky Strip, dimensionals
All supplies by Stampin' Up!
Cardstock: Whisper White, textured cardstock in Basic Black, Concord Crush, Elegant Eggplant, Perfect Plum, Rich Razzleberry, Regal Rose, Melon Mambo, Real Red, Poppy Parade, Tangerine Tango, Pumpkin Pie, More Mustard, Daffodil Delight, So Saffron, Pear Pizzazz, Old Olive, Garden Green, Island Indigo, Pacific Point
Stamp set: Create A Cupcake
Ink: none!
Accessories: Lace Ribbon punch, Modern Label punch, markers in Concord Crush, Elegant Eggplant, Perfect Plum, Rich Razzleberry, Regal Rose, Melon Mambo, Real Red, Poppy Parade, Tangerine Tango, Pumpkin Pie, More Mustard, Daffodil Delight, So Saffron, Sticky Strip, dimensionals
Saturday, April 28, 2012
Birthday Enchantment
Two of the freebies you could claim during Sell-a-bration this year was the Everyday Enchantment paper pack, and the matching Everyday Enchantment Ribbon & Brad pack. They do have quite a feminine feel though, so I decided to challenge myself and make a couple of cards that would suit either guys or gals.


Though one card is portrait and the other landscape orientation, both cards have essentially the same layout, just flipped around. I also used largely the same products for both.
All supplies by Stampin' Up!
Cardstock: Soft Suede (top card only), Pool Party, Lucky Limeade, Poppy Parade (bottom card only), Whisper White
Stamp set: Perfect Punches
Ink: none!
Accessories: Everyday Enchantment DSP, Everyday Enchantment Ribbon & Brads, Soft Suede marker, In Color Designer Printed Brads, 3/16" corner rounder, Decorative Label punch, Framelits Label Collection die, dimensionals
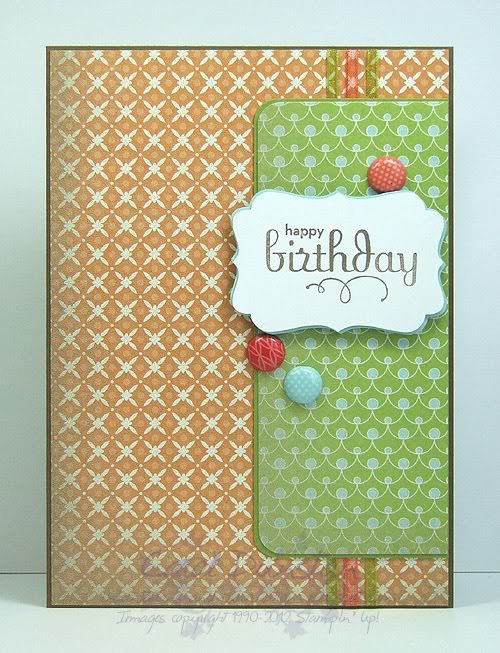
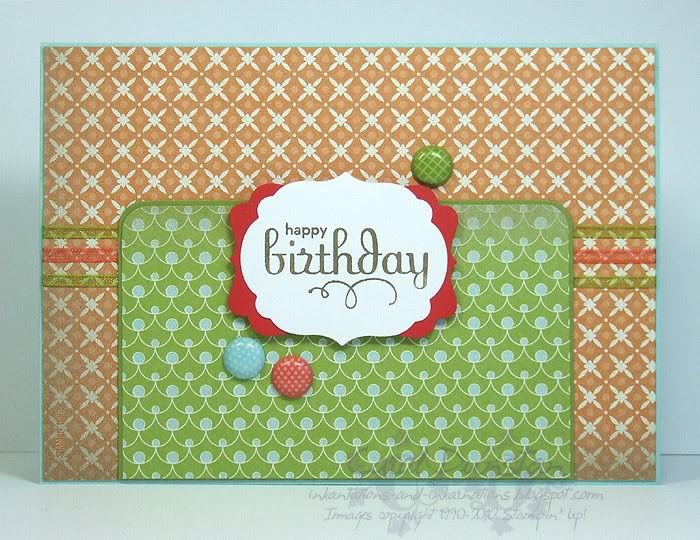
Though one card is portrait and the other landscape orientation, both cards have essentially the same layout, just flipped around. I also used largely the same products for both.
All supplies by Stampin' Up!
Cardstock: Soft Suede (top card only), Pool Party, Lucky Limeade, Poppy Parade (bottom card only), Whisper White
Stamp set: Perfect Punches
Ink: none!
Accessories: Everyday Enchantment DSP, Everyday Enchantment Ribbon & Brads, Soft Suede marker, In Color Designer Printed Brads, 3/16" corner rounder, Decorative Label punch, Framelits Label Collection die, dimensionals
Friday, April 27, 2012
Baby Bear
Remember me saying purple & aqua was one of my favourite colour combinations? Well here it is again! And isn't that little bear such a cutie? Sorry for the poor photo, but I didn't have a chance to do the full set up for a photo shoot before I needed to post this off.

It's been quite some time since I have watercoloured, so it was nice to give it a go for this card. I really wanted to make a feature of it too, so I kept the rest of the card pretty plain.
All supplies by Stampin' Up!
Cardstock: Bashful Blue, Naturals Ivory, textured Baja Breeze, Wisteria Wonder, watercolour paper
Stamp set: Give A Gift
Ink: StazOn; Crumb Cake, Baja Breeze, Marina Mist, Wisteria Wonder, Concord Crush and Bashful Blue used for watercolouring
Accessories:Marina Mist 1/8" taffeta ribbon, Scallop circle punch, aqua painter, dimensionals
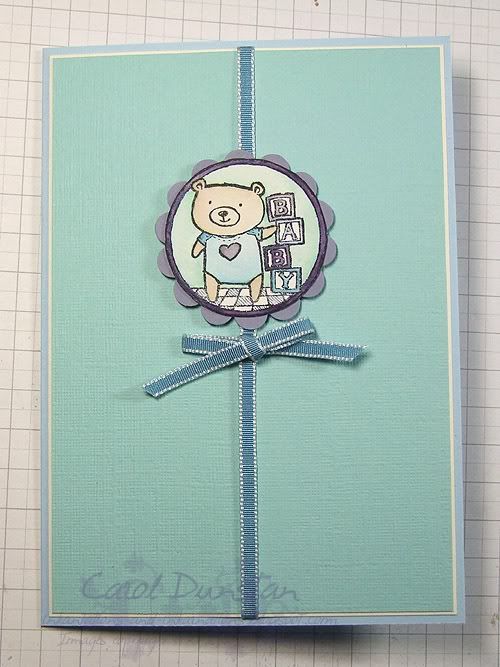
It's been quite some time since I have watercoloured, so it was nice to give it a go for this card. I really wanted to make a feature of it too, so I kept the rest of the card pretty plain.
All supplies by Stampin' Up!
Cardstock: Bashful Blue, Naturals Ivory, textured Baja Breeze, Wisteria Wonder, watercolour paper
Stamp set: Give A Gift
Ink: StazOn; Crumb Cake, Baja Breeze, Marina Mist, Wisteria Wonder, Concord Crush and Bashful Blue used for watercolouring
Accessories:Marina Mist 1/8" taffeta ribbon, Scallop circle punch, aqua painter, dimensionals
Thursday, April 26, 2012
Glitter Glitter Glitter!
I know a lot of crafters lurve glitter, and I am no different. I went to town with the glitter on this card, and I am really happy with how it came out!

The construction of this card was pretty straight forward, but it did take a bit of time. I cut out the letters from Sticky Sheets using the Simple Letters Alphabet dies and the zigzag from the Tasteful Trims die. The set doesn't have an exclamation mark, so I just cut a second 'l' and dot from an 'i'. I arranged them on my paper, then one by one peeled off the top protective layer, applied the glitter, removed excess, then moved on to the next letter. With 8 different colours of glitter, that was a lot of tapping off excess gliter... and you know what that means! Yes, I had glitter all over me and all over my floor! I like to think I have done my part for releasing glitter back into the wild ;)
All supplies by Stampin' Up!
Cardstock: Tempting Turquoise
Stamp set: none!
Ink: none!
Accessories: Afternoon Tea DSP, Sticky Sheets, Simple Letters Alphabet die, Tasteful Trims die, Fine Galaxy Glitter, Fine Supernova Glitter, Fine Cosmo glitter
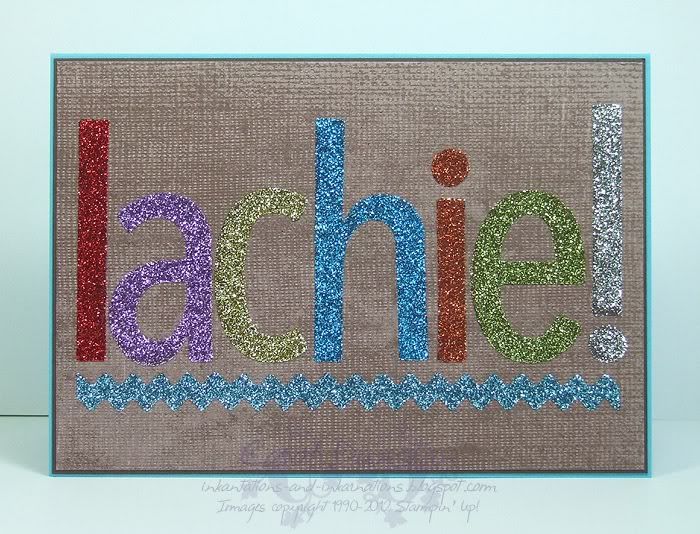
The construction of this card was pretty straight forward, but it did take a bit of time. I cut out the letters from Sticky Sheets using the Simple Letters Alphabet dies and the zigzag from the Tasteful Trims die. The set doesn't have an exclamation mark, so I just cut a second 'l' and dot from an 'i'. I arranged them on my paper, then one by one peeled off the top protective layer, applied the glitter, removed excess, then moved on to the next letter. With 8 different colours of glitter, that was a lot of tapping off excess gliter... and you know what that means! Yes, I had glitter all over me and all over my floor! I like to think I have done my part for releasing glitter back into the wild ;)
All supplies by Stampin' Up!
Cardstock: Tempting Turquoise
Stamp set: none!
Ink: none!
Accessories: Afternoon Tea DSP, Sticky Sheets, Simple Letters Alphabet die, Tasteful Trims die, Fine Galaxy Glitter, Fine Supernova Glitter, Fine Cosmo glitter
Wednesday, April 25, 2012
Paisley Butterflies
One of my favourite sets from this years Summer Mini was Spiced Paisley. With a lot of different elements I knew this set would be a lot of fun to play with.

For this card I went back to one of my favourite techniques: direct to rubber; one of my favourite colour combinations: purple and aqua; and a new favourite technique: sponging with shimmer paint. Having this set in clear mount made it so easy to create the background. I arranged the largest droplet-shaped stamp and the smallest circular stamp on the same large acrylic block so they would both stamp at the same time and save having to space things a little. One other little trick I used for this card was to fill in the scallops on the punched border with the insides of punched scallops in a different colour.
All supplies by Stampin' Up!
Cardstock: Whisteria Wonder, Island Indigo, Concord Crush, Whisper White, Pool Party
Stamp set: Spiced Paisley, On Your Birthday
Ink: none!
Accessories: sponge dauber, white shimmer paint, Wisteria Wonder marker, Concord Crush marker, Pool Party marker, Island Indigo marker, Scallop Trim Border punch, Beautiful Butterflies die, linen thread, Paper Piercer, dimensionals
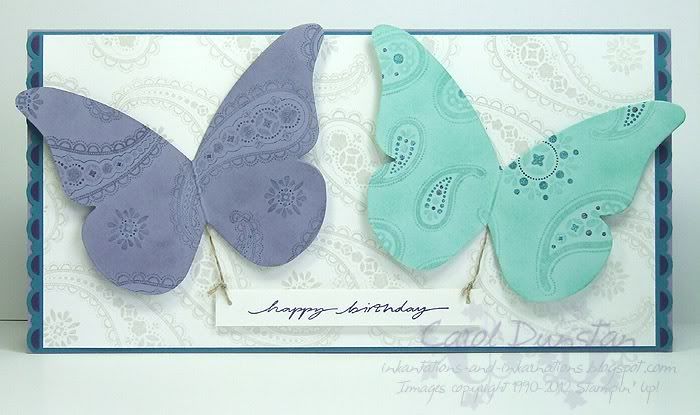
For this card I went back to one of my favourite techniques: direct to rubber; one of my favourite colour combinations: purple and aqua; and a new favourite technique: sponging with shimmer paint. Having this set in clear mount made it so easy to create the background. I arranged the largest droplet-shaped stamp and the smallest circular stamp on the same large acrylic block so they would both stamp at the same time and save having to space things a little. One other little trick I used for this card was to fill in the scallops on the punched border with the insides of punched scallops in a different colour.
All supplies by Stampin' Up!
Cardstock: Whisteria Wonder, Island Indigo, Concord Crush, Whisper White, Pool Party
Stamp set: Spiced Paisley, On Your Birthday
Ink: none!
Accessories: sponge dauber, white shimmer paint, Wisteria Wonder marker, Concord Crush marker, Pool Party marker, Island Indigo marker, Scallop Trim Border punch, Beautiful Butterflies die, linen thread, Paper Piercer, dimensionals
Tuesday, April 24, 2012
Golden 50
This year was my parents 50th wedding aniversary, and this was the card I made for them. I used the Pesto Prints Specialty paper from last years Summer Mini. The pack has a variety of designs that are clear detail on white. I used some as-is for a background with subtle interest, then sponged gold shimmer paint over some for the '50'. It's one of those cards that doesn't photograph well, you really need to hold in your hand so you can tilt it all around to get the full effect.
 All supplies by Stampin' Up!
Cardstock: White Shimmer, Gold Shimmer
Stamp set: none!
Ink: none!
Accessories: Pesto Prints Specialty DSP, Curly Label punch, chipboard, Simple Numbers die, sponge dauber, gold shimmer paint, blender pen, Antique Brads, Rhinestones

Cardstock: White Shimmer, Gold Shimmer
Stamp set: none!
Ink: none!
Accessories: Pesto Prints Specialty DSP, Curly Label punch, chipboard, Simple Numbers die, sponge dauber, gold shimmer paint, blender pen, Antique Brads, Rhinestones
Subscribe to:
Posts (Atom)