Christmas is tomorrow! I'm mostly organised, just the usual few last minute things to do. If you are looking for a quick and easy little something to brighten up your home for the big day, this might just be the project for you. Alternatively I think these would work just as well for New Year's Eve.
The idea for this project started many weeks ago. I was doing some Christmas shopping with my mother-in-law and she commented on the shopping center's Christmas decorations "they'd look liovely in my stairwell". My brain immediately started ticking over... gold and silver foil and glimmer paper was obviously the choice to replicate the surfaces of the decorations. Didn't have anything that would easily pull of the same shapes, but the Stars framelits would work pretty well. I then spent a few weeks mulling over how I might pull off the rest of the design, before ultimately deciding that there really was no way anything could be hung in their stairwell safely or easily when the ceiling was so very high above the stairs and there was no other access. That didn't mean the whole idea had to be thrown out! After ditching the stairwell idea I quickly decided that by making separate strings of stars they would offer more flexibility in their hanging. I thought a particular window would be a likely place, though there were a few other options as well. I knew there were already hooks in this window but couldn't remember how many and didn't want to ask and spoil the surprise... so I took a punt on four strings.
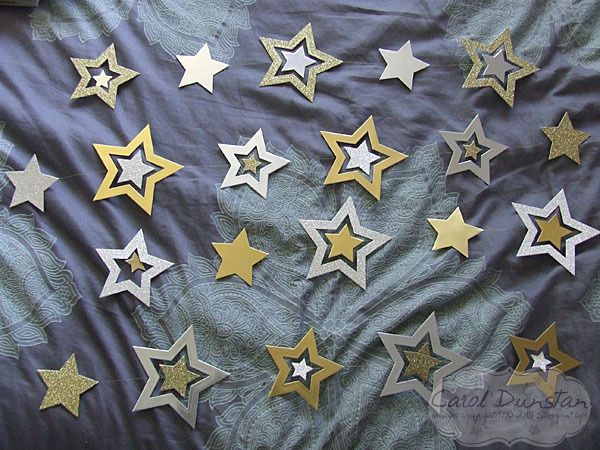
I didn't really have a good spot to get a photo of them at home, so you get a photo of them laid out on my bed. The bonus is you can admire my doona cover at the same time :) I mixed up the colours and textures of the stars so there was a rough alternation between silver and gold, glimmer paper and foil.
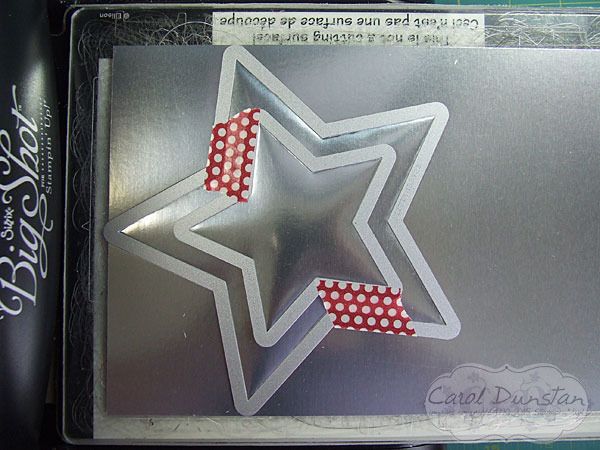
To make the large stars with middle cut out, I used two stars at the same time and placed some washi tape to keep the distance between the outside and inside star consistent across all the cuts. The inside star is two "steps" smaller than the outside star (so I didn't used the next size down from the outside star, but the next next star).
The star that was cut out of the larger star was also used, so for one run through the Big Shot, I got two stars cut.
When it came to sticking them together, I decided to use up some retired Sticky Strip I still had laying around. Sticky Strip was great stuff, gave a very strong "stick". The backing of it was a bit of a pain, it was static-y and liked to stay on you even after a few vigorous flicks of the hand. With these stars being in a sunny spot I wanted an adhesive that would really hold on even when it got a bit warm.
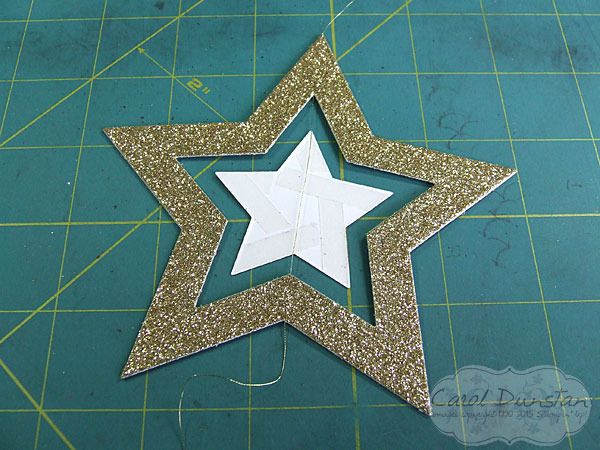
For the stars with the cut out, I attached both sides of the outside first, and then attached the inside stars.
I kept the distance between stars in the chain basically the same, though in hindsight varying them so neighbouring stars fit in the gaps better might have been the go. Probably one of those things that would only bother me though!
See that pile of red at the top of this photo? That was the backing from the Sticky Strip. I was in backing hell by the end of this... oh well, it got the job done and that's what counts!
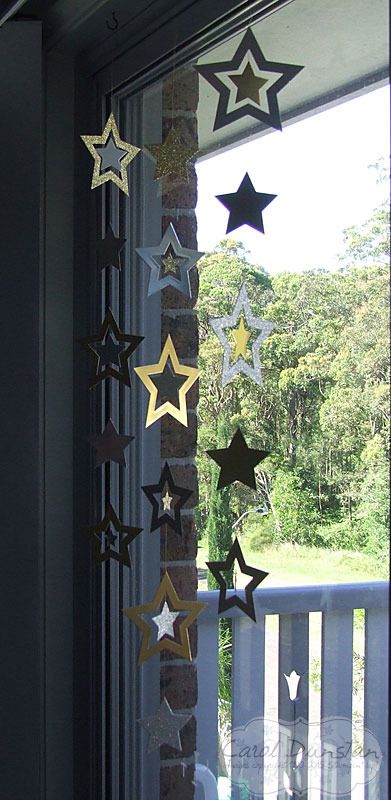
The stars were quite a hit, and I have to say I was really impressed with how they looked once hung, moving around and catching the light. They also happen to be placed opposite the Christmas tree, so at night time also catch the light off that and look even more fantastic.


No comments:
Post a Comment