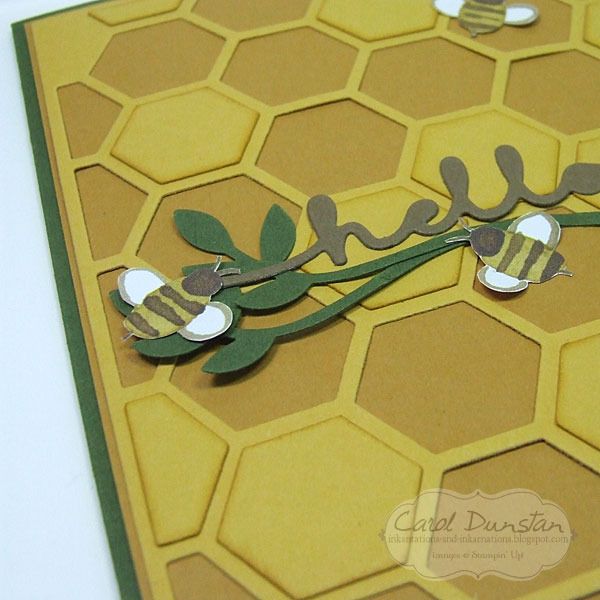
Todays card doesn't focus on a stamp set, but a diecut thinlit. In fact, todays card has no stamping at all!
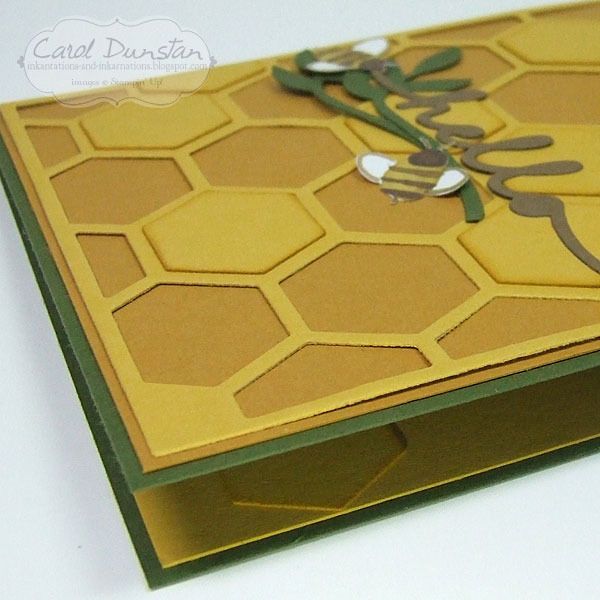
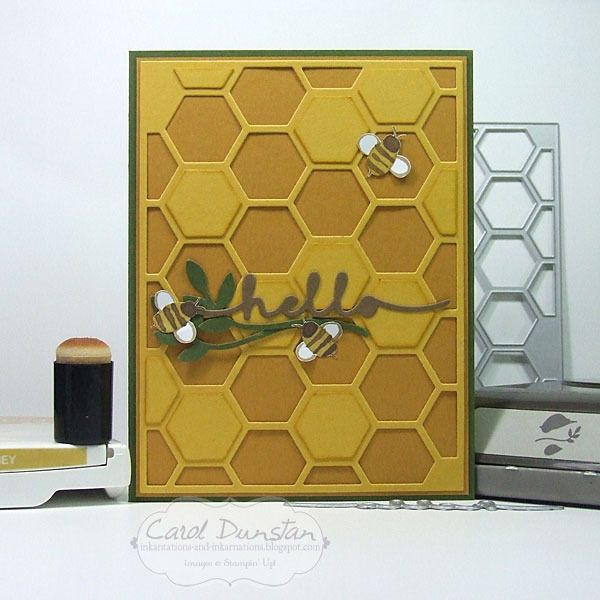
And back to the more involved cards! Going all-out with the honey/bee references, I ran some Hello Honey cardstock through the Big Shot with the hexagon thinlit. I had a few scraps of the bee paper from the English Garden DSP, so rather than stamp me some bees I cut them out of the paper. I did get a little inky by lightly sponging some Hello Honey ink on the edges of some of the cut out pieces from the hexagon thinlit and layered these in spaces where hexagons weren't cut out in the thinlit.
The leafy twigs are from the Bird Builder punch (which I'm still a bit stunned is retiring). I wasn't going to have any layers popped up on dimensionals, so give the card a little more dimension I didn't stick the twigs down flat all over. Just a little glue from the fine tip glue pen where the twigs overlapped, and a mini glue dot under one leaf on each twig to secure them at the other end.The bees are also attached with a mini glue dot, just one under their bodies so their wings can be bent up a little.
I used a couple of the sponged hexagon shapes inside the card to dress it up a little in there too.
Whenever I am working with yellow and green I find myself thinking of "green & gold" - often Australia's sporting colours - but by minimising the green I think I successfully avoided this card eliciting an "Aussie Aussie Aussie, oi oi oi!" effect.
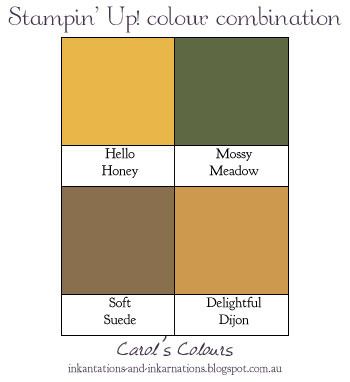
133685 Hello Honey A4 cardstock, 133683 Mossy Meadow A4 cardstock, 138345 Delightful Dijon A4 cardstock, 119982 Soft Suede A4 cardstock, 138440 English Garden DSP, 133643 Hello Honey stamp pad, 132965 Hexagon Hive thinlit die, 138275 Greetings thinlit dies, 117191 Bird Builder punch, 133773 sponge daubers, 138309 Fine-tip glue pen, 103683 mini glue dots
Showing posts with label die cuts. Show all posts
Sunday, May 01, 2016
Saturday, April 23, 2016
Farewell Flowering Flourishes Part 2
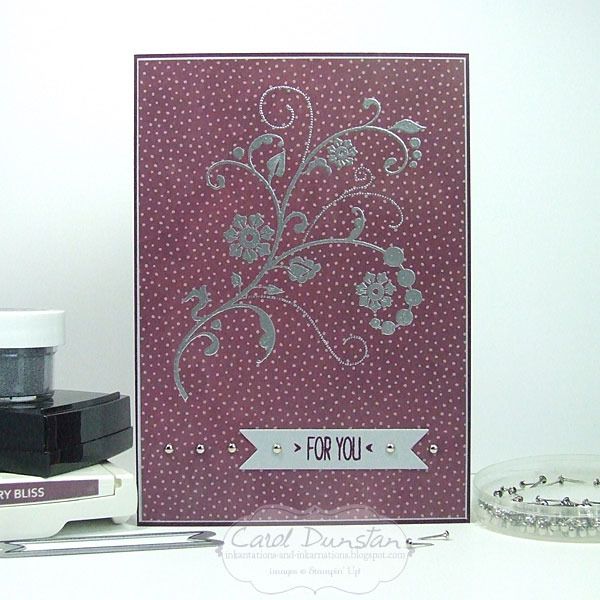
Another Flowering Flourishes card for you today, this time a more simple one than yesterday.
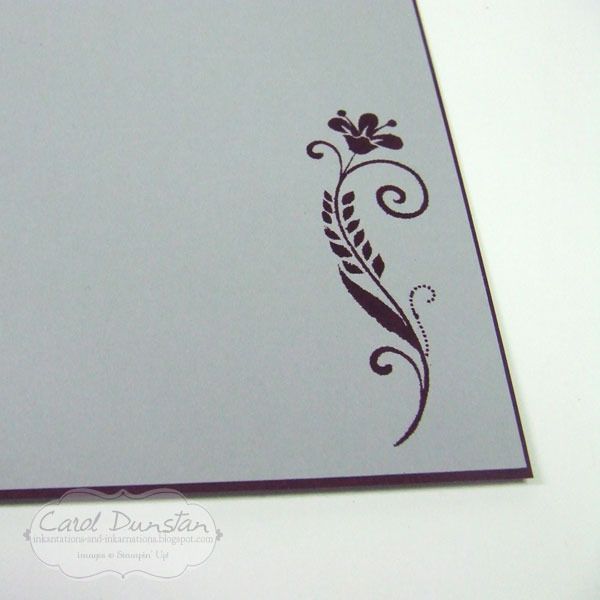
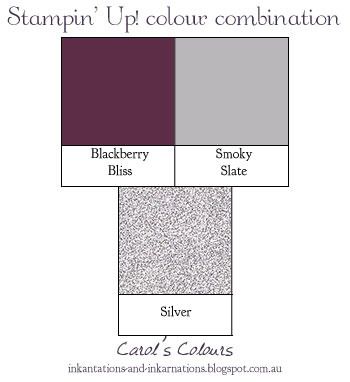
For this card I stamped the large image using VersaMark and heat embossed in silver towards the top of a piece of Farmers Market DSP. The sentiment is from the You're So Lovely set, which I stamped on Smoky Slate with Blackberry Bliss ink and cut it out using the large straight die from the Bitty Banners framelits. I used a couple of mini silver brads to attach it to the card front, and used a few more mini brads to create a line across the card.
I again stamped the smallest image from Flowering Flourishes on the inside to dress it up a little.
There's quite a bit of retired product on this card, and some of it is already sold out in some format. The Blackberry Bliss A4 cardstock is completely sold out, however you still get Blackberry Bliss in some mixed colour packs. The Flowering Flourishes stamp set is sold out in clear-mount, but still available in wood-mount. You're So Lovely stamp set, Farmers Market DSP, mini brads, and Bitty Banners framelits are all still currently available
131998 Flowering Flourishes woodmount stamp set, 140762 You're So Lovely photopolymer stamp set, 133687 2014-2016 In Color A4 cardstock, 131291 Smoky Slate A4 cardstock, 138448 Farmers Market DSP, 133642 Blackberry Bliss stamp pad, 102283 VersaMark stamp pad, 109131 silver embossing powder, 122941 mini brads, 129267 Bitty Banner frameit dies
Wednesday, April 20, 2016
Farewell A Nice Cuppa
I intended blogging about these cards before I went away, but fate had other ideas. When I went to photograph them I found one of my lights was no longer working properly, making it hard to take good photos. I ordered a new light, not expecting it to arrive before I headed off to OnStage in Sydney, but I was caught out by great service and the light arrived days before I left... and I didn't get an opportunity to take the photos in the mayhem of getting organised to go away.
However, things have probably worked out for the best as now I can point out the retired product that I used on them! A Nice Cuppa and the coordinating Cups & Kettle dies will not be carrying over to the new Stampin' Up! main catalogue. I'm quite sad about that and a little surprised by it - I know I'm not alone in enjoying a cuppa! Designer Series Paper usually retires, so the Timeless Eelgance DSP retiring wasn't a shock, but I wasn't expecting the metalic Baker's Twine to retire - indeed I had only just ordered it a few weeks ago (after forgetting for months on end!). I really like the metallic Baker's Twine as a non-white option with a twist of bling.
I didn't have much of a plan when I sat down to make these cards, I just wanted something quite simple so flicked through my patterened papers to pick something I thought would work well with the tea cups. I then cut a bunch of tea cups out of a few different papers from the pack and started thinking about the layout, working with large pieces of the paper in the background.
The Timeless Elegance paper was such a great choice, and well named! I managed to keep the Wink Of Stella brush away from these cards, instead just a touch of bling in the pearls and silver metallic Baker's Twine.
I often have stretches of every card being in this landscape orientation, and I have noticed I haven't done that for a while, so mixed it up a bit with one design this way.
It can be tricky to attach vellum to a card so you won't have adhesive showing through the vellum. For the "steam" on these cards I left the exposed vellum unattached, and the little bit that is behind the die cut tea cup is the only spot where it is stuck to anything.
While I used a number of different papers from the Timeless Elegance pack, I didn't use any with Sahra Sand on them. Instead I added Basic Gray and Smoky Slate to the mix.
A Nice Cuppa stamp set & Cups & Kettles framelit dies 141074, Basic Black A4 cardstock 121688, Basic Gray A4 cardstock 121689, Smoky Slate A4 cardstock 131291, Very Vanilla A4 cardstock 106550, vellum A4 cardstock 106584, Timeless Elegance designer series paper 138444, Basic Gray archival stamp pad 140932, Smoky Slate stamp pad 131179, Lots Of Labels framelits 138281, Pearl Basic Jewels 119247, silver metallic Baker's Twine 132976, dimensionals 104430
Saturday, April 09, 2016
Bear Hugs And Lake Fish
I have a few family members who are keen fishers, so I am always happy to see a fishing related stamp set.
We have a lake nearby, so this sentiment was also very fitting for the recipient of this card. I created a bit of a lake scene, and got what I thought was a brilliant idea for waves on the lake made using a die from the Cups & Kettles framelits die set. Both the bear & the fish were stamped on watercolour paper and watercoloured using the aquapainter and ink from the inkpads. The fish was done with very diluted Night Of Navy ink, and the light areas on the bear are Tip Top Taupe, with Early Espresso for the darker areas.
Bear Hugs clear-mount stamp set & Bear Hugs framelits dies bundle 140823, Night Of Navy A4 cardstock 106577, Very Vanilla A4 cardstock 106550, Island Indigo A4 cardstock 124390, Tip Top Taupe A4 cardstock 138343, watercolour paper 122959, Basic Black archival stamp pad, Night Of Navy stamp pad 126970, Tip Top Taupe stamp pad 138325, Early Espresso stamp pad 126974, Cups & Kettles framelits dies 140624, Large Numbers framelits dies 140622, Aquapainter 103954, dimensionals 104430
Saturday, April 02, 2016
Sunburst Shine
Today's card has been brewing in my head for some time and I'm glad I finally got to work out my vision for it.
When I saw the Sunburst die in the Occasions catalogue, I got the idea of using the die off-cuts - as is my habit of late - for additional sun rays. Once I got to fiddling around with the bits I decided that I would use them on top of the main die cut part. This is what it looked like once I had all the Sunburst pieces put together.
I have also had the idea of using the metallic threads for stitching kicking around in my head for some time, and I thought it would work really well with the Sunburst die as more sun rays. When I was doing the colours for the sun I realised that the die had little holes in it that would work great as a guide for the stitching.
I used three In Colors in this card, two of which will be retiring soon. I know I have said it before, but I see it happen every year... people wait till the retirement list comes out to purchase In Colors products and sometimes they have sold out within the first day and they miss out. So this is another reminder - get in and order those 2014-2016 In Colors before it's too late!
Sunburst Sayings clear mount stamp set & Sunburst thinlits die bundle 140807, Tangelo Twist A4 cardstock 133684, Blackberry Bliss A4 cardstock133682, Crushed Curry A4 cardstock 131288, Delightful Dijon A4 cardstock 138345, Perfect Plum A4 cardstock 108615, Blackberry Bliss133642 stamp pad , Perfect Plum stamp pad 126963, gold metallic thread 138401, Metallics sequin assortment 138390, 2" circle punch 133782, Circle collection framelit dies 130911, dimensionals 104430
Saturday, March 26, 2016
Mother's Day Rose
Yes, I know I said it'd be a while before I had another card with the Rose Garden dies, but I have to slip in this one even though it is very early for Mother's Day. I usually start thinking about Mother's Day cards when it's Easter as that is the next "big day" on everyone's calendar, aside from all the birthdays that are scattered (or clumped...) through the year. Easter Sunday is tomorrow, though it is at the "early" end of the possible timeframe for Easter.
The main reason that I had to share this now is that awesome glitterly strip down the right side of the card will not be available very soon. Sale-a-bration ends March 31, less than a week away! So you have less than a week to earn fabulous free goodies like the Metallics Glitter Tape. This was just the sort of thing I was wanting last year when working on Christmas cards, so I let out a huge "YES!" when it was released among the second wave of Sale-a-bration products. It will not be carrying over into the new Stampin' Up! catalogue so if you don't want to miss out you have only a few days left to snap it up. Sale-a-bration items can be earnt on any order for any products that total $90 and over.
Back to the oranges and yellows for this one!
Teeny Tiny Sentiments wood-mounted stamp set 130042, Rose Wonder stamp set & Rose Garden thinlits dies bundle 140804, Cucumber Crush A4 cardstock 138342, Pool Part A4 cardstock 124391, Tangelo Twist A4 cardstock 133684, Crushed Curry A4 cardstock 131288, thick Whisper White A4 cardstock 140490, Pool Part stamp pad 126982, Cucumber Crush stamp pad 138324, Metallics Glitter Tape 141020 (free with qualifying order), fine-tip glue pen 138309, dimensionals 104430
The main reason that I had to share this now is that awesome glitterly strip down the right side of the card will not be available very soon. Sale-a-bration ends March 31, less than a week away! So you have less than a week to earn fabulous free goodies like the Metallics Glitter Tape. This was just the sort of thing I was wanting last year when working on Christmas cards, so I let out a huge "YES!" when it was released among the second wave of Sale-a-bration products. It will not be carrying over into the new Stampin' Up! catalogue so if you don't want to miss out you have only a few days left to snap it up. Sale-a-bration items can be earnt on any order for any products that total $90 and over.
Back to the oranges and yellows for this one!
Teeny Tiny Sentiments wood-mounted stamp set 130042, Rose Wonder stamp set & Rose Garden thinlits dies bundle 140804, Cucumber Crush A4 cardstock 138342, Pool Part A4 cardstock 124391, Tangelo Twist A4 cardstock 133684, Crushed Curry A4 cardstock 131288, thick Whisper White A4 cardstock 140490, Pool Part stamp pad 126982, Cucumber Crush stamp pad 138324, Metallics Glitter Tape 141020 (free with qualifying order), fine-tip glue pen 138309, dimensionals 104430
Saturday, March 19, 2016
Rose Wonder Birthday
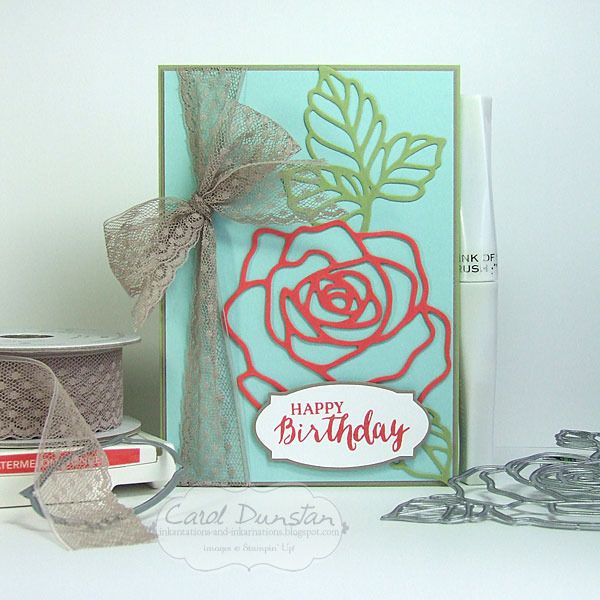
I hope you haven't been getting sick of all the Rose Wonder/Rose Garden cards, but I've had so much fun playing with them. I do promise though that this will be the last for a while. I thought it only fitting that I used Watermelon Wonder for a Rose Wonder card.
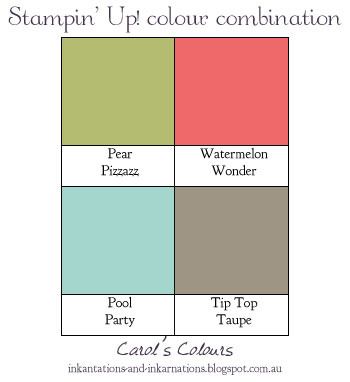
I really am loving Tip Top Taupe as another neutral colour to use. I find it so fascinating how seemingly small differences in colour can affect the overall look of a colour combination - as well as how much of each colour you use!
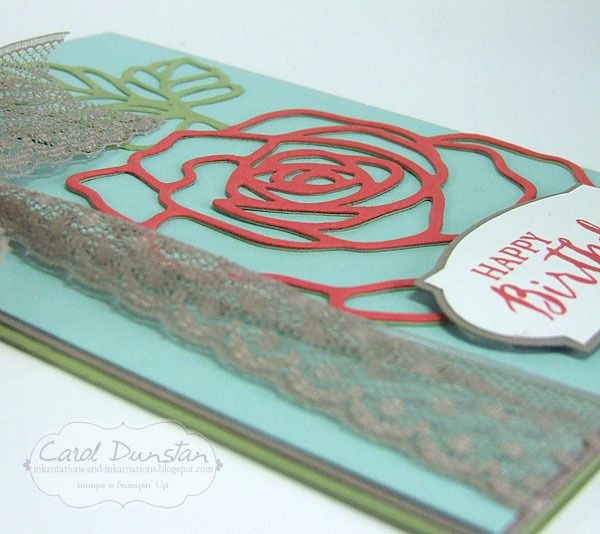
Once again I cut the rose twice and trimmed one of the pieces down so it was just the flower part, and mounted that right on top of the full piece. The fine tip glue pen is fantastic for jobs like this.
And of course I couldn't call this card complete without some Wink Of Stella.
Rose Wonder stamp set & Rose Garden thinlits dies bundle 140804, Pear Pizzazz A4 cardstock 131290, Tip Top Taupe A4 cardstock 138343, Pool Party A4 cardstock 124391, Watermelon Wonder A4 cardstock 138341, Watermelon Wonder stamp pad 138323, Tip Top Taupe Dotted Lace trim 138422, clear Wink Of Stella glitter brush 141897, Fine-tip glue pen 138309, dimensionals 104430
Sunday, March 13, 2016
A Wink Of Watercolouring
Yes I am still playing with the Rose Garden thinlits! I'm enjoying mixing things up a little bit with each card I make, and come up with different ways to work with the dies.
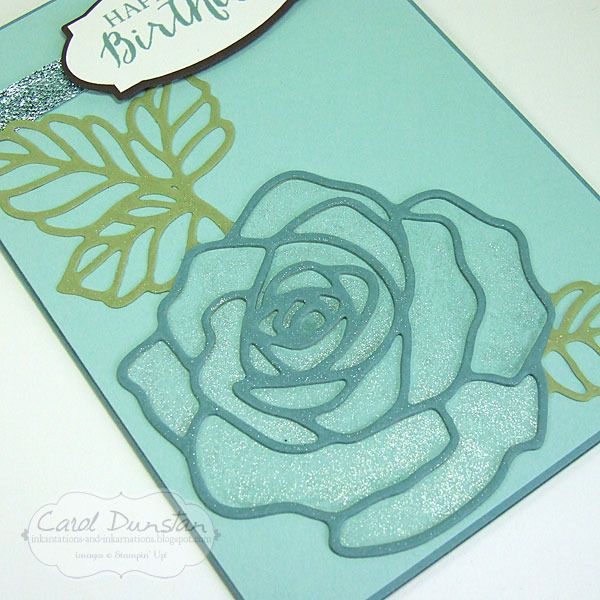
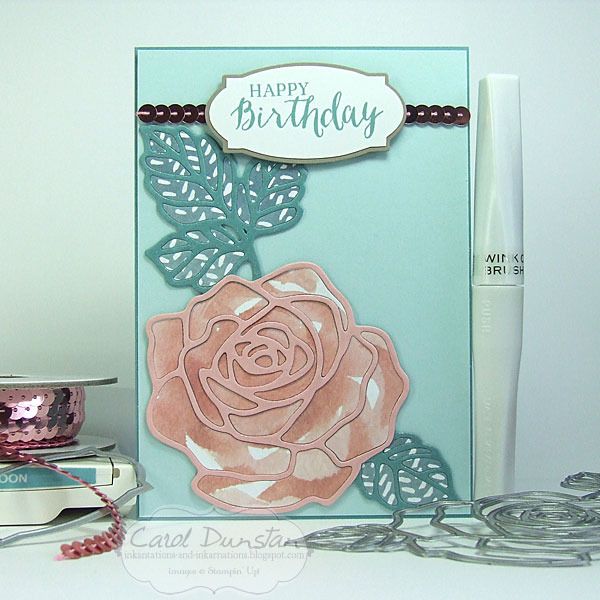
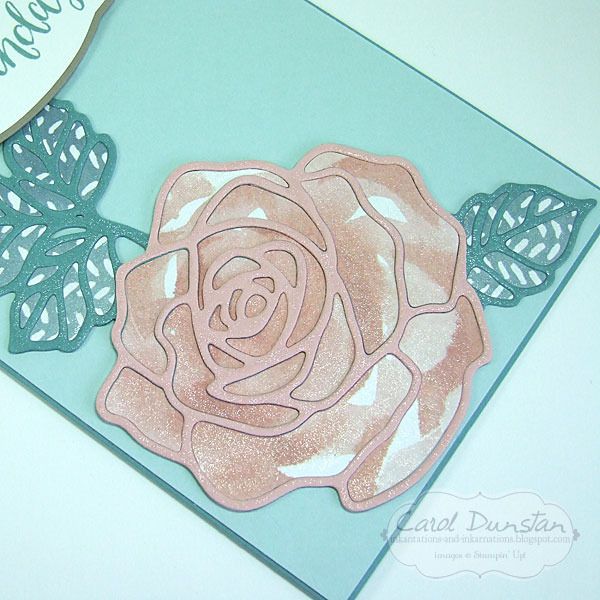
For this card I decided not to use any patterned paper, and instead have watercoloured inside the die cut.
In this case I used the clear Wink of Stella brush in place of an aquapainter to pick up the ink colour. Since I was using Lost Lagoon ink on Pool Party cardstock it doesn't take much ink to noticeably colour the cardstock.
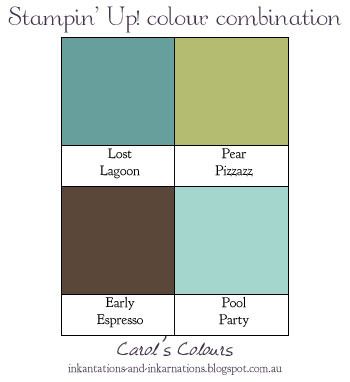
I know a lot of people will look at these colours and think they are quite masculine, and as such not what you'd expect on a floral card, but I like playing with expectations.
Rose Wonder stamp set & Rose Garden thinlits dies bundle 140804, Lost Lagoon A4 cardstock 133686, Pool Party A4 cardstock 124391, Pear Pizzazz A4 cardstock 131290, Early Espresso A4 cardstock 121686, Whisper White A4 cardstock 106549, Lost Lagoon stamp pad 133644, clear Wink Of Stella glitter brush 141897, Pool Party glitter ribbon 140561, Fine-tip glue pen 138309, dimensionals 104430
Saturday, March 05, 2016
English Garden Birthday
I've done a string of cards using the small rose die from the Rose Garden thinlits, so I felt it was high time I set the large rose and leaves die to work.
I liked the effect of the inside parts of the rose being card cut from the large flowers of patterned paper that I did on my last card, so thought I would replicate that with this larger rose. It was a little harder to find a flower on the paper large enough when I wasn't working with full sheets, but happy with how this came out. This time I decided to do the same method for the leaves as well, though the patterned paper I used for them was just an all over pattern and not leaves themselves. The rose and leaves are all part of one large die, so I cut it out in Blushing Bride cardstock and trimmed that down to just the flower part and layered that over a full die cut that I did in Lost Lagoon. I created the sentiment piece using the same method as on my last card, layered over a full string of Blushing Bride sequin trim.
You've probably already guessed that I once again went over the rose with the Wink Of Stella glitter brush. Love that shimmer!
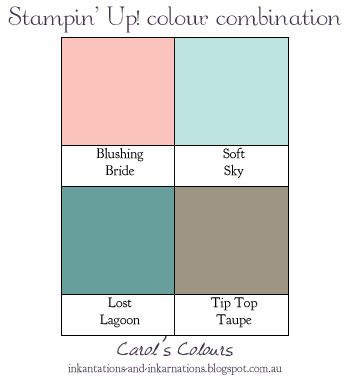
I loved the colour combination I used on the Valentine's card that I had to give it another whirl
Lost Lagoon is among the 2014-2016 In Colors that will soon be retiring in lead up to the launch of the new catalogue and a new group of In Colors, and I'm going to be so sad to see it go! If you have some favourite 2014-2016 In Colors and you haven't already thought to stock up on cardstock and get a reinker to extend the life of your stamp pad now is the time to do it and beat the rush. Once those colours are listed as retiring they are then only available while stocks last and tend to get snapped up pretty quick.
Rose Wonder stamp set & Rose Garden thinlits dies bundle 140804, Lost Lagoon A4 cardstock 133686, Soft Sky A4 cardstock 131292, Blushing Bride A4 cardstock 131287, Tip Top Taupe A4 cardstock 138343, Whisper White A4 cardstock 106549, English Garden designer series paper 138440, Lost Lagoon stamp pad 133644, clear Wink Of Stella glitter brush 141897, Blushing Bride sequin trim 138400, Fine-tip glue pen 138309, dimensionals 104430
I liked the effect of the inside parts of the rose being card cut from the large flowers of patterned paper that I did on my last card, so thought I would replicate that with this larger rose. It was a little harder to find a flower on the paper large enough when I wasn't working with full sheets, but happy with how this came out. This time I decided to do the same method for the leaves as well, though the patterned paper I used for them was just an all over pattern and not leaves themselves. The rose and leaves are all part of one large die, so I cut it out in Blushing Bride cardstock and trimmed that down to just the flower part and layered that over a full die cut that I did in Lost Lagoon. I created the sentiment piece using the same method as on my last card, layered over a full string of Blushing Bride sequin trim.
You've probably already guessed that I once again went over the rose with the Wink Of Stella glitter brush. Love that shimmer!
I loved the colour combination I used on the Valentine's card that I had to give it another whirl
Lost Lagoon is among the 2014-2016 In Colors that will soon be retiring in lead up to the launch of the new catalogue and a new group of In Colors, and I'm going to be so sad to see it go! If you have some favourite 2014-2016 In Colors and you haven't already thought to stock up on cardstock and get a reinker to extend the life of your stamp pad now is the time to do it and beat the rush. Once those colours are listed as retiring they are then only available while stocks last and tend to get snapped up pretty quick.
Rose Wonder stamp set & Rose Garden thinlits dies bundle 140804, Lost Lagoon A4 cardstock 133686, Soft Sky A4 cardstock 131292, Blushing Bride A4 cardstock 131287, Tip Top Taupe A4 cardstock 138343, Whisper White A4 cardstock 106549, English Garden designer series paper 138440, Lost Lagoon stamp pad 133644, clear Wink Of Stella glitter brush 141897, Blushing Bride sequin trim 138400, Fine-tip glue pen 138309, dimensionals 104430
Sunday, February 28, 2016
Thank You Rose
While you generally have a fair idea of when you'll need a birthday card, you don't always know when you'll need a thank you card. I like to have a couple on hand so I'm not rushing around when the need arises. Time for a thank you card using the Rose Garden thinlits!
I think this card looks less busy than my last couple, but probably not a great deal less effort in creating. The rose has been die cut in both cardstock and patterned paper like those cards, but with the print on the paper being larger it looks a little simpler. The background is also cardstock devoid of any decoration. I did however get a little fancy around the sentiment, removing some sequins from the Blushing Bride sequin trim and threading them onto silver metallic thread. For the sentiment I wanted a thin Basic Gray area around the main piece with the sentiment, I couldn't find another die or punch shape that gave me a look I was happy with, so time for plan B: I stamped the oval-ish frame image on the back of my cardstock and cut it out by hand. This gave me a piece that was nicely smaller than what the oval-ish die would cut. I then stamped my sentiment on the front of the white cardstock and layered it on the Basic Gray piece and voila! The balance of colour I was after :)
I'm totally addicted to Wink Of Stella and had to give my rose a thorough brushing with it :)
I managed to leave orange shades alone and get a bit closer to a normal colour scheme for me...
Rose Wonder stamp set & Rose Garden thinlits dies bundle 140804, Basic Gray A4 cardstock 121689, Smoky Slate A4 cardstock 131291, Pear Pizzazz A4 cardstock 131290, Whisper White A4 cardstock 106549, Pear Pizzazz stamp pad 131180, clear Wink Of Stella glitter brush 141897, Blushing Bride sequin trim 138400, Silver metallic thread 138402, Fine-tip glue pen 138309, dimensionals 104430
I think this card looks less busy than my last couple, but probably not a great deal less effort in creating. The rose has been die cut in both cardstock and patterned paper like those cards, but with the print on the paper being larger it looks a little simpler. The background is also cardstock devoid of any decoration. I did however get a little fancy around the sentiment, removing some sequins from the Blushing Bride sequin trim and threading them onto silver metallic thread. For the sentiment I wanted a thin Basic Gray area around the main piece with the sentiment, I couldn't find another die or punch shape that gave me a look I was happy with, so time for plan B: I stamped the oval-ish frame image on the back of my cardstock and cut it out by hand. This gave me a piece that was nicely smaller than what the oval-ish die would cut. I then stamped my sentiment on the front of the white cardstock and layered it on the Basic Gray piece and voila! The balance of colour I was after :)
I'm totally addicted to Wink Of Stella and had to give my rose a thorough brushing with it :)
I managed to leave orange shades alone and get a bit closer to a normal colour scheme for me...
Rose Wonder stamp set & Rose Garden thinlits dies bundle 140804, Basic Gray A4 cardstock 121689, Smoky Slate A4 cardstock 131291, Pear Pizzazz A4 cardstock 131290, Whisper White A4 cardstock 106549, Pear Pizzazz stamp pad 131180, clear Wink Of Stella glitter brush 141897, Blushing Bride sequin trim 138400, Silver metallic thread 138402, Fine-tip glue pen 138309, dimensionals 104430
Saturday, February 20, 2016
Happy Rose Birthday
You may have noticed that I'm not a huge fan of orange. That said, I have been using orange shades a bit more lately. Todays card has not one but two orangey colours, and a yellow to boot. What on earth is going on with me???!!!
This card started with left over pieces from my last card. This time the patterned paper was the frame and the cardstock was the filler pieces. To mix things up even more I made a second rose in Calypso Coral. Again I went over parts of the rose with the clear Wink Of Stella brush but failed to get a good photo of it. The rest of the card was kept pretty simple. The "happy" is cut from Dazzling Diamonds glimmer paper to keep the sparkle going, layered and slightly offset on a "happy" that was also cut from So Saffron cardstock. The sentiment and banner outline are from the Number Of Years stamp set, and the banner die is from the coordinating Large Numbers framelits.
Number Of Years stamp set & Large Numbers framelits bundle 140811, So Saffron A4 cardstock 108611, Calypso Coral A4 cardstock 124392, Watermelon Wonder A4 cardstock 138341, thick Whisper White A4 cardstock 140490, Dazzling Diamonds glimmer paper 135315, 2015-2017 In Color Designer Series Paper stack 138432, Pretty Petals Designer Series Paper stack 138442, So Saffron stamp pad 126957, Old Olive stamp pad 126953, Rose Garden thinlits 140619, clear Wink Of Stella glitter brush 141897, fine tip glue pen 138309, Fine-tip glue pen 138309, dimensionals 104430
Monday, February 15, 2016
Wordy Rose Wonder
Another set I've been hankering to play with is the Rose Wonder stamp set and dies. Considering what I did with the Delicate Ornaments and Butterfly thinlits, I think it was obvious what I would do with these dies.
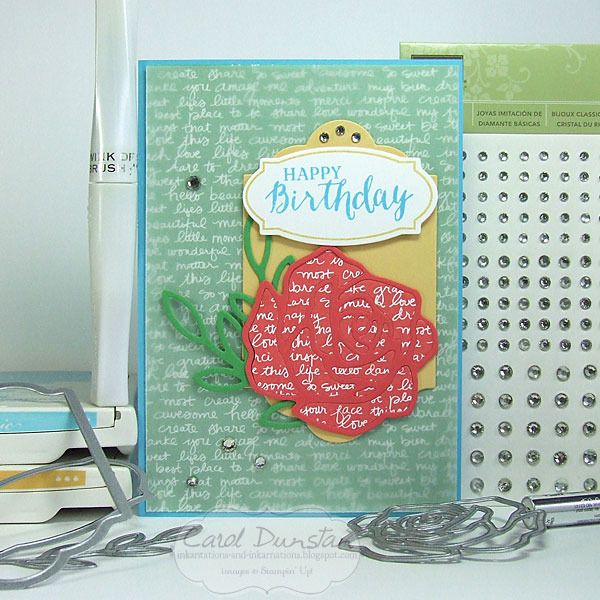
Rather than try the rainbow effect with a rose, I cut the rose out in both Watermelon Wonder cardstock and a sheet of Watermelon Wonder patterned paper. Just like the Delicate Ornaments, I mounted the rose frame on a base before putting in the other pieces. The 2" circle punch is a great size for a base for the the small rose die, though you will need to cut a small notch out as a small bit will stick out.
After mounting the rose, leaves and sentiment on a Lots Of Labels die cut, I felt the the leaves didn't stand enough from the Cucumber Crush patterned paper I was planning to use as a background, so I layered a piece of vellum over the top. I attached the vellum to the card behind the label, since adhesives show through the vellum. However, in the humid weather we have been having lately the vellum was curling up a bit at the edges. To minimise this I wanted to attach it in more places and closer to the edge, so a few rhinestone jewels help to hide the glue.
I did brush the clear Wink Of Stella over the Watermelon Wonder patterned paper pieces, but I failed to get a good photo of it :/
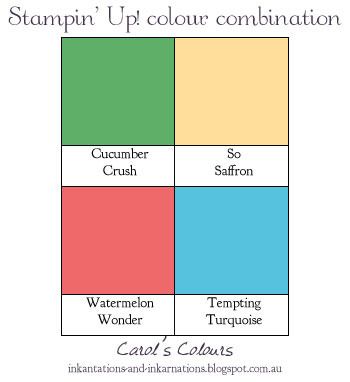
A very primary colour scheme for me today:
Rose Wonder stamp set & Rose Garden thinlits bundle 140804, Tempting Turquoise A4 cardstock 108598, So Saffron A4 cardstock 108611, Cucumber Crush A4 cardstock 138342, Watermelon Wonder A4 cardstock 138341, thick Whisper White A4 cardstock 140490, 2015-2017 In Color Designer Series Paper stack 138432, So Saffron stamp pad 126957, Tempting Turquoise stamp pad 126952, clear Wink Of Stella glitter brush 141897, Rhinestone basic jewels 119246, Lots Of Labels framelits 138281, Fine Tip Glue pen 138309, Fine-tip glue pen 138309, dimensionals 104430
Subscribe to:
Posts (Atom)