Showing posts with label 3D item. Show all posts

Thursday, December 17, 2015

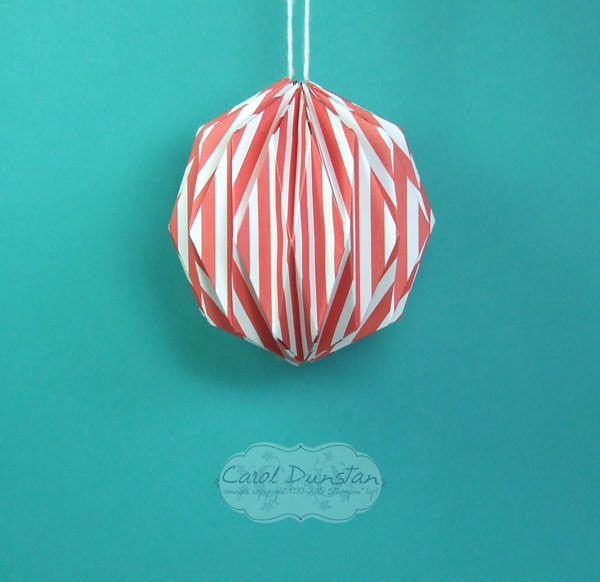
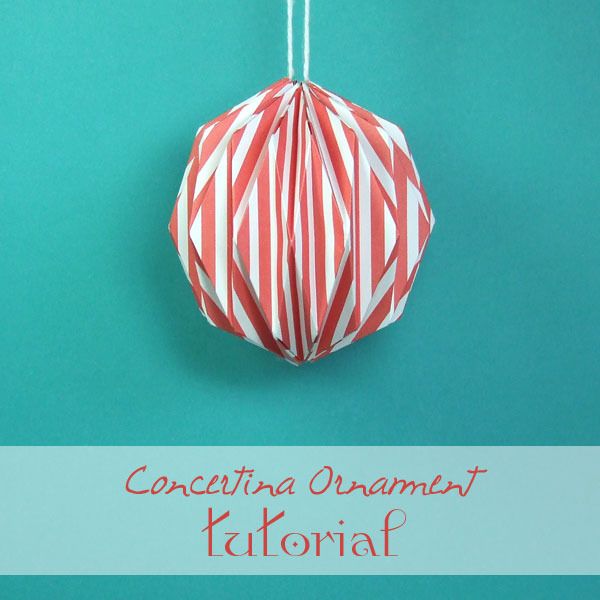
Concertina Ornaments, With Tutorial

I recently came across some instructions for some paper ornaments that were right up my ally. There are templates to print out, but I suspected that there was much wider scope for the design. So I have been madly folding paper to test my theory out, and happy to say I was right! I have seen this style of ornament given a few different names and ordinarily I would avoid muddying the waters further with yet another name, but given I have released the ornaments from the restriction of a template and because of Tori Amos, I am calling them Concertina Ornaments. So without further ado...


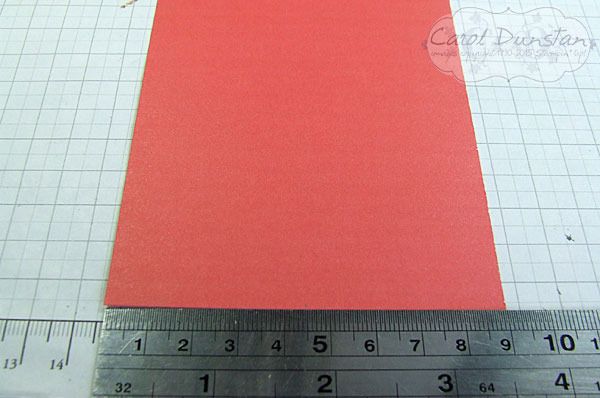
For this tutorial I have used a piece of Watermelon Wonder envelope paper. I simply cut a 9cm wide strip off a sheet of 12x12... so my piece measured 9cmx30.48 cm. More about that later...


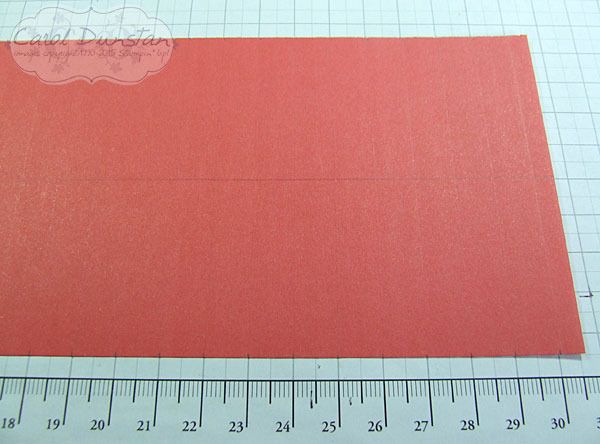
The first thing to do is score vertical lines along the long edge. I chose to work in centimetres for this ornament (more about that later...), so I scored at every centimetre. I used my paper trimmer and it doesn't create a very visible indentation on the paper so it's a little hard to see. After scoring at every centimeter, on the back of the paper I put a small mark at the halfway point on both short edges and drew a line from one to the other. You don't necessarily need to rule the line, but it helps to check that folds are staying on track later.


So the ends of the score lines stood out more I also made small marks for all of those too. Notice that bit of paper from 30cm-30.48 cm? If you are working in centimetres it will make things much easier if you trim your paper down to a whole centimeter...

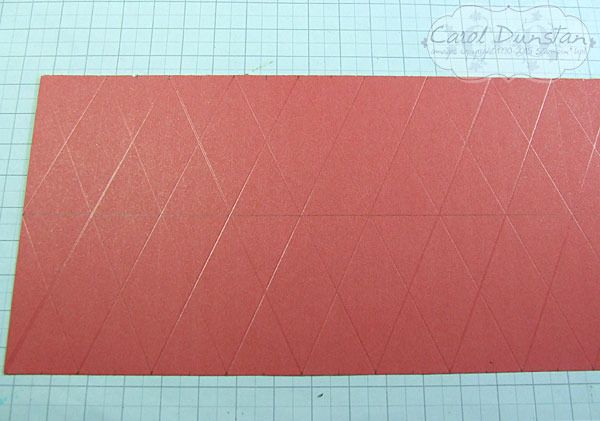
The next step is to create your diagonal score marks. The diagonal score lines should cross the vertical score lines at the middle. On the ends there will be ones that start at the middle point of the short edge... except if you have left part of a centimetre of paper. I strongly recommend trimming that off so you don't accidentally create a score line to the wrong spot. Let my mistakes be a lesson to you!

After all that scoring, it's time to start creasing. I start with the vertical lines, that will be valley folds so you will be folding the paper with the front/right side onto itself.

Once all of those are done it's time to crease the diagonal score lines. These will be mountain folds, so to greate the peak on the front/right side, you fold the paper with the back/wrong side onto itself.

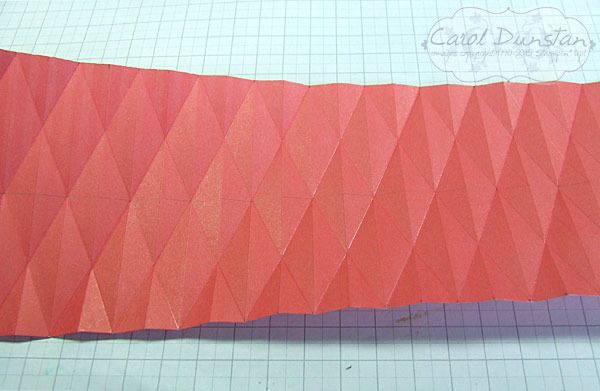
This is what my paper looked like after all the score lines have been creased. You can see from the slight shadows on the paper that little peaks and valleys are starting to take shape.

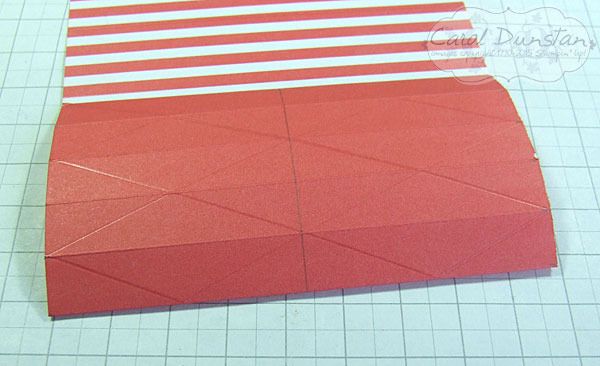
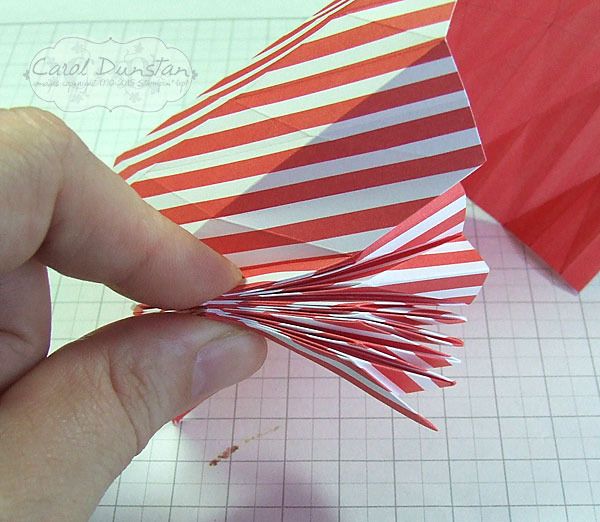
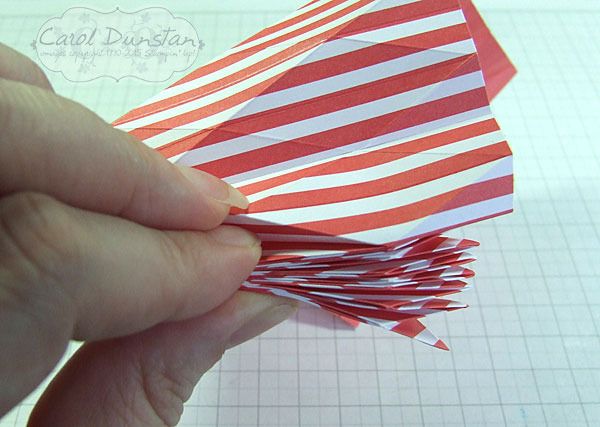
Now it's time to fold all those peaks and valleys at the same time. It can take a little bit to get it started, but I find that pinching the middle where two diagonal lines cross quite effective. The diamond shapes that all the score lines have created should collapse along the folds pretty easily, and then you'll just need to tuck in the triangles along the edge.
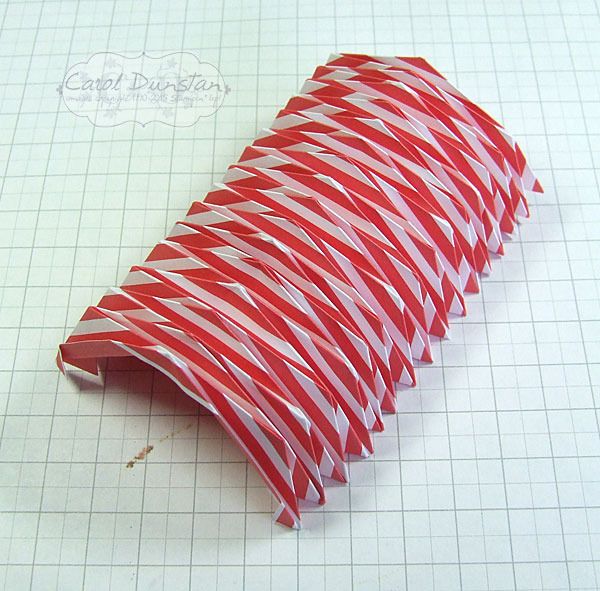
With thumb and index finger pinching what has already been folded I use my middle finger to pull down the next section. Continue like this until your strip is completely folded...

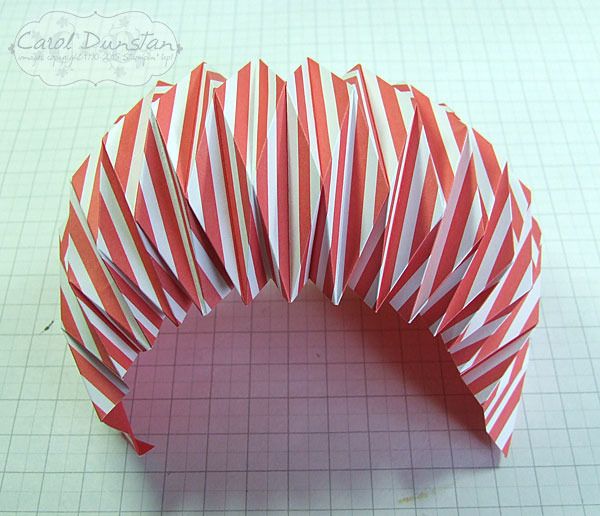
At which point it should look something like this!

Pull the edges of the paper around to start forming the ornament.

Overlap the ends of the paper. How much you overlap depends on the length of your paper, as it is dependant on the folds lining up on both layers. If you are working in centimetres, even numbered lengths will have a whole segment overlap similar to above (though I still have that extra 0.48cm on it...).

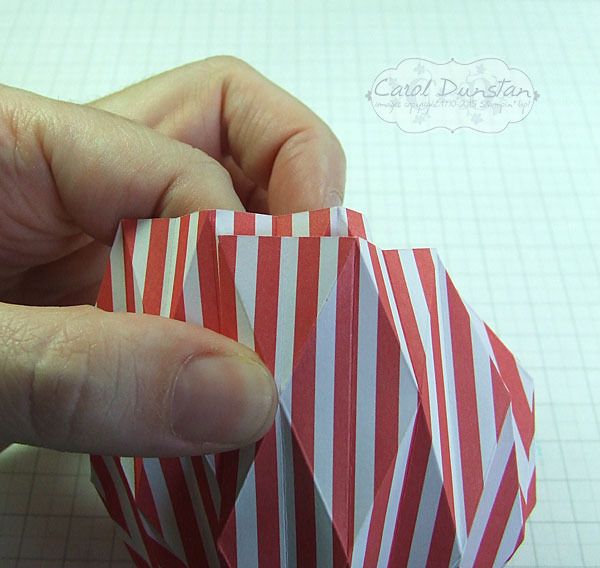
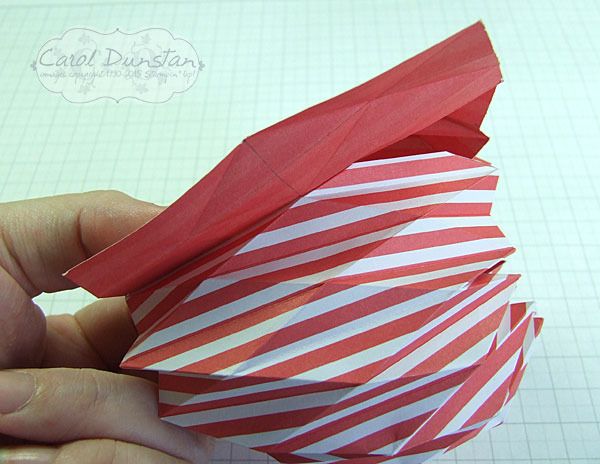
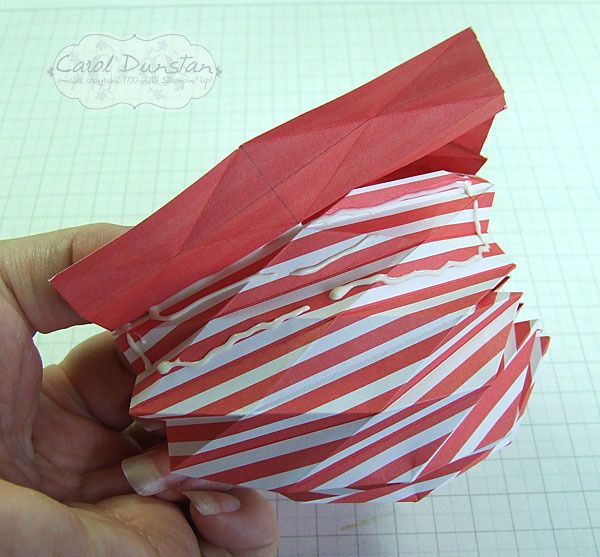
Hold the two layers close to the end of the inside layer and raise the top layer a bit so you can apply adhesive.
I've used Tombow multi glue, and think glues are the better option for sticking the ornament together. This way there is a bit of leeway for moving the layers as you bend the ornament into it's final shape. I put the glue in from the edge so when it spreads it shouldn't ooze out.

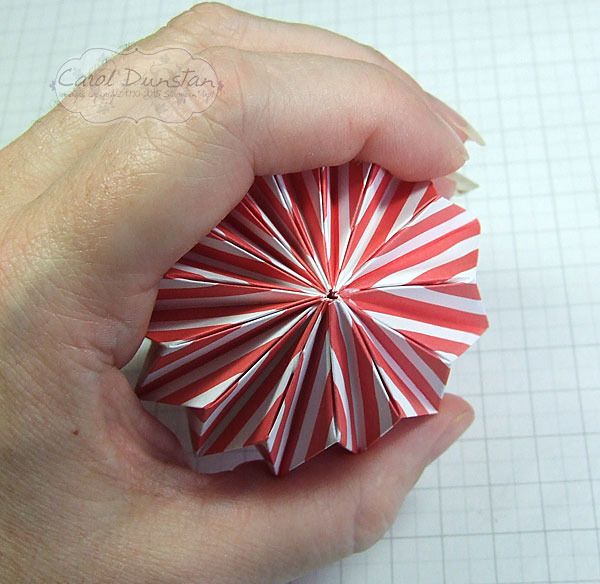
I like to have the ends of the ornament close up tight and tidy, so I use more Tombow here. The instructions I linked to at the top used thread to pull these together.

Once the glue is on, hold the ornament for a while for the glue to dry a bit. You may want to find something else to keep the ornament in shape so you can step away and let the glue dry completely, a clean, dry cup or mug might do the trick, depending on the size of the ornament.

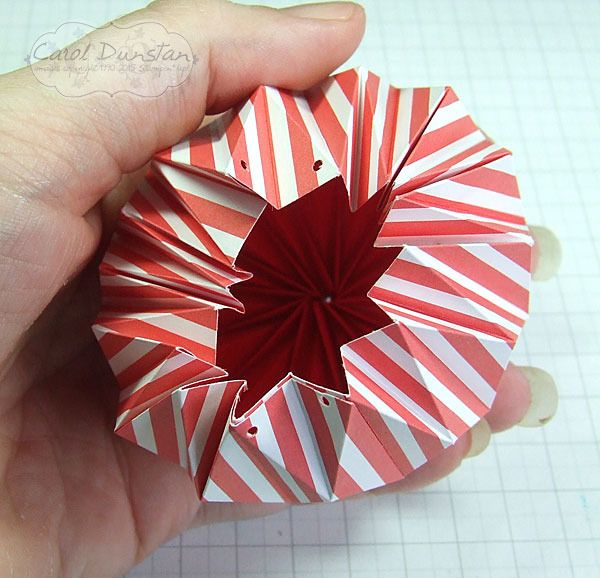
For the top of the ornament, use a small hole punch to make holes on opposite sides of the opening.

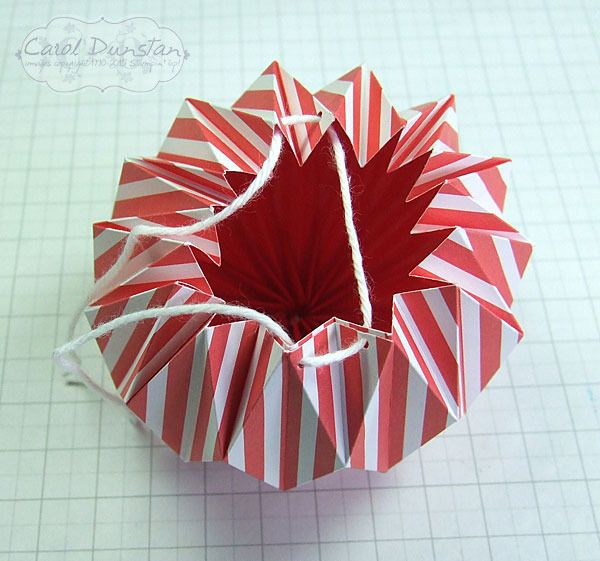
Thread some baker's twine through the holes. Thread the ornament so that the ends will be at peaks of folds when the top is closed, this gives a neater finish.

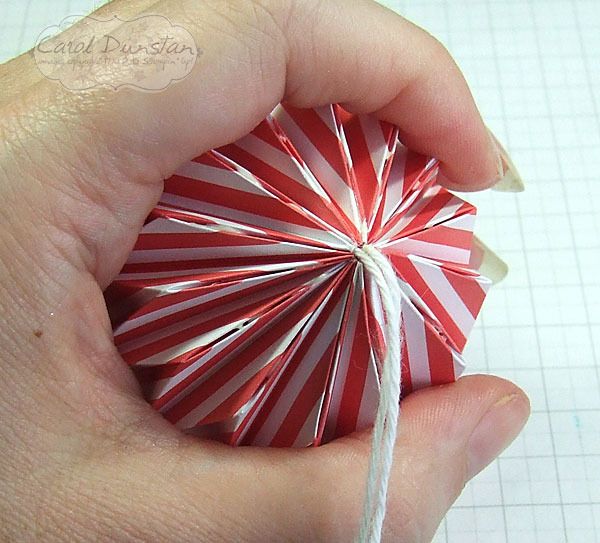
Apply glue same as for the bottom, then hold the ornament to close up the top, pulling through any slack in the twine as you do so.

Voila! Your ornament is finished!


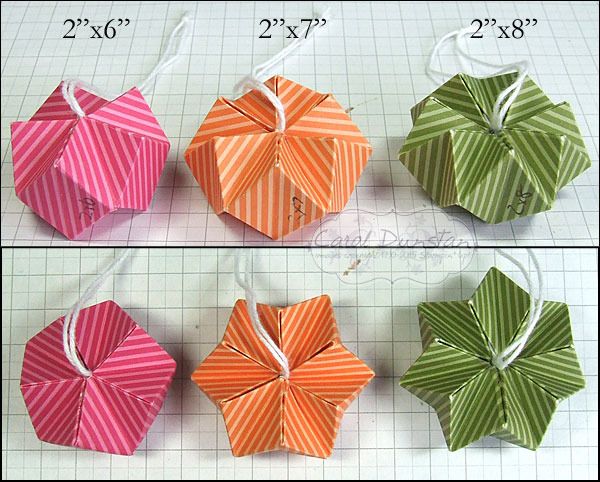
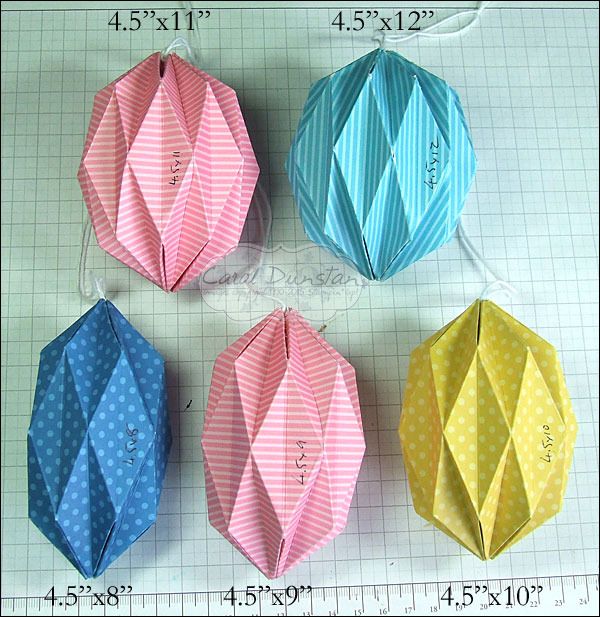
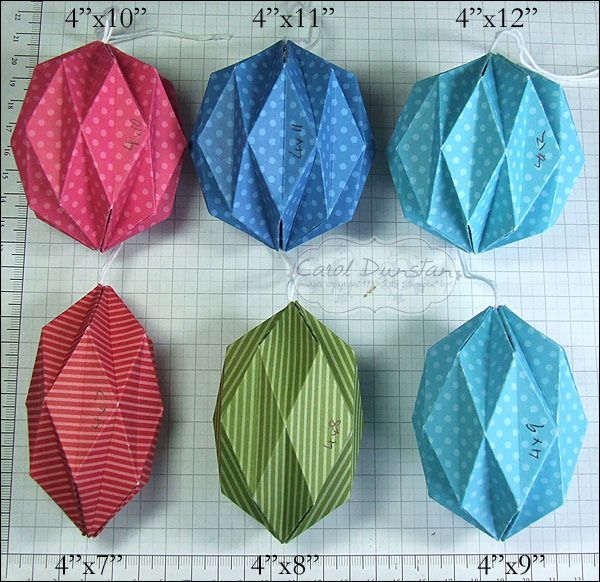
What I love about this ornament is that the basic directions will work for a wide variety of paper sizes. Here are ones I made using Designer Series Paper. After I made a few, I decided I needed to make more to see how the difference in measurements affects the shape of the ornament (because I just couldn't visualise it in my head!). And then I decided I needed to make even more to get an even better idea of this... in the end one of my daughters called them Tribbles due to the regular population explosion!

The measurements on my grid paper are in centimetres with the bold lines being whole cm's and the thinner lines marking half cm's. Being so small these ones were quite fiddly, especially the 2"x8" one as there was so much movement in the center of the ornament it was hard to hold things in the right position while the glue dried.

I've threaded a couple of these through the side as an alternative. I think it looks particuarly striking with the striped paper. I've also cut some paper with the stripes going the other way to see how different that might look.


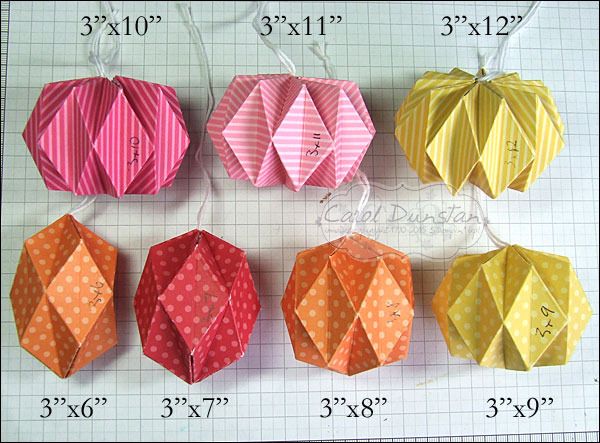
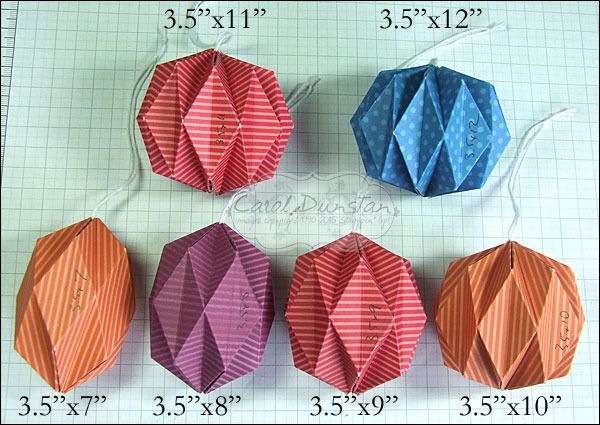
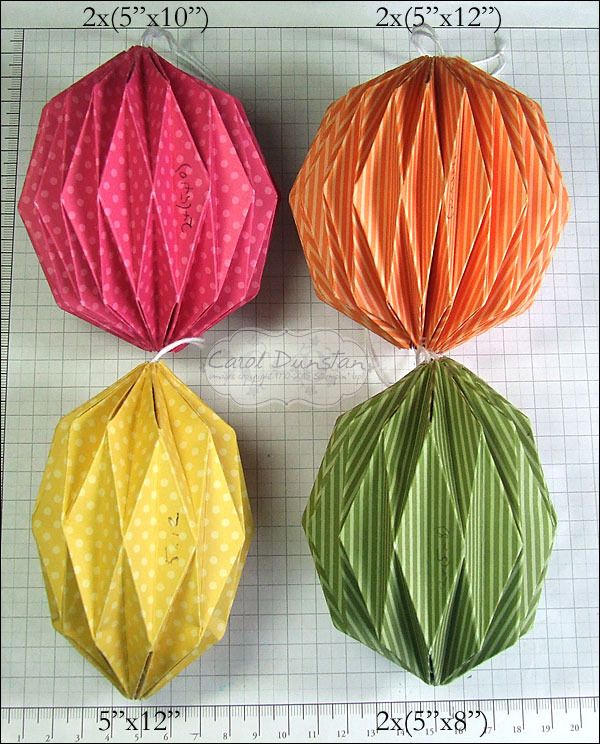
Once you get up to strips 3" wide you can really see how different the ornaments can look depending on how long the strip is.

Basically, the longer the strip is, the shorter and wider the end result will be as the folds are forced into deeper shapes.

3" and 4" are good sizes if you are cutting into a full 12x12 sheet, as you will get 3-4 ornaments from the one sheet.
The wider the starting strip, the bigger the ornament... and the heavier!

Particuarly if you join two pieces together.

And then there are sizes that just won't have a neat finish on the end.

This one is 6"x12". Some will come together neatly with a bit of jiggling and squishing, but others will just be like this. Which isn't exactly ugly, but I would probably dress it up with a tassle or something.

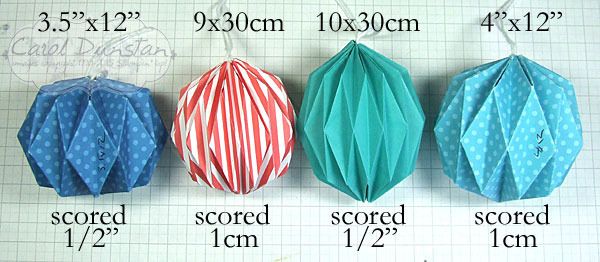
All the ornaments I made with DSP were based on inch measurements. For this tutorial I worked with centimetres, and I also made one with cotton paper 10cm wide. 3.5" is about 8.9cm, and 4" is about 10.16cm. 1/2" is about 1.27cm. With little difference in the width of the starting piece of paper, the small difference between 1/2" and 1cm ends up having quite an influence on the finished shape as well (and yes, I did list both the centimetre ones as being 30cm long though that wasn't actually the case - effectively though they were 30cm with the overlap). Lots of fun to be had here!

Of the papers I used, the envelope paper was the best to work with. The DSP is a good deal thicker, so the folds are more bulky and the ornament heavier - which might be an issue depending on where you plan to hang them. The cotton paper makes nice folds, but is so much flimsier it was probably the hardest to work with.

Thursday, April 30, 2015

Butterflies Suncatcher

I promised I would share something from Stampin' Up! Convention and here it is, a suncatcher made with the Butterflies thinlits dies!

I've had this idea kicking around in my head since I made the Rainbow Butterflies cards. I wanted to come up with something that had a similar effect, but a lot simpler to put together - I understand not everyone likes jigsaws! I thought of colouring the sections with ink pretty quickly, and it didn't take long after that to think that such an design would be more effective off a card where light could shine through it. When I didn't find time to try it out straight away, and while separately trying to come up with something I could make for Convention I realised the simple answer was to "kill" two butterflies with one project.  The method I decided on was the back the black cardstock with Adhesive Sheets before cutting the butterflies out. For the vellum I used the negative of the butterflies to trace inside the cut-out onto vellum. To ensure none of the vellum would be exposed on the outer edge I also cut inside the line... which was a good idea since the butterflies aren't actually symetrical so they don't line up perfectly. Luckily you can't see this from a distance. I chose to colour the vellum before sticking it to the black to ensure there wasn't any halo where the marker couldn't reach, but after mass-producing these I really don't know that that was necessary. With the butterflies not being symetrical you have to colour a much larger area than you need (especially when colouring the first side) and I often ended up having to touch up spots.

I think this would look as effective with a tealight candle so I am hoping to tackle that idea when I get back from Convention.

Built for Free Using: My Stampin Blog

Thursday, November 27, 2014

TBT - Woven Winter Frost

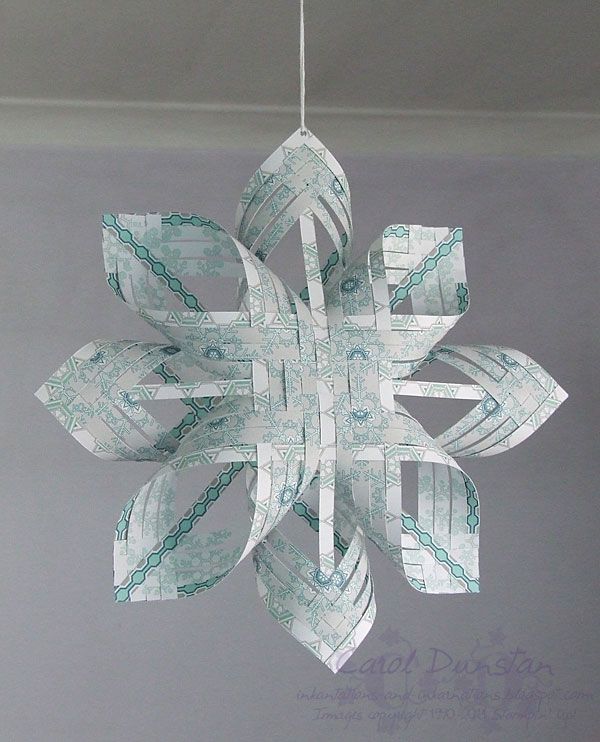
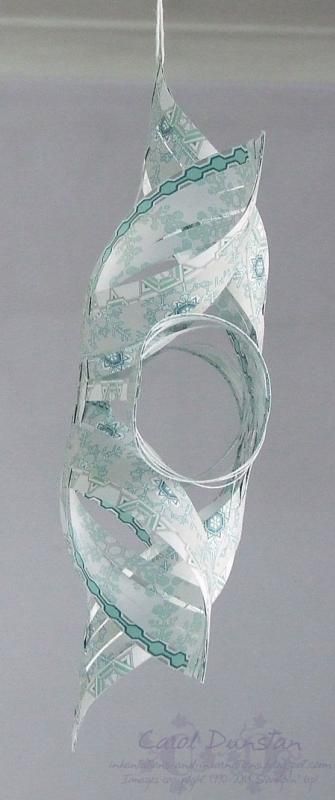
Just as I had finished my layered Winter Frost star last week, Alisa Tilsner shared a star she had made. I loved the look of the narrow, more woven strips so thought I would have a crack at one myself. I stayed with Alisa's technique of a single narrow strip to join the two halves, but used different width and number of strips. These changes resulted in more paper trying to squeeze between other parts so right off the bat knew these would go together as flat as I usually make them, but that's ok! Not sure that it is all that obvious from the above photo...

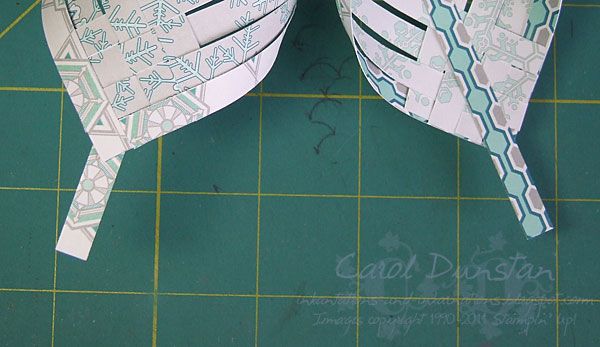
There are many tutorials out there so I won't do a full one myself, but I thought I would show one step to help demonstrate how I do mine which seems to be a little different to what a lot of tutorials show.
When putting the two halves together some tutorials have very little if any of the long strip trimmed off when attached to the "tube" part of the other half. How much I have to trim off varies depending on the size of the star, but above you can see how much I trimmed off this star.

All supplies by Stampin' Up!
Cardstock: none
Stamp set: none
Ink: none
Accessories: Winter Frost patterned paper, mini glue dots, white Baker's Twine
Show watched while creating: NCIS


Thursday, November 20, 2014

TBT - Winter Frost Star

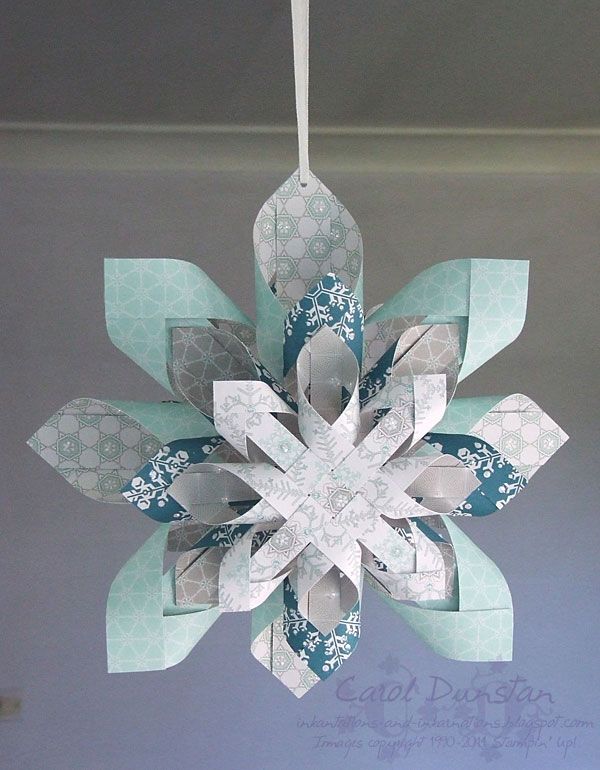
A common theme that is already running through my Throw-back Thursday posts is patterned paper. The gorgeous stuff is seductive, and even when you do use it... it's amazing how far it can go! I was not a slacker with using last years Winter Frost paper, but I still have a good deal left. So much so, I had enough paper to make another of what I call a layered Finnish Star. The two I have made in the past can be found here and here. I again changed the sizes I was working with, keeping the large middle star made with 12" x 1" strips, the medium stars uses 8" x 1.7cm and the smallest star uses 6" x 1.3cm strips. Yep, still mixing my measurements... and no idea why I didn't go with the 6" x 1/2" measurements I used in the first star I made... although 1.3cm is much the same as 1/2". Anyway rather than doing glitter along the edges as I did last time, this time I chose to use Dazzling Details to highlight details on the paper designs. The effect is much more subtle, but also much easier and cleaner... though I still managed to get it on me ;)

All supplies by Stampin' Up!
Cardstock: none
Stamp set: none
Ink: none
Accessories: Winter Frost patterned paper, mini glue dots, 1/8" white taffeta ribbon, Dazzling Details
Show watched while creating: Reign

Thursday, September 18, 2014

TBT - Mother's Day Card-In-A-Box


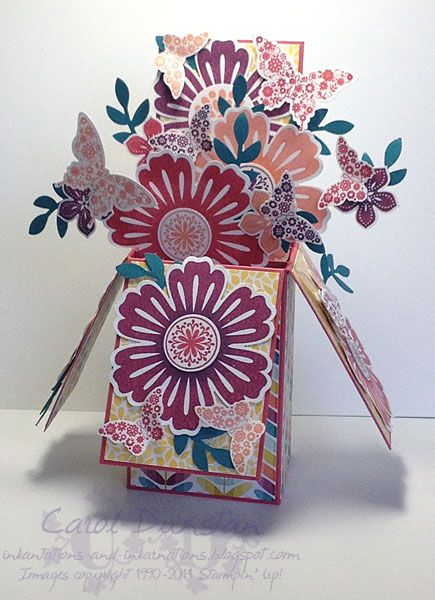
For my second Throw-Back Thursday I thought I would share this card-in-a-box. I followed the instructions of Tanya Bell for a card that would fit into a standard Australian envelope. If you haven't tried your hand at a card-in-a-box, they are quite simple once you get your head around them, and have a great wow factor. The retired items used here are the patterned papers, from the Floral District and Sycamore Street packs. I have a bad habit of buying pretty papers and then being precious about using them... but they always look better when on display as part of a creation!

All supplies by Stampin' Up!
Cardstock: Tangerine Tango, Island Indigo, Whisper White
Stamp sets: Mixed Bunch, Papillon Potpourri
Ink: Rich Razzleberry, Elegant Eggplant, Regal Rose, Rose Red, Calypso Coral, Tangerine Tango
Accessories: sponge dauber, Blossom punch, Elegant Butterfly punch, Bitty Butterfly punch, 3/4" circle punch, 1" circle punch, Bird Builder punch

Thursday, November 24, 2011

Let the Glitter Run Free

One layered Finnish star was just not enough! After making the Raspberry Tart one, I realised I really wanted to add glitter to it but it was just too hard to do after the fact. I also felt that the proportions could be improved, so I just had to make a second one to try these ideas out. I made this one for a relative who had commented on this Kaleidoscope paper recently, and luckily I had enough left over to use it. (Once again, you can click the image below to see a larger version with more detail)

This time the sizes were 12" x 1", 8" x 1.7cm (basically 2/3 of an inch) and 4" x 0.85cm (1/3"). Yes, I am wierd and work in mixed measurements sometimes! To add the glitter I lined the edge of the star points with Tombow glue and then sprinkled Dazzling Diamonds over the top. I tap off as much excess as I could, then set the stars aside to dry for a few hours, or preferably over night. I then used a large soft-bristled brush to remove the rest of the excess. I wish I had thought to do this over my desk so I could return the excess to the container of glitter... but it wasn't untill afterwards that I realised just how much loose excess remained on the stars. My floor was coated in it! Not that that is really a bad thing... Once I removed the rest of the excess I attached the stars with mini glue dots.

I really do think the glitter finishes it off nicely! Here's a side-by-sde shot of the two stars to highlight the different size of the layers. I now don't mind the sizing of the Raspberry Tart one so much, so if you don't quite have enough paper to do 12, 8 & 4 inch stars the smaller ones will still work nicely. You can also see that I arranged the layers different on the Kaleidoscope star, alternating the opening of the points - not really sure how to describe them! These are incredibly easy to make, though the initial lining up of the strips can be time consuming if you are as pedantic as me. I also wouldn't recommend using strips smaller than 3" as even this size is fiddly to work with.
All supplies by Stampin' Up!
Cardstock: none!Stamp set: none!
Ink: none!
Accessories: Kaleidoscope patterned paper, mini glue dots, Tombow glue, Dazzling Diamonds glitter, 1/8" white taffeta ribbon
Show watched while creating: Torchwood

Wednesday, November 23, 2011

Layered Finnish Star

I recently stumbled across directions for something called a Finnish Star, I thought they looked quite effect so I just had to make one. And at this time of year, anything like this is going to have a Christmas bent, so I chose the Christmas-ish colours of the Raspberry Tart patterned paper pack. I did tweak the design a bit though, making 5 stars and attaching them to make one large decoration. (you can click on the image below and see a larger version)
The large star was made using 12" x 1" strips, the medium star uses 6" x 1/2" strips and the small star uses 3" x 1/4" strips. Here's a side-on view to see the dimension of the stars.

If you are wondering what the star is hanging off, it's a dragon's wing! Below you can see the dragon in all it's glory, with it's companion and whole bunch of other decorations done in Raspberry Tart too (yes, I was rather obsessed with it and bought a few packs...)!

All supplies by Stampin' Up!
Cardstock: none! 
Stamp set: none!
Ink: none!
Accessories: Raspberry Tart patterned paper, mini glue dots, 1/8" white taffeta ribbon
Show watched while creating: Time Team

PS Kari Hughes, this is another decoration challenge for you!

Monday, November 21, 2011

(pine) Cone Trees

I've been having a bit of fun with glitter lately, spreading it from one end of the house to the other. Well, that wasn't what I was working on, but it always seems to happen! The first project to get the glitter treatment were these trees, made using the Petal Cone die for the Big Shot.

The tree on the left has been decorated with dots from a Sticky Sheets and mini glue dots. The great thing about using dots from the Sticky Sheets is you can stick them all on at the start where you want them, and peel off the back of all the ones you want a particular colour then move on to the next colour. When doing the mini glue dots, I had to stick the dots for each colour separately. The tree on the right has been decorated with a brand new product. In the up-coming Summer Mini Stampin' Up! will be introducing Glimmer Paper. 12" sheets of glitter that doesn't come off! OK, that is a little less fun, but it has it's advantages! I used the Tasteful Trim die to cut out two strips to wind around the tree. I'm still contemplating adding some dots - which means adding more glitter! The trunks are just strips of Choclate Chip that I made tabs at the top of, then curled around and stuck together, then stuck to the base of the cones.

All supplies by Stampin' Up!
Cardstock: Chocolate ChipStamp set: none!
Ink: none!
Accessories: Petal Cone die, Tasteful Trim die, Brights Collection paper stack, Sticky Sheets, mini glue dots, Fine Galaxy glitter pack, Red Glimmer Paper
Show watched while creating: Torchwood

Monday, March 29, 2010

Hippity Hoppity Easter is on it's Way

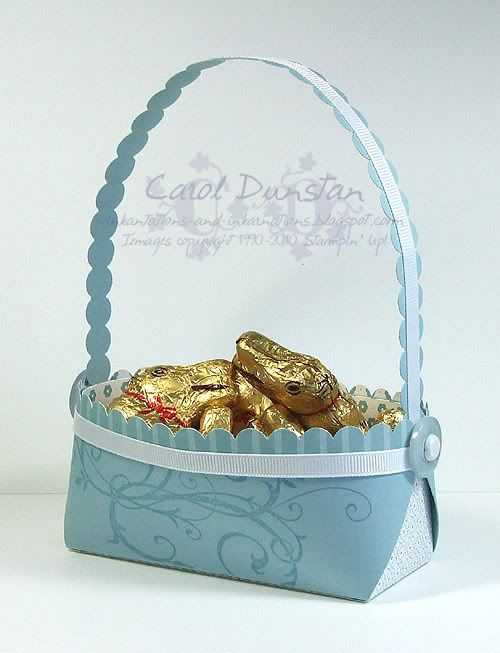
A couple of weeks ago Ariane posted a very cute Easter basket on her blog. Many of us hounded her for a tutorial, and while we waited, and I studied her pictures, I got to playing and came up with a template of my own. Ariane has now posted her tutorial, and our templates are a little different but the made up baskets look the same to all but the closest observers. Anyway, here is the basket I came up with, all ready for Tiarna's guitar teacher tomorrow afternoon, filled with a whole bag of little Lindt bunnies biggrin


All supplies (except chocolate...) by Stampin' Up!
Cardstock: Baja Breeze
Stamp Set: Baroque Motifs
Ink: Baja Breeze
Accessories: Baja Breeze Patterns designer series paper, scallop edge punch, Whisper White 1/4" grosgrain ribbon, Button Bouquet designer buttons, 5/16" Neutral brads, Sticky Strip

Saturday, November 07, 2009

Double-Ball Ornament

I'm very excited to let you all know that I have had a tutorial published! Beate asked me to provide a tutorial of the double-ball oraments I shared last year (second image on this post) for Splitcoast Stampers, and today it is up! They are very easy, and only use small pieces of DSP so it can even be made with scraps. Head over to Splitcoast for the full list of supplies as well as photo and videos of the tutorial. I've just thought of a tweak for these too, so I shall give that a go later and share with you too :)

Tuesday, October 20, 2009

Shaelea's Birthday Card

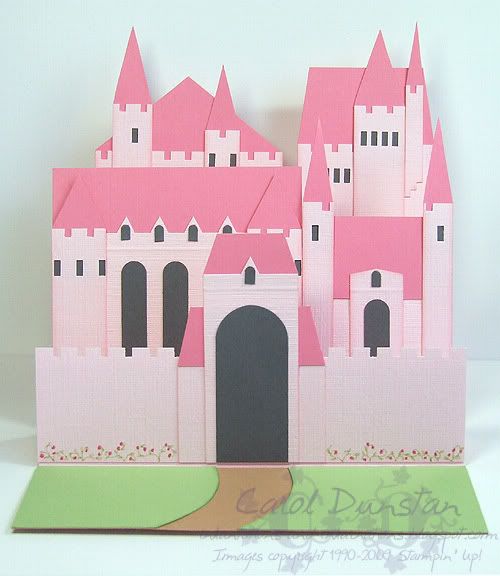
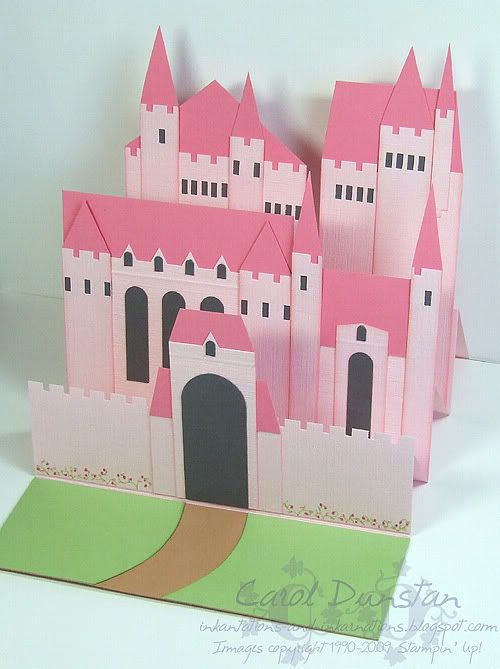
Yesterday was Shaelea's birthday, so for the last few days I have been working on her card, another castle one - this one being based on the castle in the latest Barbie movie (though I made this pinker for Shaelea). I took quite a few liberties with the back row, there was just so many darn turrets and little things I simplified that a lot but it's still quite effective.
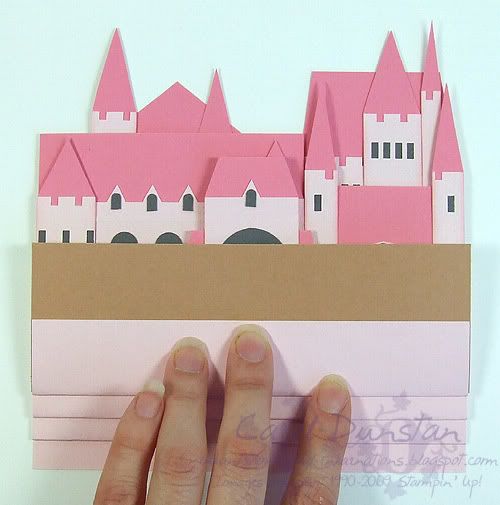
Construction was much the same as Hogwarts, using textured cardstock and making one side of the concertina fold longer than the other to push the castle more upright. One thing I did differently for this one compared to the previous two (the other being the Beauty and the Beast castle) was to use the double rectangle punch for the battlements and to punch windows into the castle walls and cover them from behind... trying to attach all those fiddly little windows so they are straight is tricky! I did the Beauty and the Beast roses along the outside castle wall because I couldn't think of an easy way to do the fountains.
Here is the card folded up so you can see how the concertina folds stager. This one also fits in a 15cm square envelope.

All supplies by Stampin' Up!
Cardstock: textured Pink Pirouette, textured Regal Rose, Basic Gray, Certainly Celery, Creamy Caramel
Stamps: none
Inks: Pink Pirouette, Certainly Celery
Accessories: 1" circle punch, Word Window punch, horizontal slot punch, double rectangle punch, cutter kit, daubers, Certainly Celery marker, Regal Rose marker.