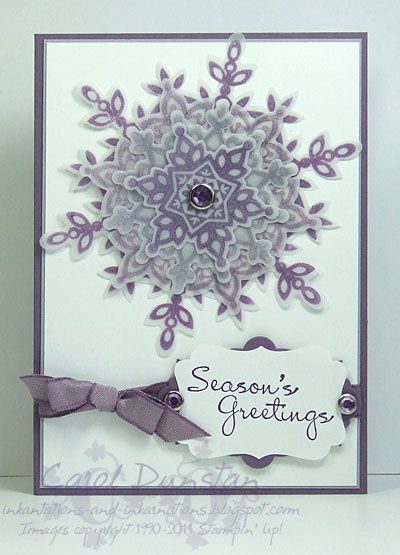
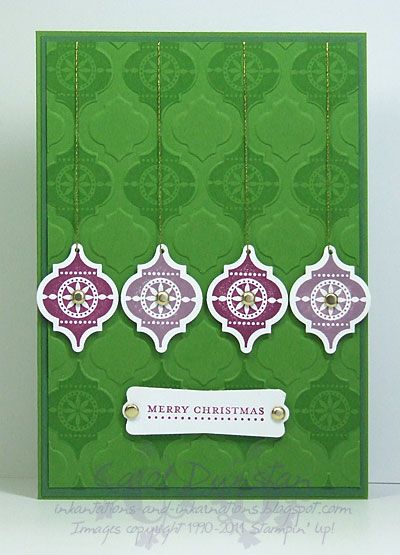
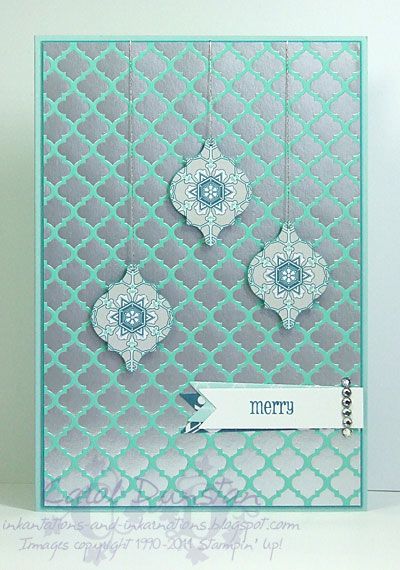
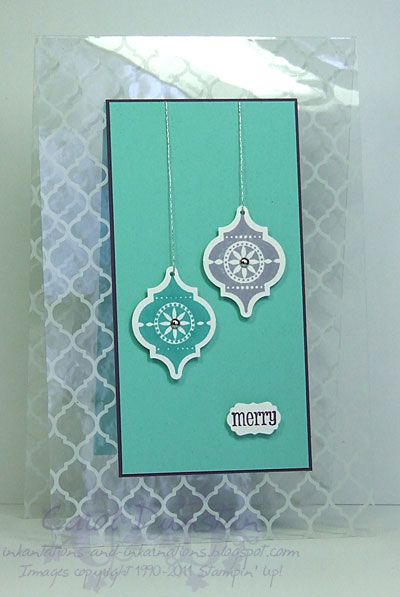
Below are a couple of cards I made that used these ribbons (for full card details, click on the images).
Showing posts with label TBT. Show all posts
Thursday, December 25, 2014
TBT - Ruffled Ribbon
The end of the year is getting close but there's still time to snap up a bargain from the Year-End Closeout! This Throw-back Thursday I'll once again take the opportunity for a product focus from the Closeout sale. Today I wanted to feature the Ruffled Ribbon, the coordinating embellishment for the 2011-2013 In Colors. When the Color Collections were refreshed for the 2013-2014 Annual Catalogue many of these colours became long-term Color Collection members. The two colours of Ruffle Ribbon in the Closeout sale just so happen to be two colours that are still current, so if you are look for more options for matching embellishments for Wisteria Wonder and Pool Party, the Ruffled Ribbon might just be what you are looking for!
Below are a couple of cards I made that used these ribbons (for full card details, click on the images).
Labels:
TBT
Thursday, December 18, 2014
TBT - Festive Flurry Framelits
Have you checked out the Year-End Closeouts? There are some fantastic products available at amazing prices. Many of these products are retired, so this is your last chance to order them. I thought this was a good oportunity to highlight some of the products on sale.
One of my favourite sets from last years Holiday catalogue was the Festive Flurry snowflake set. While the set itself is not available, the coordinating framelit dies are. You can see a few ways I used them in the cards below (for full details on the cards, just click on them).
Thursday, December 11, 2014
TBT - Fancy Visions
If you have been enjoying my Throw-Back Thursday posts, sorry about missing last week! While this card uses a new set, there is a lot of retired product used on it. I'm still working on some old patterned paper, and while other paper designs might have been fancier, I wanted to use paper that would combine well with an embossing folder. The embossed layer is also retired textured cardstock, which I must admit I do miss for that subtle variety it offered.
All supplies by Stampin' Up!
Cardstock: Wild Wasabi, textured Wild Wasabi, Pistachio Pudding, Whisper White
Stamp set: Visions of Santa
Ink: Memento Black
Accessories: Crumb Cake Blendabilities, Skin Tone Blendabilities, Decorative Dots embossing folder, Decorative Label punch, Oval Accent Bigz die, Brights Collection DSP stack (retired design)
Show watched while creating: Castle, Sleepy Hollow
All supplies by Stampin' Up!
Cardstock: Wild Wasabi, textured Wild Wasabi, Pistachio Pudding, Whisper White
Stamp set: Visions of Santa
Ink: Memento Black
Accessories: Crumb Cake Blendabilities, Skin Tone Blendabilities, Decorative Dots embossing folder, Decorative Label punch, Oval Accent Bigz die, Brights Collection DSP stack (retired design)
Show watched while creating: Castle, Sleepy Hollow
Thursday, November 27, 2014
TBT - Woven Winter Frost
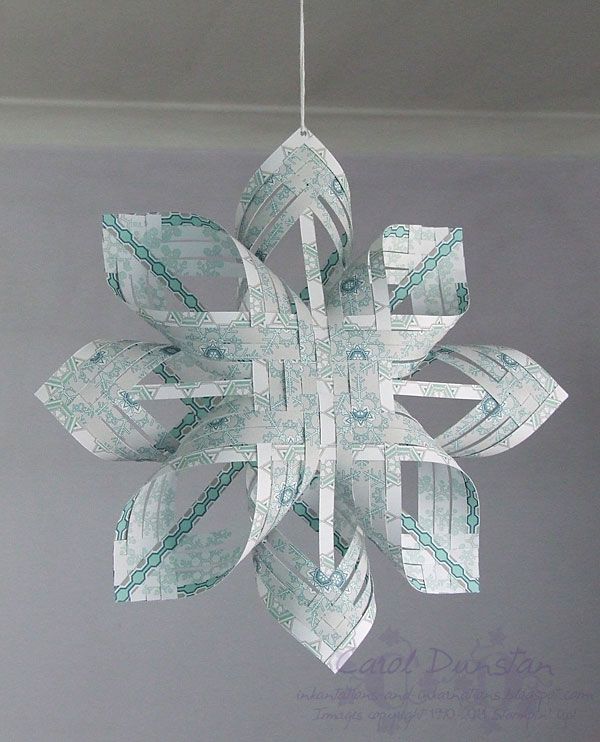
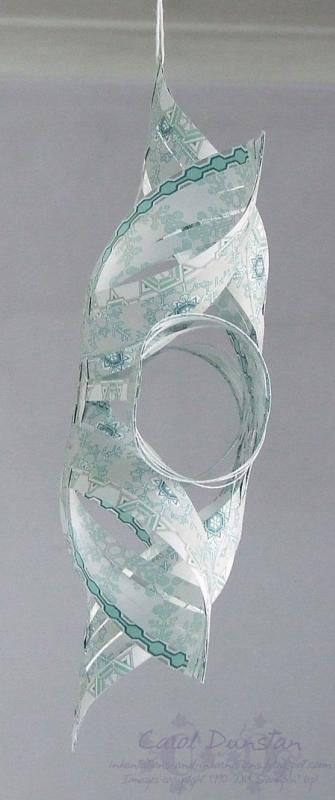
Just as I had finished my layered Winter Frost star last week, Alisa Tilsner shared a star she had made. I loved the look of the narrow, more woven strips so thought I would have a crack at one myself. I stayed with Alisa's technique of a single narrow strip to join the two halves, but used different width and number of strips. These changes resulted in more paper trying to squeeze between other parts so right off the bat knew these would go together as flat as I usually make them, but that's ok! Not sure that it is all that obvious from the above photo...
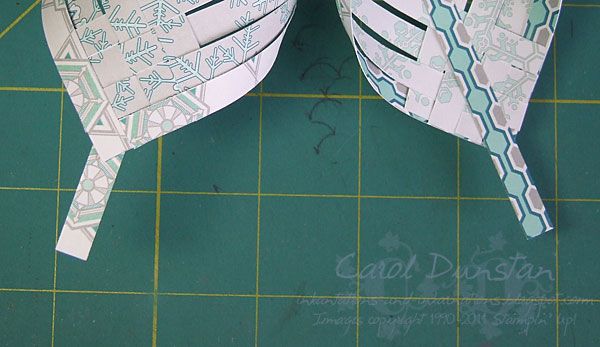
There are many tutorials out there so I won't do a full one myself, but I thought I would show one step to help demonstrate how I do mine which seems to be a little different to what a lot of tutorials show.
When putting the two halves together some tutorials have very little if any of the long strip trimmed off when attached to the "tube" part of the other half. How much I have to trim off varies depending on the size of the star, but above you can see how much I trimmed off this star.
All supplies by Stampin' Up!
Cardstock: none
Stamp set: none
Ink: none
Accessories: Winter Frost patterned paper, mini glue dots, white Baker's Twine
Show watched while creating: NCIS
There are many tutorials out there so I won't do a full one myself, but I thought I would show one step to help demonstrate how I do mine which seems to be a little different to what a lot of tutorials show.
When putting the two halves together some tutorials have very little if any of the long strip trimmed off when attached to the "tube" part of the other half. How much I have to trim off varies depending on the size of the star, but above you can see how much I trimmed off this star.
All supplies by Stampin' Up!
Cardstock: none
Stamp set: none
Ink: none
Accessories: Winter Frost patterned paper, mini glue dots, white Baker's Twine
Show watched while creating: NCIS
Thursday, November 20, 2014
TBT - Winter Frost Star
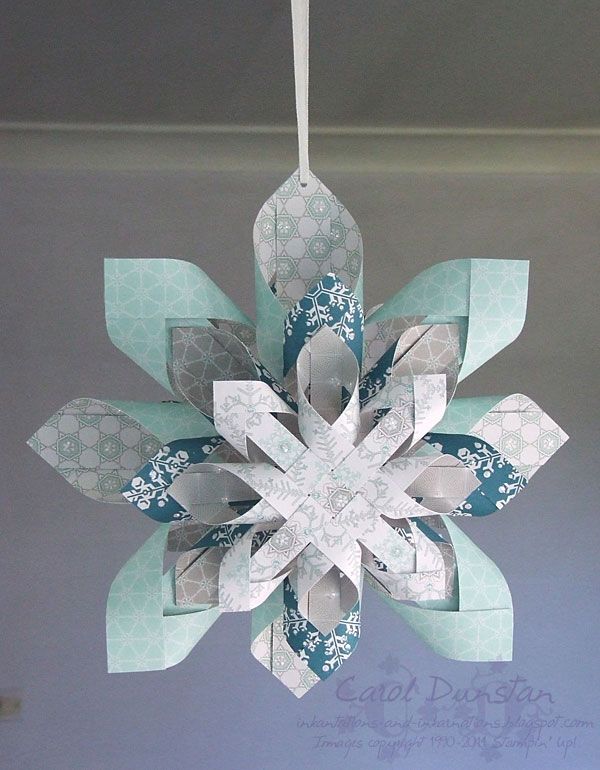
A common theme that is already running through my Throw-back Thursday posts is patterned paper. The gorgeous stuff is seductive, and even when you do use it... it's amazing how far it can go! I was not a slacker with using last years Winter Frost paper, but I still have a good deal left. So much so, I had enough paper to make another of what I call a layered Finnish Star. The two I have made in the past can be found here and here. I again changed the sizes I was working with, keeping the large middle star made with 12" x 1" strips, the medium stars uses 8" x 1.7cm and the smallest star uses 6" x 1.3cm strips. Yep, still mixing my measurements... and no idea why I didn't go with the 6" x 1/2" measurements I used in the first star I made... although 1.3cm is much the same as 1/2". Anyway rather than doing glitter along the edges as I did last time, this time I chose to use Dazzling Details to highlight details on the paper designs. The effect is much more subtle, but also much easier and cleaner... though I still managed to get it on me ;)
All supplies by Stampin' Up!
Cardstock: none
Stamp set: none
Ink: none
Accessories: Winter Frost patterned paper, mini glue dots, 1/8" white taffeta ribbon, Dazzling Details
Show watched while creating: Reign
All supplies by Stampin' Up!
Cardstock: none
Stamp set: none
Ink: none
Accessories: Winter Frost patterned paper, mini glue dots, 1/8" white taffeta ribbon, Dazzling Details
Show watched while creating: Reign
Thursday, November 13, 2014
TBT - Purple Snowflakes
For this weeks edition of Throw-back Thursday I am going back to the Festive Flurry stamps and dies I showed a few weeks ago. This card was kind of inspired by a Marvin Gaye Christmas song you don't hear a lot, unsurprisingly (cosidering the card...) called Purple Snowflakes. I stamped the snowflakes on vellum to soften their look and have a little of the underlying images to show through the layers. These were also "inked" with a mix of white shimmer paint coloured with reinkers, like the last Festive Flurry card I shared.
All supplies by Stampin' Up!
Cardstock: Perfect Plum, Smoky Slate, Whisper White
Stamp set: Festive Flurry, can't remmeber what the sentiment is from sorry!
Ink: Perfect Plum
Accessories: Perfect Plum tafetta ribbon, Festive Flurry dies, Decorative Label punch, Apothecary Accents die, dimensionals, sponge daubers, white shimmer paint, Elegant Eggplant reinker, Perfect Plum reinker, Wisteria Wonder reinker, circle Fire Rhinestone brads
All supplies by Stampin' Up!
Cardstock: Perfect Plum, Smoky Slate, Whisper White
Stamp set: Festive Flurry, can't remmeber what the sentiment is from sorry!
Ink: Perfect Plum
Accessories: Perfect Plum tafetta ribbon, Festive Flurry dies, Decorative Label punch, Apothecary Accents die, dimensionals, sponge daubers, white shimmer paint, Elegant Eggplant reinker, Perfect Plum reinker, Wisteria Wonder reinker, circle Fire Rhinestone brads
Thursday, November 06, 2014
TBT - Merry Mosaic
Another mosaic Christmas card for Throw-back Thursday this week. This time I moved away fromt eh Winter Frost paper and teamed the Very Merry Tags mosaic image with the Modern Mosaic embossing folder. You just have to love the thought Stampin' Up! put into coordinating items across product ranges! To create the background I put the cardstock through the Big Shot with the Modern Mosaic embossing folder, then used the Stamp-a-ma-jig to help line up the mosaic image to stamp on the embossed mosaic shape. It was a little time consuming, but it was the only way to achieve the look I wanted.
Most supplies by Stampin' Up!
Cardstock: Gumball Green, Garden Green, Whisper White
Stamp sets: Very Merry Tags, Teeny Tiny Sentiments
Ink: Rich Razzleberry, Wisteria Wonder, VersaMark
Accessories: Modern Mosaic embossing folder, Mosaic punch, Modern Label punch, dimensionals, gold brads, gold embroidery thread
Thursday, October 30, 2014
TBT - Frosty Mosaics
Yep... more cards using the Winter Frost paper! These two cards really highlight the "specialty" aspect of this paper, with a foil print design and a printed acetate sheet. The motif on both of these is similar to the Mosaic punch, so I focused on that. The top card just uses the punch with another design from the Winter Frost paper, while the bottom uses a stamp from the "Very Merry Tags" set.
Winter Frost foil card
Most supplies by Stampin' Up!
Cardstock: Coastal Cabana, Bermuda Bay, Whisper White
Stamp set: Pennant Parade
Ink: Island Indigo
Accessories: Mosaic punch, Bitty Banners dies, dimensionals, Rhinestone Basic Jewels, silver embroidery thread
Winter Frost acetate card
Most supplies by Stampin' Up!
Cardstock: Elegant Eggplant, Coastal Cabana, Whisper White
Stamp set: Very Merry Tags, Pennant Parade
Ink: Bermuda Bay, Wisteria Wonder, Elegant Eggplant
Accessories: Mosaic punch, Little Labels Punch Pack, dimensionals, mini brads, silver embroidery thread
Thursday, October 23, 2014
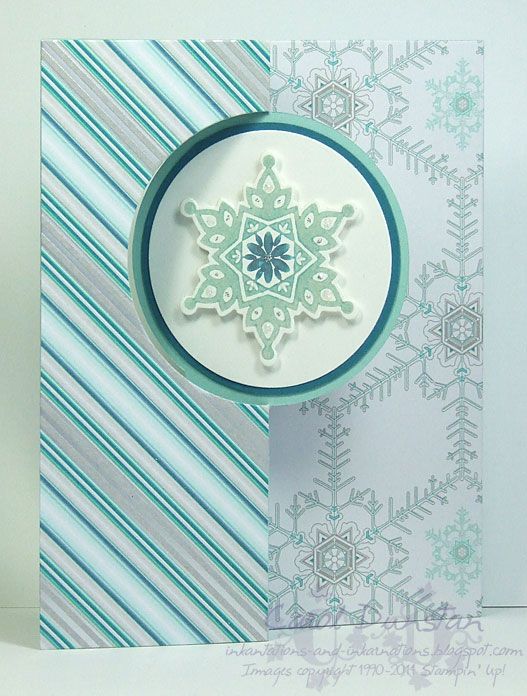
TBT - Festive Frost
This card was one of the Chirstmas cards I mass-produced to send out to friends & family for Christmas last year, and it has a lot of retired product on it. It uses the Festive Flurry stamps & dies, the Winter Frost specialty DSP - all from the 2013 Holiday catalogue - and the Thinlits "Circle Card" die. I really loved the colours of the paper, and even though I made a lot of things with it I still have some left over. It's amazing how far one pack of paper can stretch, so really there's no need to fret over using it all up with not a lot to show for it! The snowflake was inked up with white Shimmer Paint that I coloured with reinkers and applied with sponge daubers.
All supplies by Stampin' Up!
Cardstock: Pool Party, Island Indigo, Whisper White
Stamp set: Festive Flurry
Ink: none technically...
Accessories: Frost White Shimmer Paint, Island Indigo reinker, Coastal Cabana reinker, Pool Party reinker, dimensionals, sponge daubers, Festive Flurry dies, Circle Card die, Winter Frost DSP, Dazzling Details
All supplies by Stampin' Up!
Cardstock: Pool Party, Island Indigo, Whisper White
Stamp set: Festive Flurry
Ink: none technically...
Accessories: Frost White Shimmer Paint, Island Indigo reinker, Coastal Cabana reinker, Pool Party reinker, dimensionals, sponge daubers, Festive Flurry dies, Circle Card die, Winter Frost DSP, Dazzling Details
Thursday, October 16, 2014
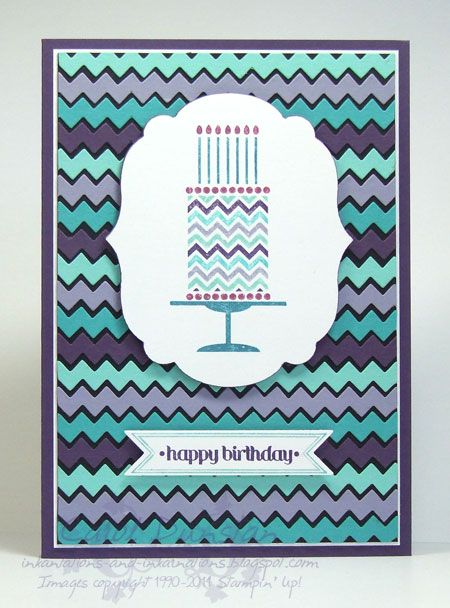
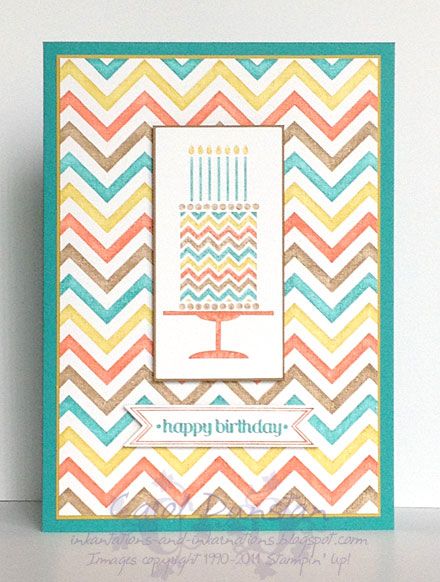
TBT - Chevron Birthdays
When the Birthday Cake stamp came out last year, I immediately knew how I was going to use it - it was begging to be teamed up with the small chevron from the Tasteful Trims die! It was a lot of work, putting the die through the Big Shot so many times to get enough chevrons for the background, but totally worth it!
Then there was the matter of the Positively Chevron background stamp that also came out last year. It had crossed my mind when I had done the other card, but I had dismissed it as I thought inking it up in multiple colours would be too difficult. But the idea kept playing on my mind, and eventually I decided I just had to give it a go and find out for sure. Turns out while it was time consuming, it did still give a good result if you go over it a few times. My method for something like this is to ink it up and stamp it off on a scrap of paper. This serves two purposes, to see how the colour combination and placement work in actuality, and to get some ink on the stamp so less is taken up by the rubber next time and more should be transfered to the cardstock. When I ink the stamp again, I finish off by putting lots of little dots along the middle of the rubber of each part to create little pools of ink in the middle of the rubber. I do this as the ink tends to be drawn to the edge and this can cause pale patches in solid areas of an image. I then give the stamp a huff so moisture in my breath dampens the whole stamp again.
Die-cut Chevron card
All supplies by Stampin' Up!
Cardstock: Elegant Eggplant, Wisteria Wonder, Pool Party, Bermuda Bay, Whisper White
Stamp sets: Birthday Cake, Itty Bitty Banners
Ink: none
Accessories: Elegant Eggplant marker, Wisteria Wonder marker, Pool Party marker, Bermuda Bay marker, Rich Razzleberry marker, Bitty Banners die, Labels Collection die, Tasteful Trim Bigz XL die, dimensionals
Stamped Chevron card
All supplies by Stampin' Up!
Cardstock: Bermuda Bay, Summer Starfruit, Soft Suede, Whisper White
Stamp sets: Birthday Cake, Positively Chevron, Itty Bitty Banners
Ink: none
Accessories: Bermudy Bay marker, Summer Starfruit marker, Soft Suede marker, Tangerine Tango marker, Bitty Banners die, dimensionals
Then there was the matter of the Positively Chevron background stamp that also came out last year. It had crossed my mind when I had done the other card, but I had dismissed it as I thought inking it up in multiple colours would be too difficult. But the idea kept playing on my mind, and eventually I decided I just had to give it a go and find out for sure. Turns out while it was time consuming, it did still give a good result if you go over it a few times. My method for something like this is to ink it up and stamp it off on a scrap of paper. This serves two purposes, to see how the colour combination and placement work in actuality, and to get some ink on the stamp so less is taken up by the rubber next time and more should be transfered to the cardstock. When I ink the stamp again, I finish off by putting lots of little dots along the middle of the rubber of each part to create little pools of ink in the middle of the rubber. I do this as the ink tends to be drawn to the edge and this can cause pale patches in solid areas of an image. I then give the stamp a huff so moisture in my breath dampens the whole stamp again.
Die-cut Chevron card
All supplies by Stampin' Up!
Cardstock: Elegant Eggplant, Wisteria Wonder, Pool Party, Bermuda Bay, Whisper White
Stamp sets: Birthday Cake, Itty Bitty Banners
Ink: none
Accessories: Elegant Eggplant marker, Wisteria Wonder marker, Pool Party marker, Bermuda Bay marker, Rich Razzleberry marker, Bitty Banners die, Labels Collection die, Tasteful Trim Bigz XL die, dimensionals
Stamped Chevron card
All supplies by Stampin' Up!
Cardstock: Bermuda Bay, Summer Starfruit, Soft Suede, Whisper White
Stamp sets: Birthday Cake, Positively Chevron, Itty Bitty Banners
Ink: none
Accessories: Bermudy Bay marker, Summer Starfruit marker, Soft Suede marker, Tangerine Tango marker, Bitty Banners die, dimensionals
Thursday, October 09, 2014
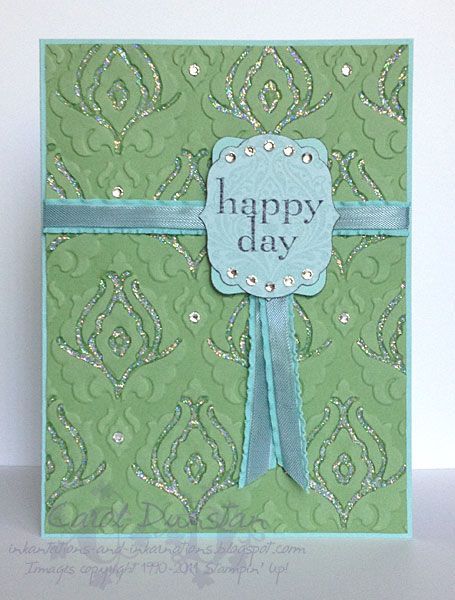
TBT - Happy Days
Time for more ye olde cards. Both of these were made so long ago it's a struggle remembering what I used on them! The Happy Day card was another case of products I loved but hadn't used a lot. I love old style patterns like what was used in the Beautifully Baroque stamp and embossing folder. I wanted to give the background a fuzzy velvet look and feel, so once it had been through the embossing folder I went over it with the sanding block. I've seen a lot of people do it since, particuarly with this embossing folder - great minds think alike! I then went over the indented parts of each motif with the Dazzling Details glitter glue and added some rhinestones for a luxurious sparkly effect. If there had been matching patterend paper I probably would have stamped my sentiment on that, but since there wasn't I basically made my own.
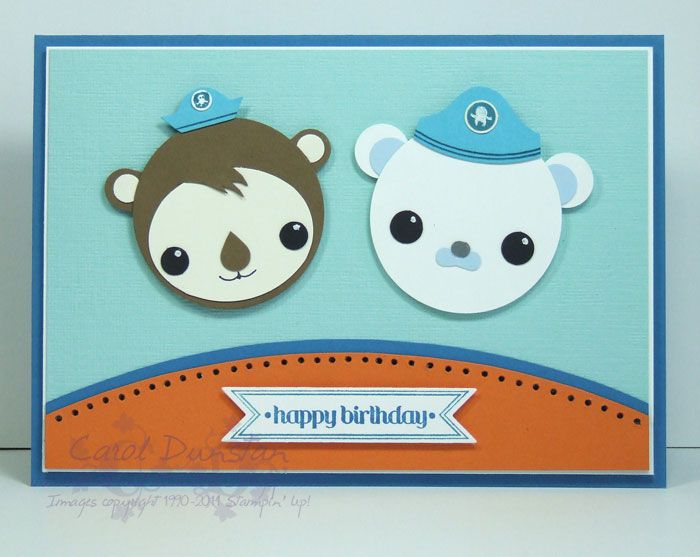
The Octonauts card was easier in some respects, as it was to accompany a present of Octonaut bath toys. So the decision of what to make the card was easy, the how was a little harder. After some experimentation (how most punch art goes!) I came up with reasonably simple ways of creating the faces, but there weren't really any short cuts I could take with the hats so they were hand cut.
Happy Day card
All supplies by Stampin' Up!
Cardstock: Pool Party, Pear Pizzazz, Baja Breeze
Stamp sets: Beautifully Baroque, Happy Day
Ink: VersaMark, StazOn Jet Black
Accessories: sanding block, Pool Party ruffled ribbon, Baja Breeze seam binding ribbon, Decorative Label punch, Beautifully Baroque embossing folder, Labels Collection die, Dazzling Details glitter glue, Rhinestone Basic Jewels
Octonauts punch art card
All supplies by Stampin' Up!
Cardstock: Pacific Point, Bashful Blue, Pool Party texturedSoft Suede, Very Vanilla, Tempting Turquoise, Basic Black, Pumpkin Pie, Basic Grey, Whisper White
Stamp sets: Itty Bitty Banners
Ink: Pacific Point
Accessories: 1 3/4" circle punch, Large Oval punch, Itty Bitty Shapes punch pack, Small Heart punch, Slot punch, Owl Builder punch, Circle Scissors, Bitty Banners Framelits, white gel pen, Pacific Point marker, Basic Black marker
Thursday, October 02, 2014
TBT - The Fox Says...
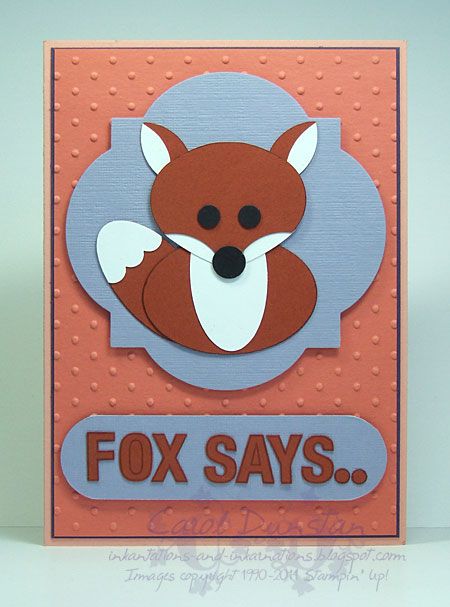
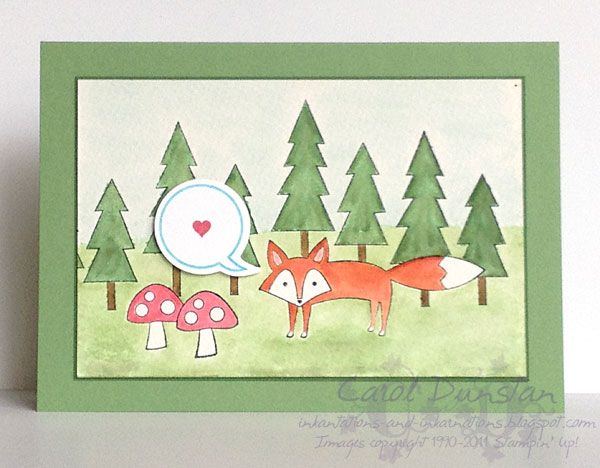
If you are wondering what is with all the foxes, it's a play on the Ylvis song The Fox. There's little retired product on the second card, which was kind of the main idea behind TBT, but it was made quite a few months ago so falls into the theme that way. Like a lot of people I was sad the Ornament punch, as used for the foxes head on the first card, was retired. Aside from being a great shape for Christmas ornaments, it is great for punch art. Pretty sure it's one item I will never part with even if it is no longer current!
Fox punch art card
All supplies by Stampin' Up!
Cardstock: Crisp Canteloup, Concord Crush, Calypso Coral, textured Wisteria Wonder, Cajun Craze, Whisper White, Basic Black
Stamp set: ABC-123 Outline Alphabet & Numbers
Ink: Cajun Craze
Accessories: Ornament punch, Extra-Large Oval punch, Large Oval punch, Scallop Oval punch, Owl Builder punch, Cupcake Builder punch, 5-Petal Flower punch, dimensionals, Perfect Polka Dots embossing folder, Window Frames Collection dies
Forest scene card
All supplies by Stampin' Up!
Cardstock: Wild Wasabi, Gumball Green, Whisper White, watercolour paper
Stamp set: Life In The Forest, Just Sayin'
Ink: StazOn black, Wild Wasabi, Pear Pizzazz, Chocolate Chip, Rose Red, Blushing Bride, Pumpkin Pie (I think!), Soft Sky
Accessories: aquapainter, white gel pen, Tempting Turquoise marker, dimensionals, Word Bubbles dies
Thursday, September 25, 2014
TBT - Doctor Who cards
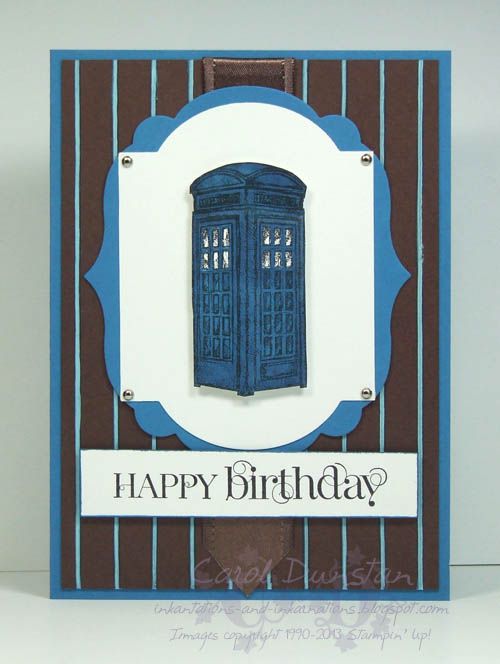
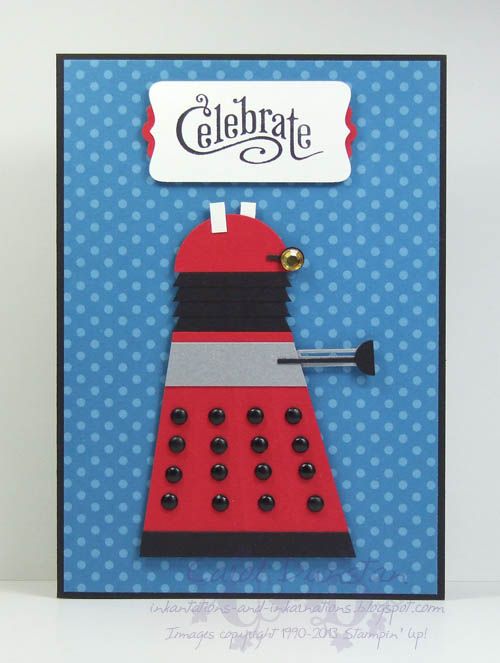
For my third Throw-Back Thursday post I thought I would share a couple of Doctor Who cards I made last year.
I know a lot of fellow crafting Whovians were ecstatic about last years Sale-a-bration set "Feeling Sentimental" with it's old-style phone booth stamp... I think I only saw one card made with it where it was a proper phone box and not a TARDIS/Police Call box!
TARDIS card
All supplies by Stampin' Up!
Cardstock: Pacific Point, Chocolate Chip, Whisper White, watercolour paper
Stamp set: Feeling Sentimental, Curly Cute
Ink: StazOn black, Chocolate Chip
Accessories: aquapainter, white gel pen, Pacific Point marker, dimensionals, Chocolate Chip satin ribbon, Simply Scored tool, 1/8" mini brads, Labels Collection dies, Window Frames Collection dies
Dalek card
All supplies by Stampin' Up!
Cardstock: Basic Black, Real Red, brushed silver, Whisper White
Stamp set: Perfectly Penned
Ink: StazOn black
Accessories: Decorative Label punch, Modern Label punch, dimensionals, Neutrals brads, Circle Fire Rhinestone brads, Brights Patterns DSP stack
I know a lot of fellow crafting Whovians were ecstatic about last years Sale-a-bration set "Feeling Sentimental" with it's old-style phone booth stamp... I think I only saw one card made with it where it was a proper phone box and not a TARDIS/Police Call box!
TARDIS card
All supplies by Stampin' Up!
Cardstock: Pacific Point, Chocolate Chip, Whisper White, watercolour paper
Stamp set: Feeling Sentimental, Curly Cute
Ink: StazOn black, Chocolate Chip
Accessories: aquapainter, white gel pen, Pacific Point marker, dimensionals, Chocolate Chip satin ribbon, Simply Scored tool, 1/8" mini brads, Labels Collection dies, Window Frames Collection dies
Dalek card
All supplies by Stampin' Up!
Cardstock: Basic Black, Real Red, brushed silver, Whisper White
Stamp set: Perfectly Penned
Ink: StazOn black
Accessories: Decorative Label punch, Modern Label punch, dimensionals, Neutrals brads, Circle Fire Rhinestone brads, Brights Patterns DSP stack
Thursday, September 18, 2014
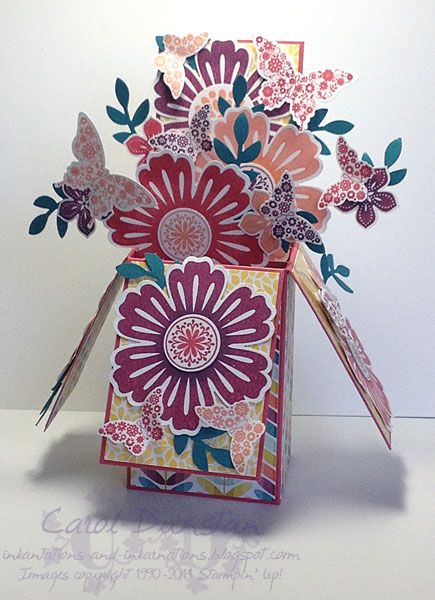
TBT - Mother's Day Card-In-A-Box
For my second Throw-Back Thursday I thought I would share this card-in-a-box. I followed the instructions of Tanya Bell for a card that would fit into a standard Australian envelope. If you haven't tried your hand at a card-in-a-box, they are quite simple once you get your head around them, and have a great wow factor. The retired items used here are the patterned papers, from the Floral District and Sycamore Street packs. I have a bad habit of buying pretty papers and then being precious about using them... but they always look better when on display as part of a creation!
All supplies by Stampin' Up!
Cardstock: Tangerine Tango, Island Indigo, Whisper White
Stamp sets: Mixed Bunch, Papillon Potpourri
Ink: Rich Razzleberry, Elegant Eggplant, Regal Rose, Rose Red, Calypso Coral, Tangerine Tango
Accessories: sponge dauber, Blossom punch, Elegant Butterfly punch, Bitty Butterfly punch, 3/4" circle punch, 1" circle punch, Bird Builder punch
Thursday, September 11, 2014
TBT - Paisley Father's Day
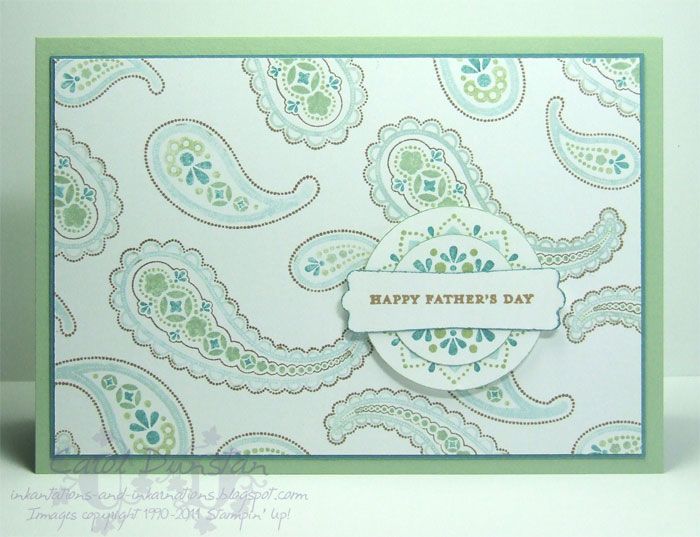
I thought I would incorporate TBT - Throw-Back Thursday - in my blog as a way of sharing things using retired products. Hopefully you might get some ideas for long-lost items tucked away in your stash, pull them out and make use of them! Quite a few of my TBT posts over the next few weeks will be things I made during my blogging absence, but to kick it off I am sharing a card from Father's Day just past. The retired product here is the Spiced Paisley set. I'm a bit of a fan of paisley, but I just didn't use it much while it was available, so I am making up for lost time now. The stamps were inked with markers, one of my favourite techniques. Some images are quite detailed and it can be tricky to avoid getting the colours in the wrong spot, something I wasn't compeltely successful with here but I knew I could stamp this background ten times and still not get it perfect, so I decided there was no point sweating it - it was still well received!
All supplies by Stampin' Up!
Cardstock: Pear Pizzazz, Island Indigo, Whisper White
Stamp set: Spiced Paisley, Teeny Tiny Sentiments
Ink: Soft Suede
Accessories: Pear Pizzazz marker, Wild Wasabi marker, Soft Sky marker, Island Indigo marker, Soft Suede marker, Moderm Label punch, 1 1/4" circle punch, 1 3/4" circle punch
Subscribe to:
Posts (Atom)