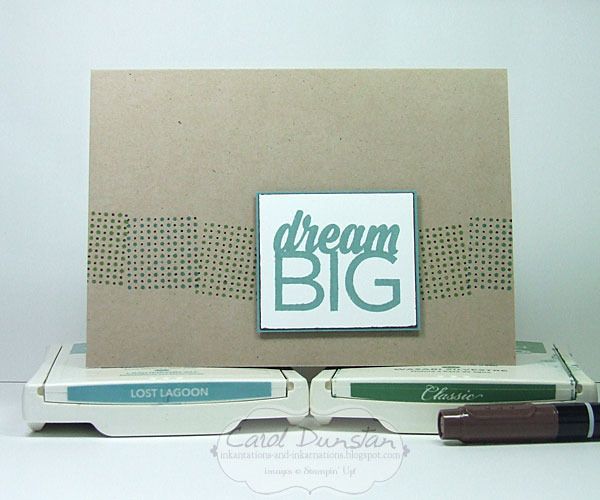
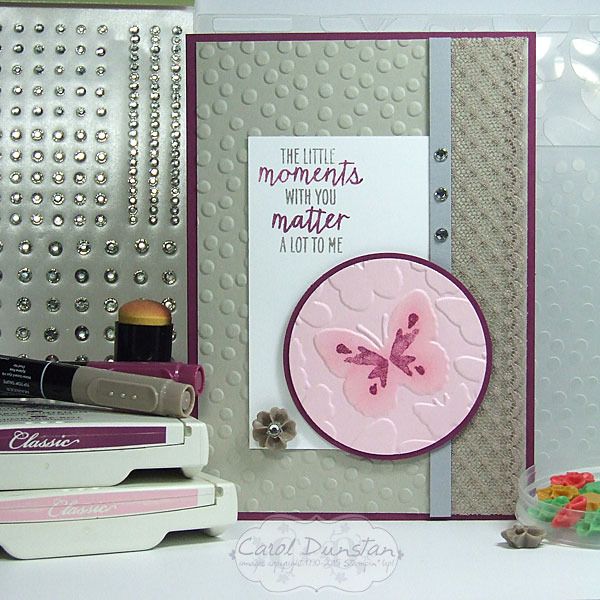
Hello again all! Todays card is another one to send off Enjoy The Little Things.
My cards have been quite simple of late, but this easily takes the cake! Just the cardbase with a sentiment on a couple of layers of cardstock. That said, in my usual style I had to do it in a way that wasn't quick...
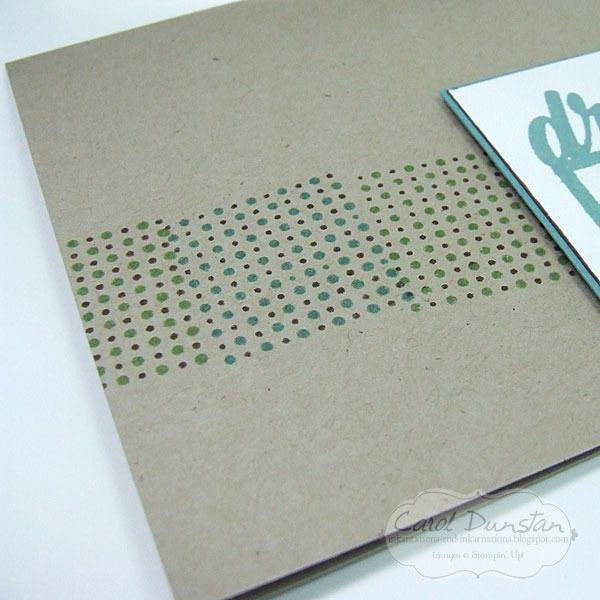
For the stamping on the card base I used the square of dots image and inked it up on an inkpad first then coloured the smaller dots with the Chocolate Chip marker. While some will think I am crazy for going with such a fiddly technique I would point out I wasn't crazy enough to ink all the dots individually with a marker :P (never say never though!)
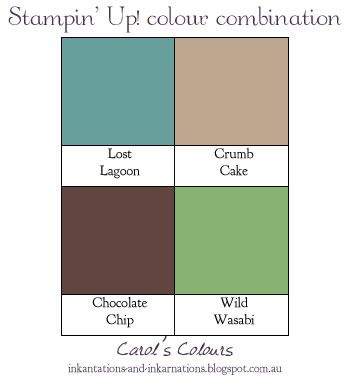
140958 Enjoy The Little Things photopolymer stamp set, 121685 Crumb Cake A4 cardstock, 133686 Lost Lagoon A4 cardstock, 106549 Whisper White A4 cardstock, 133644 Lost Lagoon stamp pad, 126959 Wild Wasabi stamp pad, 131261 Neutrals markers, 104430 dimensionals
Showing posts with label markers direct to rubber. Show all posts
Friday, April 29, 2016
Saturday, November 07, 2015
Jolly Jumping Reindeer
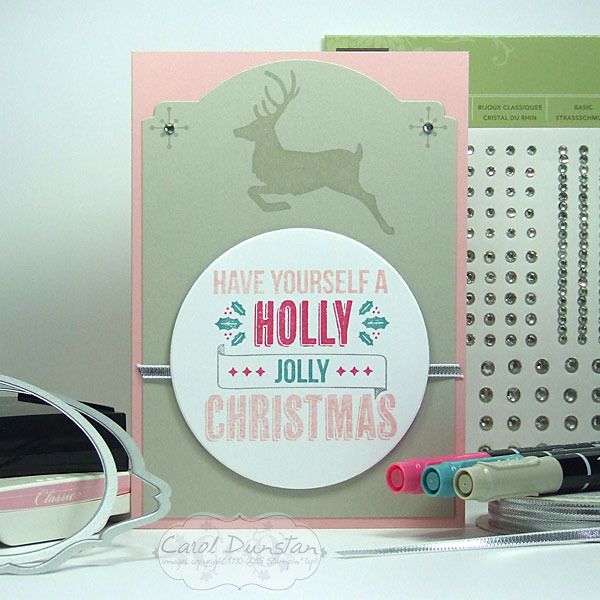
I haven't got very far with making Christmas cards this year, but got back into the swing of it with the Jolly Christmas set.
As is often the case, the idea that came to mind was multiple colours on an image, so out came the markers for some direct to rubber technique. I did cheat a little bit in using the Blushing Bride inkpad to ink up the top and bottom lines. As I was working on this my brain was ticking over how I would do the rest of the card, and initially I thought I would have the reindeer leaping more to the right hand side of the card, but when I started spacing things I found there wasn't a lot of room at the side... but plenty at the top. The idea to shape the top of the reindeer layer came not long after, and I have to say I am really pleased with how it came out. I trimmed the Sahara Sand cardstock to the width I wanted, then positioned it so it was half in/half out of the Deco Labels framelit so just the top edge would be cut.
Almost traditional Christmas colours used today:
As is often the case, the idea that came to mind was multiple colours on an image, so out came the markers for some direct to rubber technique. I did cheat a little bit in using the Blushing Bride inkpad to ink up the top and bottom lines. As I was working on this my brain was ticking over how I would do the rest of the card, and initially I thought I would have the reindeer leaping more to the right hand side of the card, but when I started spacing things I found there wasn't a lot of room at the side... but plenty at the top. The idea to shape the top of the reindeer layer came not long after, and I have to say I am really pleased with how it came out. I trimmed the Sahara Sand cardstock to the width I wanted, then positioned it so it was half in/half out of the Deco Labels framelit so just the top edge would be cut.
Almost traditional Christmas colours used today:
Thursday, June 11, 2015
Mojo Monday 401
It's been a very long time since I played along with a sketch challenge, this week I finally got back into that swing of things with the Mojo Monday sketch.
When my order from the new catalogue arrived last week I immediately noticed that one of the stamps from the Watercolor Wings could fit on some of the butterflies of the Fluttering embossing folder. I thought this sketch would suit highlighting that, so the rest of the card fell into place around that focal point. To really emphasise the butterfly I sponged some Pink Pirouette ink over the raised butterfly.
Here are the colours I played with for this card:
When my order from the new catalogue arrived last week I immediately noticed that one of the stamps from the Watercolor Wings could fit on some of the butterflies of the Fluttering embossing folder. I thought this sketch would suit highlighting that, so the rest of the card fell into place around that focal point. To really emphasise the butterfly I sponged some Pink Pirouette ink over the raised butterfly.
Here are the colours I played with for this card:
Friday, May 29, 2015
I Have A Mint Crush
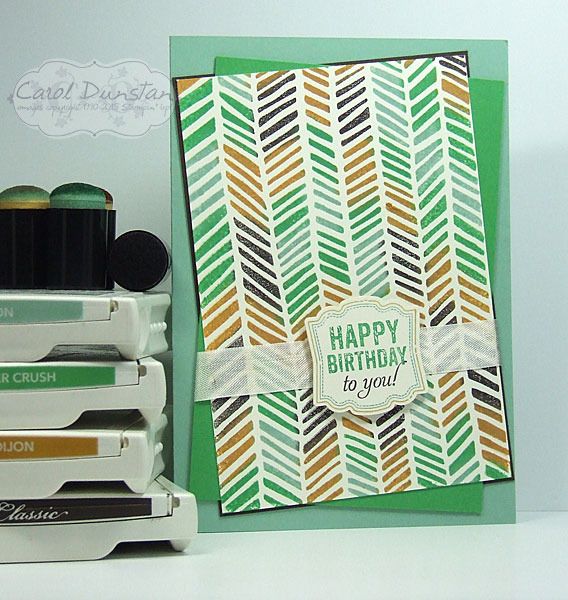
I've been busy busy busy again, so here's TWO cards I managed to make a few days ago.
I'm sad about a number of stamps that are retiring, and this Handcarved background stamp is one of them. I love it's informal chevron-ish look. I sponged the colours on with daubers and didn't worry about being too neat - but also didn't want to be overly messy and get some horribly muddied colours. I teamed this background with some more retiring products, the Label Love set and coordinating Artisan Label punch.
For the next card I decided to stick with the same colour scheme but go for a completely different look. I don't have a lot of Thank You cards in my stash, so decided to make one with the Because You Care set. If you haven't noticed it, it's a hostess set in the Occasions Catalogue and won't be available after June 2. I let a piece of Mint Macaron cardstock take centre stage on this card, it's definitely my favourite of the new In Colors, so expect to see a lot of it! Some of the items used in these cards, like that yummy Mint Macaron cardstock, can't be ordered until June 2nd, but don't forget June 2nd is a wonderful day when you can order from the current catalogue, the Occasions catalogue and the new 2015-2016 catalogue! That said, any retiring items you like you really shouldn't wait to order as they are only available while stocks last.
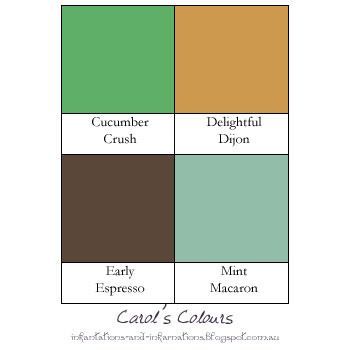
And the colour combination for both cards:
I'm sad about a number of stamps that are retiring, and this Handcarved background stamp is one of them. I love it's informal chevron-ish look. I sponged the colours on with daubers and didn't worry about being too neat - but also didn't want to be overly messy and get some horribly muddied colours. I teamed this background with some more retiring products, the Label Love set and coordinating Artisan Label punch.
For the next card I decided to stick with the same colour scheme but go for a completely different look. I don't have a lot of Thank You cards in my stash, so decided to make one with the Because You Care set. If you haven't noticed it, it's a hostess set in the Occasions Catalogue and won't be available after June 2. I let a piece of Mint Macaron cardstock take centre stage on this card, it's definitely my favourite of the new In Colors, so expect to see a lot of it! Some of the items used in these cards, like that yummy Mint Macaron cardstock, can't be ordered until June 2nd, but don't forget June 2nd is a wonderful day when you can order from the current catalogue, the Occasions catalogue and the new 2015-2016 catalogue! That said, any retiring items you like you really shouldn't wait to order as they are only available while stocks last.
And the colour combination for both cards:
Thursday, October 16, 2014
TBT - Chevron Birthdays
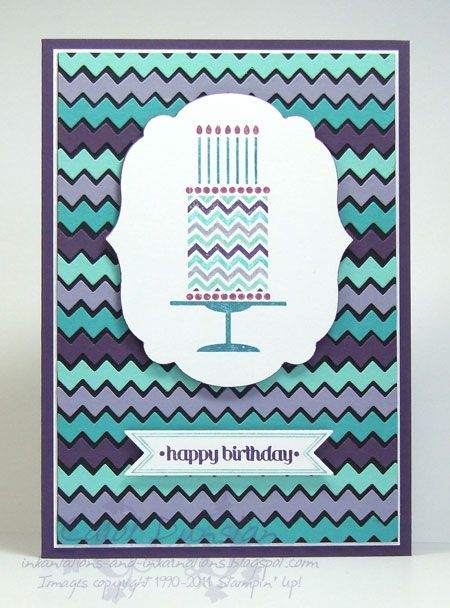
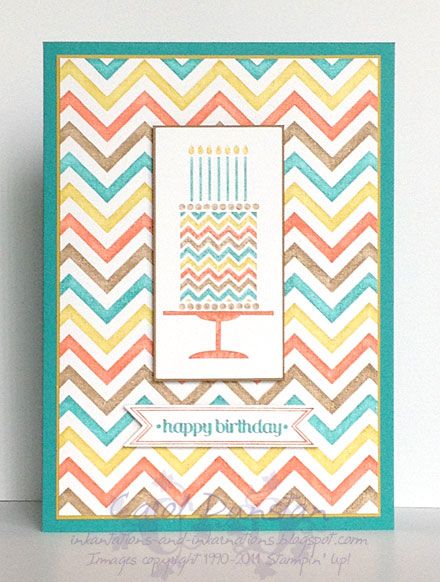
When the Birthday Cake stamp came out last year, I immediately knew how I was going to use it - it was begging to be teamed up with the small chevron from the Tasteful Trims die! It was a lot of work, putting the die through the Big Shot so many times to get enough chevrons for the background, but totally worth it!
Then there was the matter of the Positively Chevron background stamp that also came out last year. It had crossed my mind when I had done the other card, but I had dismissed it as I thought inking it up in multiple colours would be too difficult. But the idea kept playing on my mind, and eventually I decided I just had to give it a go and find out for sure. Turns out while it was time consuming, it did still give a good result if you go over it a few times. My method for something like this is to ink it up and stamp it off on a scrap of paper. This serves two purposes, to see how the colour combination and placement work in actuality, and to get some ink on the stamp so less is taken up by the rubber next time and more should be transfered to the cardstock. When I ink the stamp again, I finish off by putting lots of little dots along the middle of the rubber of each part to create little pools of ink in the middle of the rubber. I do this as the ink tends to be drawn to the edge and this can cause pale patches in solid areas of an image. I then give the stamp a huff so moisture in my breath dampens the whole stamp again.
Die-cut Chevron card
All supplies by Stampin' Up!
Cardstock: Elegant Eggplant, Wisteria Wonder, Pool Party, Bermuda Bay, Whisper White
Stamp sets: Birthday Cake, Itty Bitty Banners
Ink: none
Accessories: Elegant Eggplant marker, Wisteria Wonder marker, Pool Party marker, Bermuda Bay marker, Rich Razzleberry marker, Bitty Banners die, Labels Collection die, Tasteful Trim Bigz XL die, dimensionals
Stamped Chevron card
All supplies by Stampin' Up!
Cardstock: Bermuda Bay, Summer Starfruit, Soft Suede, Whisper White
Stamp sets: Birthday Cake, Positively Chevron, Itty Bitty Banners
Ink: none
Accessories: Bermudy Bay marker, Summer Starfruit marker, Soft Suede marker, Tangerine Tango marker, Bitty Banners die, dimensionals
Then there was the matter of the Positively Chevron background stamp that also came out last year. It had crossed my mind when I had done the other card, but I had dismissed it as I thought inking it up in multiple colours would be too difficult. But the idea kept playing on my mind, and eventually I decided I just had to give it a go and find out for sure. Turns out while it was time consuming, it did still give a good result if you go over it a few times. My method for something like this is to ink it up and stamp it off on a scrap of paper. This serves two purposes, to see how the colour combination and placement work in actuality, and to get some ink on the stamp so less is taken up by the rubber next time and more should be transfered to the cardstock. When I ink the stamp again, I finish off by putting lots of little dots along the middle of the rubber of each part to create little pools of ink in the middle of the rubber. I do this as the ink tends to be drawn to the edge and this can cause pale patches in solid areas of an image. I then give the stamp a huff so moisture in my breath dampens the whole stamp again.
Die-cut Chevron card
All supplies by Stampin' Up!
Cardstock: Elegant Eggplant, Wisteria Wonder, Pool Party, Bermuda Bay, Whisper White
Stamp sets: Birthday Cake, Itty Bitty Banners
Ink: none
Accessories: Elegant Eggplant marker, Wisteria Wonder marker, Pool Party marker, Bermuda Bay marker, Rich Razzleberry marker, Bitty Banners die, Labels Collection die, Tasteful Trim Bigz XL die, dimensionals
Stamped Chevron card
All supplies by Stampin' Up!
Cardstock: Bermuda Bay, Summer Starfruit, Soft Suede, Whisper White
Stamp sets: Birthday Cake, Positively Chevron, Itty Bitty Banners
Ink: none
Accessories: Bermudy Bay marker, Summer Starfruit marker, Soft Suede marker, Tangerine Tango marker, Bitty Banners die, dimensionals
Thursday, September 11, 2014
TBT - Paisley Father's Day
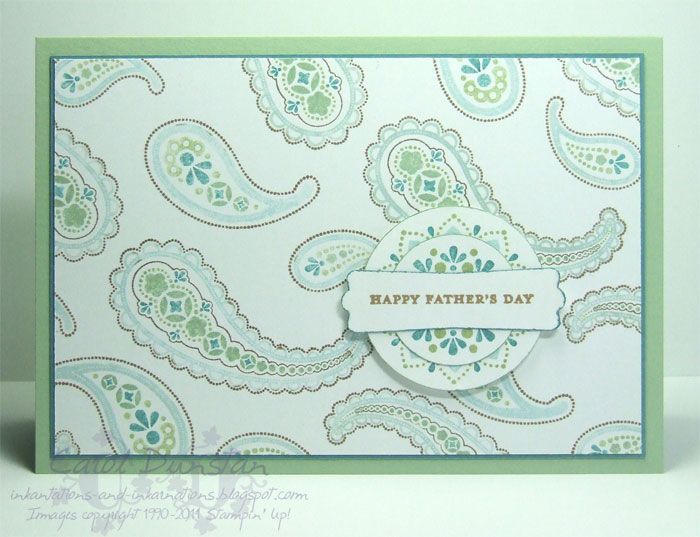
I thought I would incorporate TBT - Throw-Back Thursday - in my blog as a way of sharing things using retired products. Hopefully you might get some ideas for long-lost items tucked away in your stash, pull them out and make use of them! Quite a few of my TBT posts over the next few weeks will be things I made during my blogging absence, but to kick it off I am sharing a card from Father's Day just past. The retired product here is the Spiced Paisley set. I'm a bit of a fan of paisley, but I just didn't use it much while it was available, so I am making up for lost time now. The stamps were inked with markers, one of my favourite techniques. Some images are quite detailed and it can be tricky to avoid getting the colours in the wrong spot, something I wasn't compeltely successful with here but I knew I could stamp this background ten times and still not get it perfect, so I decided there was no point sweating it - it was still well received!
All supplies by Stampin' Up!
Cardstock: Pear Pizzazz, Island Indigo, Whisper White
Stamp set: Spiced Paisley, Teeny Tiny Sentiments
Ink: Soft Suede
Accessories: Pear Pizzazz marker, Wild Wasabi marker, Soft Sky marker, Island Indigo marker, Soft Suede marker, Moderm Label punch, 1 1/4" circle punch, 1 3/4" circle punch
Wednesday, April 25, 2012
Paisley Butterflies
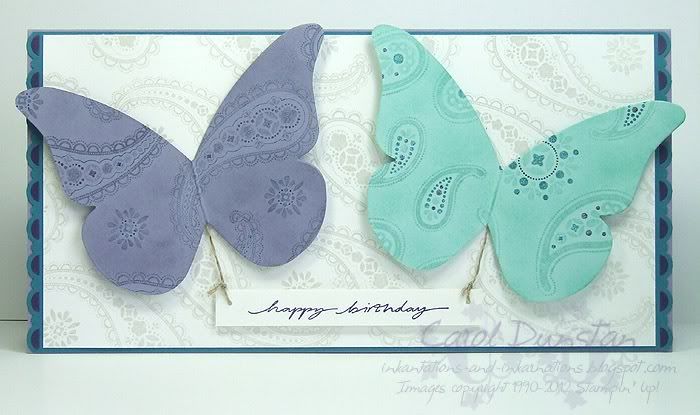
One of my favourite sets from this years Summer Mini was Spiced Paisley. With a lot of different elements I knew this set would be a lot of fun to play with.
For this card I went back to one of my favourite techniques: direct to rubber; one of my favourite colour combinations: purple and aqua; and a new favourite technique: sponging with shimmer paint. Having this set in clear mount made it so easy to create the background. I arranged the largest droplet-shaped stamp and the smallest circular stamp on the same large acrylic block so they would both stamp at the same time and save having to space things a little. One other little trick I used for this card was to fill in the scallops on the punched border with the insides of punched scallops in a different colour.
All supplies by Stampin' Up!
Cardstock: Whisteria Wonder, Island Indigo, Concord Crush, Whisper White, Pool Party
Stamp set: Spiced Paisley, On Your Birthday
Ink: none!
Accessories: sponge dauber, white shimmer paint, Wisteria Wonder marker, Concord Crush marker, Pool Party marker, Island Indigo marker, Scallop Trim Border punch, Beautiful Butterflies die, linen thread, Paper Piercer, dimensionals
For this card I went back to one of my favourite techniques: direct to rubber; one of my favourite colour combinations: purple and aqua; and a new favourite technique: sponging with shimmer paint. Having this set in clear mount made it so easy to create the background. I arranged the largest droplet-shaped stamp and the smallest circular stamp on the same large acrylic block so they would both stamp at the same time and save having to space things a little. One other little trick I used for this card was to fill in the scallops on the punched border with the insides of punched scallops in a different colour.
All supplies by Stampin' Up!
Cardstock: Whisteria Wonder, Island Indigo, Concord Crush, Whisper White, Pool Party
Stamp set: Spiced Paisley, On Your Birthday
Ink: none!
Accessories: sponge dauber, white shimmer paint, Wisteria Wonder marker, Concord Crush marker, Pool Party marker, Island Indigo marker, Scallop Trim Border punch, Beautiful Butterflies die, linen thread, Paper Piercer, dimensionals
Sunday, April 22, 2012
A Pony Type of Christmas
Another one to file away in the "you can make anything Christmasy", this was probably my favourite of the Christmas cards I made last year. It was the last one I made and it's a one of a kind!
Once again the Merry & Type stamp was inked with markers, then punched out with the Decorative Label punch. The pony was stamped on Whisper White with StazOn, then coloured with markers, including the free-hand holly 'cutie mark' on her hip, then cut out. To pattern the tree I used the scallop border punch on some scrap cardstock then sponged along the scalloped edge, move & repeat till the tree was filled. The background has the Starburst jumbo wheel stamped in VersaMark, and a dot of white shimmer paint in the center of each starburst to finish it off. Grass layers were cut with the cutting blade from the Cutter Kit.
Here's a close up of the pony herself. For the mane and tail I edged the coloured sections in a darker shade before colouring in the rest. The white sections were painted with white shimmer paint.
All supplies by Stampin' Up!
Cardstock: Garden Green, Regal Rose, Bashful Blue, Pear Pizzazz, Certainly Celery, Wild Wasabi, Chocolate Chip textured, Whisper White
Stamp set: Merry & Type, Pony Party, Starburst jumbo wheel
Ink: StazOn, VersaMark, Wild Wasabi
Accessories: markers in Garden Green, Wild Wasabi, Real Red, Rose Red;Decorative Label punch, Pennant die, Cutter Kit, Scallop Edge punch, sponge dauber, white shimmer paint, blender pen, gold brads, silver brads, Real Red 1/8" taffeta ribbon, dimensionals
Once again the Merry & Type stamp was inked with markers, then punched out with the Decorative Label punch. The pony was stamped on Whisper White with StazOn, then coloured with markers, including the free-hand holly 'cutie mark' on her hip, then cut out. To pattern the tree I used the scallop border punch on some scrap cardstock then sponged along the scalloped edge, move & repeat till the tree was filled. The background has the Starburst jumbo wheel stamped in VersaMark, and a dot of white shimmer paint in the center of each starburst to finish it off. Grass layers were cut with the cutting blade from the Cutter Kit.
Here's a close up of the pony herself. For the mane and tail I edged the coloured sections in a darker shade before colouring in the rest. The white sections were painted with white shimmer paint.
All supplies by Stampin' Up!
Cardstock: Garden Green, Regal Rose, Bashful Blue, Pear Pizzazz, Certainly Celery, Wild Wasabi, Chocolate Chip textured, Whisper White
Stamp set: Merry & Type, Pony Party, Starburst jumbo wheel
Ink: StazOn, VersaMark, Wild Wasabi
Accessories: markers in Garden Green, Wild Wasabi, Real Red, Rose Red;Decorative Label punch, Pennant die, Cutter Kit, Scallop Edge punch, sponge dauber, white shimmer paint, blender pen, gold brads, silver brads, Real Red 1/8" taffeta ribbon, dimensionals
Friday, December 11, 2009
Hello Butterfly
Thursday, December 10, 2009
Dazzling Sugar Plum
Tuesday, November 24, 2009
Owly Friends
Friday, November 06, 2009
Cardmaking Stamping & Papercraft Vol 15 No 6
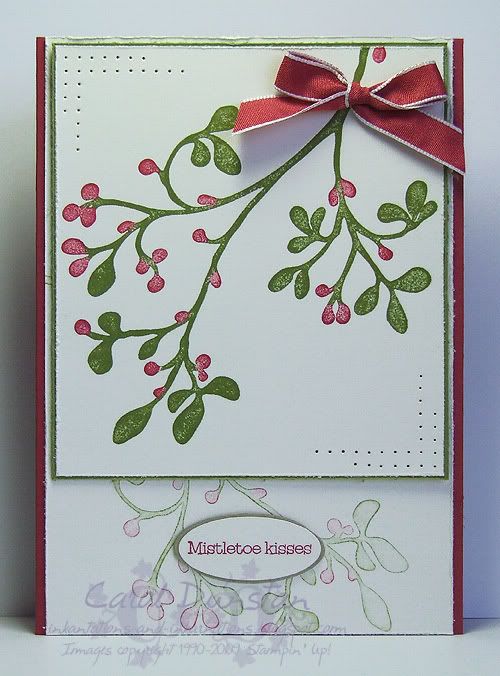
I have four cards in the current issue of Australian Cardmaking, Stamping and Papercraft, Featuring the Kindred Spirits stamp set. I'm sharing one of the cards below, probably my fave for the little touch of dark outline around the bottom mistletoe image.
It can be tricky colouring such a large image with markers, as the first sections you coloured start to dry out by the time you have finished colouring the whole thing. I like to colour the skinny sections first as these hold the ink for longer, and then give a quick touch up to the wider areas (just a few dabs, doesn't have to be evenly coloured) just before stamping.
The issue will be in shops for another week or so, check it out to see the other cards and their product details.
(I've no idea what is happening with the CS&P page, two weeks ago it wasn't working at all and now it is showing an issue three years old!)
It can be tricky colouring such a large image with markers, as the first sections you coloured start to dry out by the time you have finished colouring the whole thing. I like to colour the skinny sections first as these hold the ink for longer, and then give a quick touch up to the wider areas (just a few dabs, doesn't have to be evenly coloured) just before stamping.
The issue will be in shops for another week or so, check it out to see the other cards and their product details.
(I've no idea what is happening with the CS&P page, two weeks ago it wasn't working at all and now it is showing an issue three years old!)
Thursday, August 20, 2009
Cinema Saturday #45
I probably should have put a brightness warning on this one shouldn't I? This week's Cinema Saturday movie is Sixteen Candles, and our challenge requirement was 80's colours... so out came the fluro Bold Brights!
I did have Summer Sun and Tangerine Tango for the yellow and orange but they just didn't look bright enough, so I used Yoyo Yellow and Only Orange instead - yes, I used those two colours of my own free will! You can pick yourself up off the floor now
I'm not much of an orange or yellow fan as it is, but when it comes to these two colours I use them even less than normal. So much so that I am still working on the original sheets (12) from the bulk packs of Bold Brights I bought in 2006 (when Stampin' Up! started in Australia in 2006 only select colours were available in their own packs of cardstock, so the only way to get many of the colours was in a bulk pack). As I mentioned before, I am currently desk lighting challenged, and as that is where I normally take the photos of my creations I had to come up with something else for this one. I had to dash outside and snap my photo in the late afternoon light to get this today, but the colours and brightness are off in the photo so I will have to get another one some other time. Oh, and the card layout comes from Beate's Weekend Sketch Challenge 93.
The set I've used here is a brand new one for me called Party Hearty. During June and July Stampin' Up! ran an incentive for their demonstrators where we could earn a free set for placing $600 in orders in both months. I chose Party Hearty because it even though it's not my normal style, it is quite versatile.
All supplies by Stampin' Up!
Cardstock: Pink Passion, Yoyo Yellow, Only Orange, Green Galore, Whisper White
Stamp Set: Party Hearty
Inks: none
Accessories: markers in Pink Passion, Green Galore, Yoyo Yellow, Only Orange; scallop circle punch, dimensionals
The set I've used here is a brand new one for me called Party Hearty. During June and July Stampin' Up! ran an incentive for their demonstrators where we could earn a free set for placing $600 in orders in both months. I chose Party Hearty because it even though it's not my normal style, it is quite versatile.
All supplies by Stampin' Up!
Cardstock: Pink Passion, Yoyo Yellow, Only Orange, Green Galore, Whisper White
Stamp Set: Party Hearty
Inks: none
Accessories: markers in Pink Passion, Green Galore, Yoyo Yellow, Only Orange; scallop circle punch, dimensionals
Sunday, June 21, 2009
KW Colour Inspiration #55
All supplies by Stampin' Up!
Cardstock: textured Basic Gray, Very Vanilla, Basic Gray
Stamp Set: Friends 24-7
Inks: Basic Gray (for edges)
Accessories: markers in Really Rust, More Mustard, Basic Gray; sponge dauber; Eyelet Border punch, dimensionals
Monday, April 13, 2009
Thoughts of You
This card was made for Taylor's latest sketch challenge, and I think I stuck to the sketch pretty closely for a change! Once again I have used my self-made Baja Breeze marker, along with Old Olive (stamped off) and Certainly Celery to ink up the stamp. The finish the image off I went back and added flower centers with the fine end of the Barely Banana marker.
All supplies by Stampin' Up!
Cardstock: Old Olive, Baja Breeze, Whisper White
Stamp Set: Thoughts & Prayers
Inks: none technically
Accessories: Old Olive marker, Certainly Celery marker, Baja Breeze "marker", Barely Banana marker, crafter's tool kit, Flower Fusion, Flower Fusion Too, Soft Subtles brads, Very Vanilla 5/8" grosgrain, Certainly Celery 1/4" grosgrain
Show watched while creating: Dead Like Me
Tuesday, January 27, 2009
Belated Australia Day
All supplies by Stampin' Up!
Cardstock: More Mustard, Always Artichoke, Whisper White
Stamp Set: Live Your Dream
Inks: VersaMark
Accessories: More Mustard marker, Always Artichoke marker, Scallop Edge Punch, Aged Copper Hodgepodge, large oval punch, Earth Elements buttons, linen thread
Monday, January 19, 2009
Cinema Saturday #15
AKA "We'll always have Paisley"
.
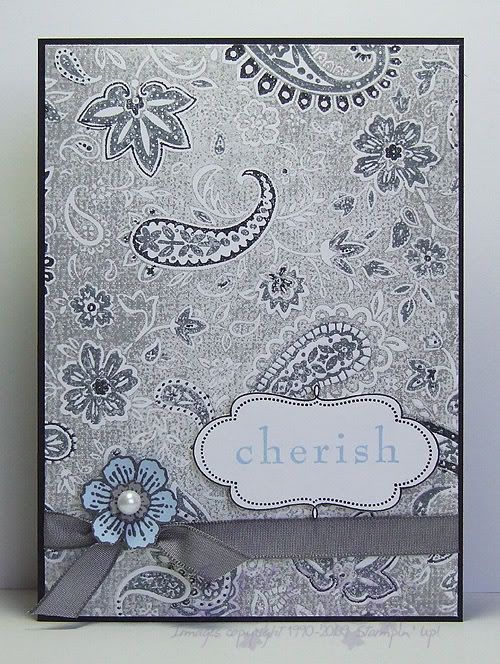
This weeks Cinema Saturday challenge is Casablanca. A classic no doubt, yet a movie I had not seen in full until last night. This week Sankari and Brooke also gave us colour guidelines, very fitting for this movie. I had initially picked out Pale Plum as my free choice, but as soon as Rick mentioned that Ilsa had worn blue the last time he'd seen her I changed my mind. I knew I was going to use this additional colour sparingly, aided by choosing a pale shade of the colour, though I wasn't quite sure how, but I made myself watch the whole movie before really starting on my card and I am glad I did. I was going to draw inspiration from Sam's piano though I have few stamps with a real Morrocan feel to them (ooooh, but how i would love it!), but as soon as I saw Ilsa's paisley blouse it was a done deal... I am a sucker for paisley, especially when I have such a gorgeous stamp of it! I ended up basing my card on that whole scene, the conversation that gave fond memories of Paris back to Rick and Ilsa. There's the paisley for her blouse, the ribbon for her sash/belt, the frame for a slightly Morrocan touch, the sentiment for the memories and the Carte Postale flower for the French connection.
All supplies by Stampin' Up!
Cardstock: Basic Black, Whisper White, Bashful Blue, Going Gray
Stamp Sets: Paisley, Frames With A Flourish, Baroque Motifs, Carte Postale
Inks: Going Gray, Basic Black, Basic Gray, Bashful Blue
Accessories: Basic Gray marker, Basic Black marker, Basic Gray taffeta ribbon, Pretties Kit, dimensionals
Show watched while creating: Casablanca of course!
All supplies by Stampin' Up!
Cardstock: Basic Black, Whisper White, Bashful Blue, Going Gray
Stamp Sets: Paisley, Frames With A Flourish, Baroque Motifs, Carte Postale
Inks: Going Gray, Basic Black, Basic Gray, Bashful Blue
Accessories: Basic Gray marker, Basic Black marker, Basic Gray taffeta ribbon, Pretties Kit, dimensionals
Show watched while creating: Casablanca of course!
Friday, November 21, 2008
Kiwi Chocolate
And then I went shopping.
And I finally found the cinnamon Lindt balls my sister had been raving about (with good reason).
And I got myself a pack of peanut butter Lindt balls too (and a second silver lantern with the cinnamon Lindt balls for good measure).
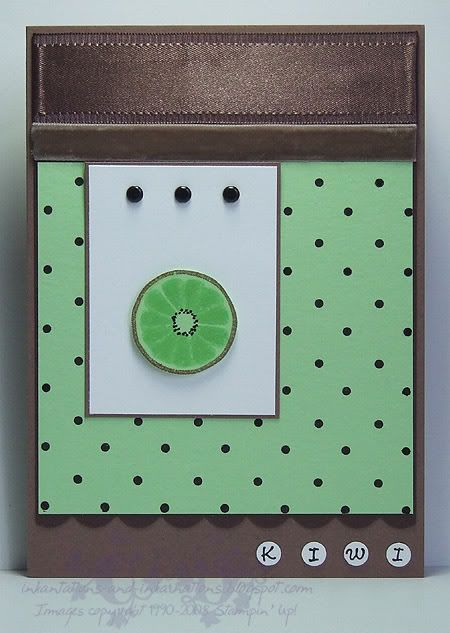
And then I came across Whittaker's Kiwi Chocolate.
I'd love to give you a link for it, and the cinnamon Lindt balls, and the peanut butter Lindt balls... but all their websites are pretty woeful really. And I'm woeful too because I forgot to photograph the chocolate as I photographed the card. But I will tell you I found the Lindt balls in Target (Charlestown Square store to be precise) and the kiwi fruit choc in Big W (also Charlestown Square).
Oh - and we are playing NZ in the cricket at the moment (I'd love to make some witty comment about eatting the kiwis but we aren't going as good as we should in the cricket), we're playing them in the rugby league world cup tomorrow and I am sure there was some other sporting event between the two nations soon. Oh well, those were enough signs for me to realise I had to make this card yesterday... and Julee's Mojo sketch for the week worked in nicely (with a few adjustments of course - it is rare for me to follow a sketch to the pixel).
So here we have it... the Tart & Tangy citrus image inked in Gable Green, ink removed from the "peel" with a cotton bud before inking it with my Close To Cocoa marker, then reinking with the Green, removing the peel ink again and stamping over the top of the original impression, but rotating the cardstock a little. I then added the seeds with my Basic Black marker and cut it out. The background is larger black seeds (I mean Polka Dots) stamped in Basic Black ink, and I just had to use the velvetty Close to Cocoa ribbon for the hairy kiwi skin. The segments are a little more distinct on this one than my practise, which makes me think that I had forgotten that I'd stamped off first with the practise, but I think this works well enough.
All supplies by Stampin' Up!
Cardstock: Close To Cocoa, Chocolate Chip, Gable Green, Whisper White
Stamp Sets: Tart & Tangy, Polka Dot, Alphabits
Inks: Basic Black, Gable Green
Accessories: 1/4" circle punch, 3/16" corner rounder, Theater Ribbon Originals, Vintage brads, Basic Black marker, Close to Cocoa marker, dimensionals
Shows watched while creating: Aus v NZ test cricket, Bones, Heroes
Thursday, November 20, 2008
KW Colour Inspiration #31
The stamping on this card is pretty straight forward, although for the Pumpkin and Sffron flowers I have used a cotton bud to remove the ink from the flower centers before colouring them with Elegant Egglplant. I also used the Pumpkin marker on the Saffron flower, simply colouring over the top with it since Saffron is a paler colour and wouldn't distort the Pumpkin too much.
All supplies by Stampin' Up!
Cardstock: Elegant Eggplant, So Saffron, Whisper White
Stamp Sets: Spring Solitude
Inks: So Saffron, Pumpkin Pie, Elegant Eggplant
Accessories: Fire Circle Rhinestone Brads, Elegant Eggplant marker, Pumpkin Pie marker, District Ribbon Originals, Theater Ribbon Originals, dimensionals
Show watched while creating: Aus v NZ test cricket
Wednesday, November 12, 2008
KW Colour Inspiration #30
All supplies by Stampin' Up!
Cardstock: Old Olive, Certainly Celery, Whisper White
Stamp Set: Boho Backgrounds
Inks: none
Accessories: Old Olive marker, Certainly Celery marker, Sahara Sand marker, dimensionals
Subscribe to:
Posts (Atom)