Showing posts with label other papercrafts. Show all posts

Thursday, October 30, 2008

KW Colour Inspiration #28

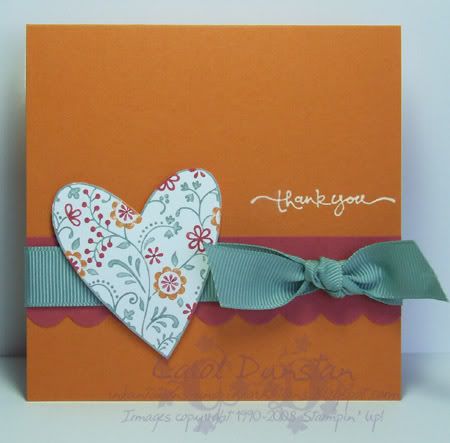
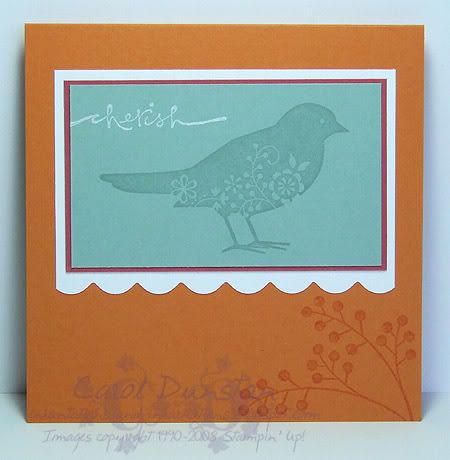
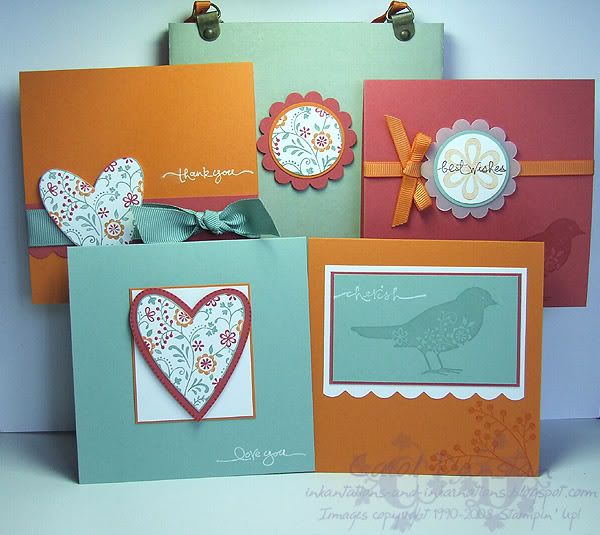
As you can see, I had a lot of fun playing with Kristina's latest colour challenge. The colours are quite autumnal, but the inspiration piece had me thinking of flowers from the get go and I think I was in just the right mood for them too. I started off making one card, then thought "the inspiration piece is a bag, lets make a bag for the card to go in". And if you are making a bag for one card to go in, you may as well make a few more cards to go in it. Above you can see all the items crammed into one little shot, but below are larger images of each item. I think "love you" is my favourite"


All supplies by Stampin' Up!
Cardstock: Pumpkin Pie, Ruby Red, Sage Shadow, Whisper White, Outlaw paper
Stamp set: Always, Short & Sweet, Warm Words
Inks: VersaMark, Whisper White, Pumpkin Pie, Chocolate Chip, Ruby Red
Accessories: Antique Brass Hodgepodge, Pumpkin Pie 1/4" grosgrain, sticky strip, scallop circle punch, 1 3/8" circle punch, 1 1/4" circle punch, 1/16" circle punch, 3/16" corner rounder, District Ribbon Originals, Sage Shadow marker, Ruby Red marker, Pumpkin Pie marker, mini glue dot, dimensionals
Show watched while creating: House

Tuesday, May 13, 2008

"a" card

Hello all, I hope everyone had a nice mother's day!

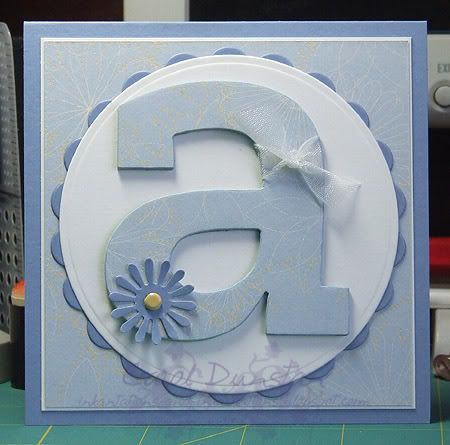
Both my daughters had birthday invitations for Saturday, so I thought I'd share with you the cards I made for the birthday girls. This card was for Anna, who loves blue... so I pulled out some of the retired "Spring Showers" paper and a chipboard "a" for her (chipboard is from the Simon Lower Case range). The paper was adhered using the 2-way glue pen and sanded to the shape of the chipboard piece to give a nice edge... I also like to colour the edges of my chipboard (I have a thing about leaving the edge raw... it just doesn't look right to me most os the time!), so for this one I went along it with the Bashful Blue marker. I added a bit of white organdy ribbon (retired), and a daisy from the Spring Bouquet punch in Brocade Blue. To attach the flower I simply punched a hole through my chipboard with my 1/16 plier-style hole punch... I wasn't sure if it'd work but it went fine! The flower is attached with a So Saffron brad. The "a" has been mounted on top of some Nestability diecut shapes in Whisper White and Brocade Blue, which in turn are layered on top of more Spring Showers paper and Whisper White. Finally the card base, 10.5cm square, is Brocade Blue. It was all quite simply really... I should play with chipboard more often! I'll be back later today to share the other birthday card with you, so look out for it!

Thursday, May 08, 2008

Mother's Day Treat

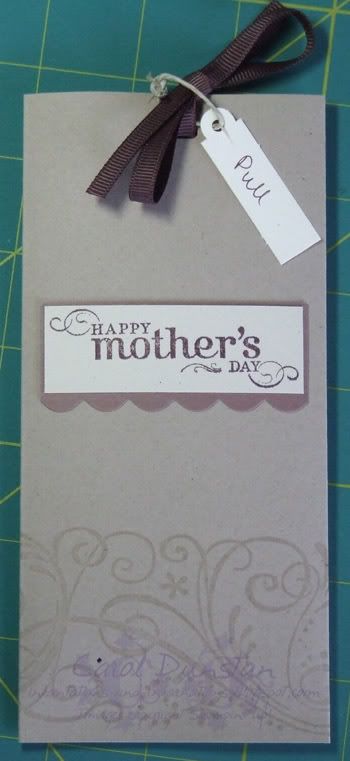
In keeping with the Mother's Day theme, I thought I'd show you the pull treats I made for today's Mother's Day stall at school. I used Kraft cardstock for the main part, rolling the So Swirly wheel across with VersaMark ink. I also used some Naturals Ivory and Close to Cocoa, the sentiment is from the Occasional Greetings set, stamped in Chocoloate Chip, some narrow Chocolate grosgrain (now retired) and on the vanilla tag I wrote "pull" using the Chocolate Chip marker (fine end) since I wouldn't be there to tell anyone who bought one how they worked. Inside is a Jarrah Extreme Chocolate hot chocolate sachet... sounds like a yummy Mother's Day treat to me!

Tuesday, March 18, 2008

Shock! Horror! No stamping!

eek Now how did that happen? lol Hopefully I'll be excused because these are just so cute.

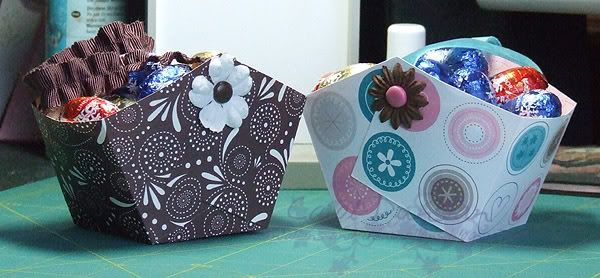
These are a couple of little baskets I whipped up last night, as teacher gifts for the girls to deliver today. Each basket uses a 6x6 piece of paper scored at 2" and 4" on each side, then cut 1/3rd of the way along the score lines on one side, turn 180degrees and repeat on the other side. I used sticky strip to hold the basket together, and Prima flowers and large Finishing Touch Ideas brads to attach the handles - for which I chose ribbon from the Flirty Ribbon Originals pack. I then split an assorted pack in Lindt choc eggs between the two baskets. How interesting that there was an even number and there wasn't a little dark chocolate one left over...


twisted

Sunday, February 17, 2008

Loves Me Some Chipboard

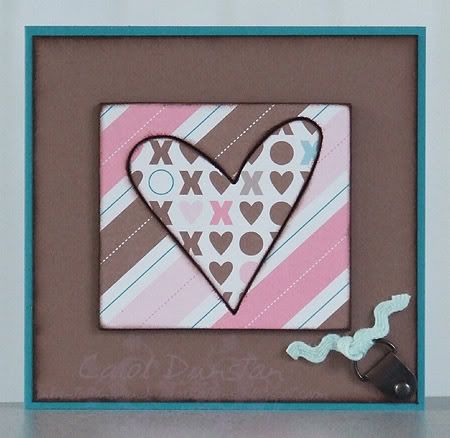
Better late than never! This is the Valentines card I made for Glenn using two different papers from the 'Loves Me' series, a wee bit of the matching Flirty ribbon, two pieces of On Board Accents chipboard and prodigious Chocolate Chip sponging. I used colours featured in the 'Loves Me' paper (available from the Summer Mini only until the end of March) for the card base and layer - Taken With Teal and Close To Cocoa - and attached the ribbon to some Aged Copper hodgepodge. It's a cute little card with a good deal of dimension with the chipboard, hodgepodge and ribbon.

Friday, November 23, 2007

Again with the ornaments!

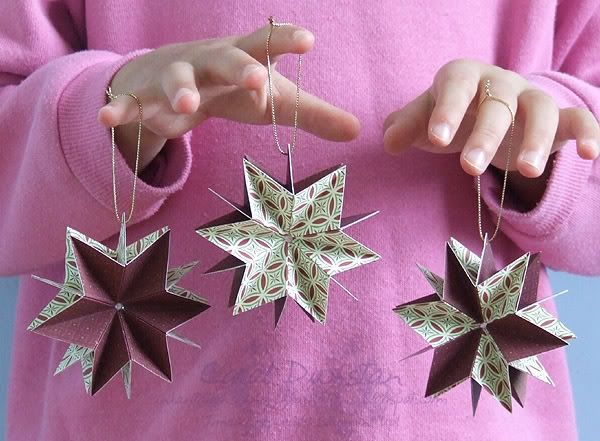
I should be working on a birthday card today, but this morning when I saw Mary Brown's ornament tutorial I just had to give them a go! These three ornaments have been made from half a sheet of Holiday Thyme paper. Since there was enough of this sheet (left over from my German ornaments) to make three I decided to do one with the dark side showing out, one with the light side showing out, and one with alternating pieces. They are so quick and easy! I also used 2x2" pieces to make mine and while I didn't measure them against a ruler, they are just slightly smaller than the German ornaments. Thank you to Shaelea for playing Christmas tree for me biggrin

Thursday, November 22, 2007

German Ornament Tutorial

* I've edited the tutorial to hopefully make some of the later steps easier to follow. Still not perfect, but I wanted to get it done quickly while I still had reasonable natural light. So if you think the paper seems to change colour... it's not your eyes.

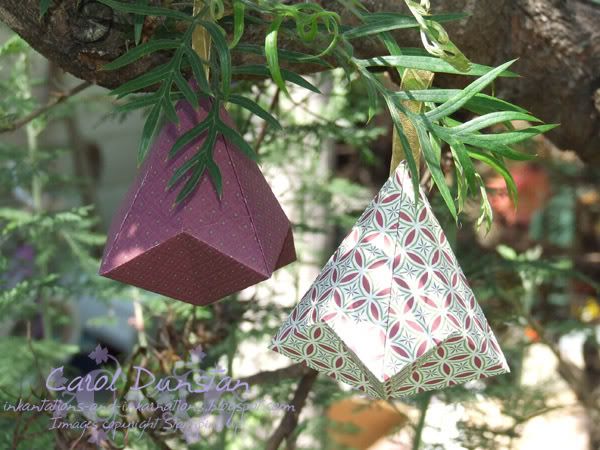
Yesterday I posted this ornament over on the Elite Challenge blog, so I thought I would do a tutorial for it in case anyone else wanted to try their hand at it.

I first made these decorations some 21 years ago when my sister and I found a book on European Christmas decorations in the school library. I think we used to make a few other things from the same book, but my only lasting memories of it are elves and this decoration. It's quite simple so after you have done a couple you probably won't need to refer to instructions any more.

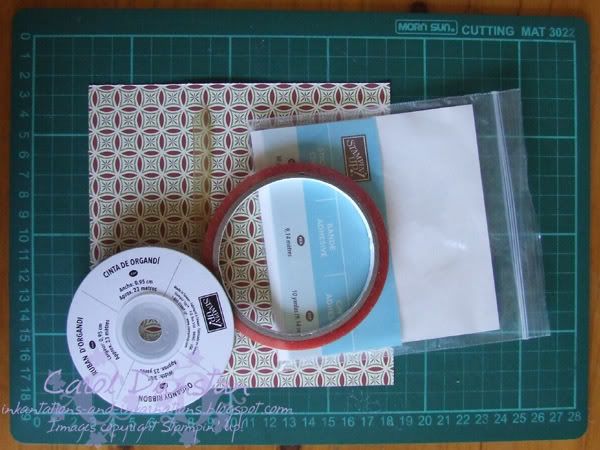
Supplies:
a square piece of paper
adhesive
something to hang the ornament with

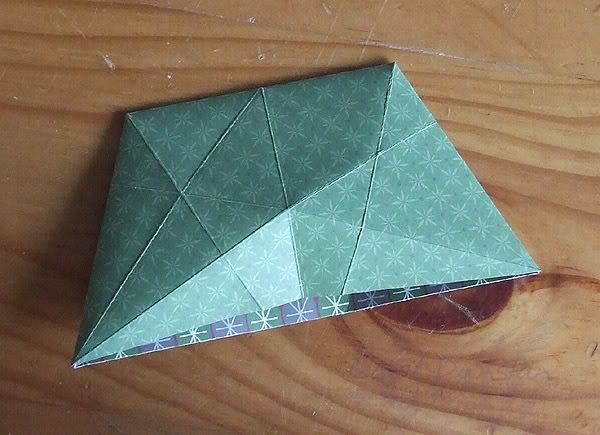
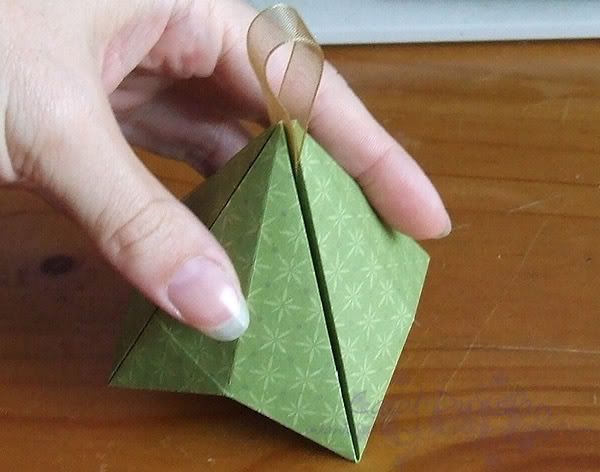
My piece of paper is 6x6 and makes an ornament about 8.9cm (or 3 1/2") from top to bottom. I've chosen sticky strip for my adhesive because you'll need something with some added strength for the final step, plus some extra assurance that the hanger wasn't going to pull out. I chose organdy ribbon to hang my ornament so that the ornament should stick together flat.

Step 1:
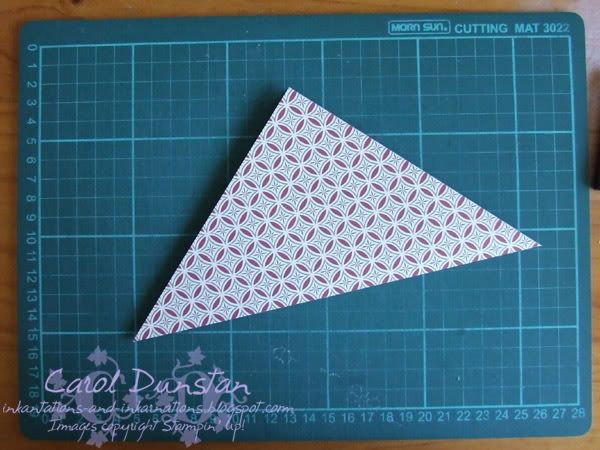
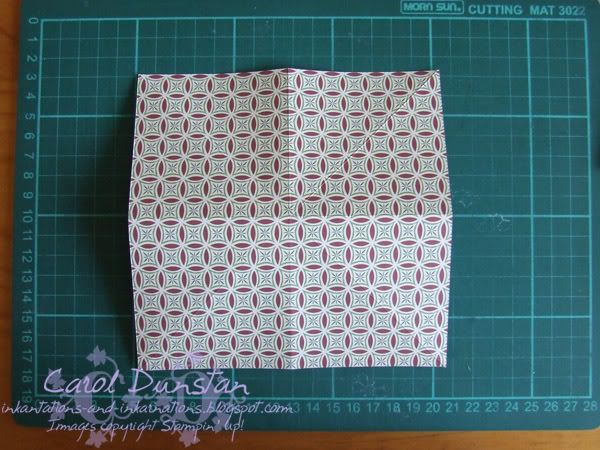
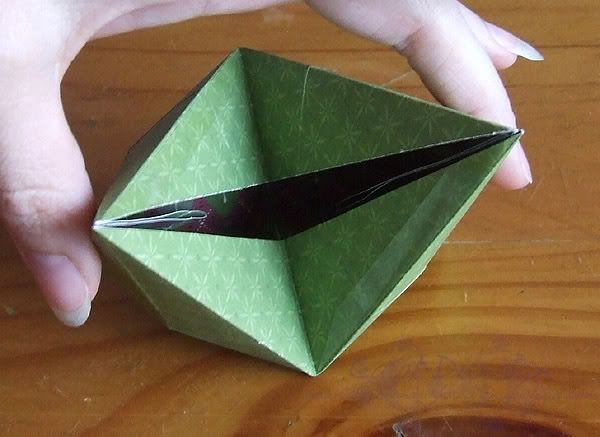
Lay your piece of paper on your work surface with the wrong/ inside facing up. Fold your piece of paper in half diagonally. Unfold and repeat with the other corners.


When you unfold your paper it should look like this, with a crease along each diagonal.


Step 2:
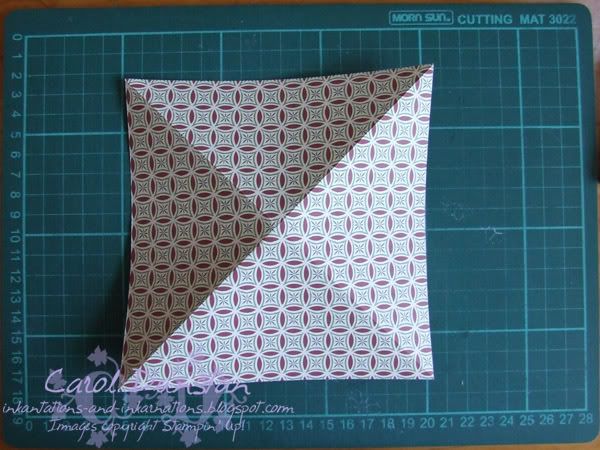
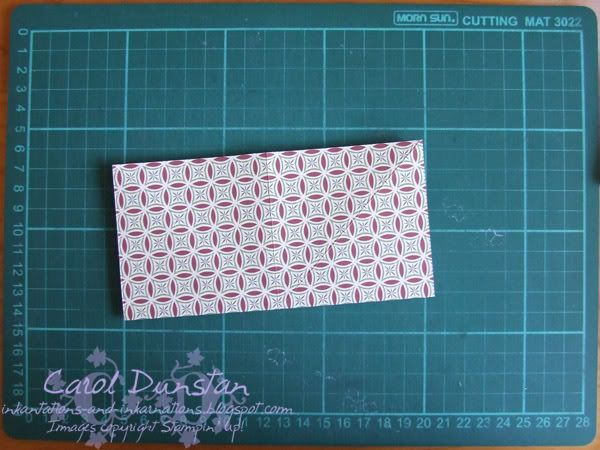
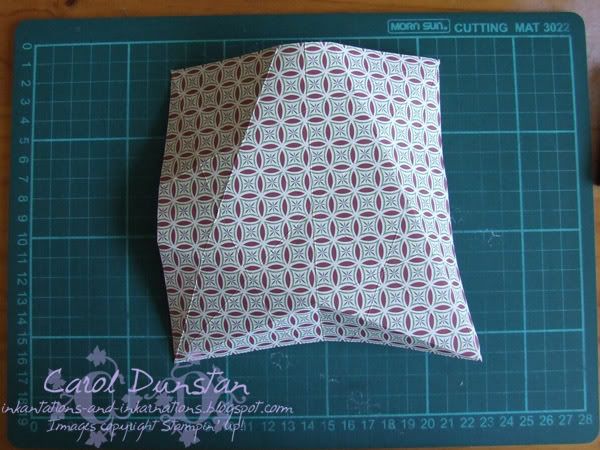
With wrong side facing up, fold the square in half (forming a rectangle). Unfold and fold in half the other way.


When you unfold your paper (and flip it over so right side is facing up) it should look like this.


Step 3:
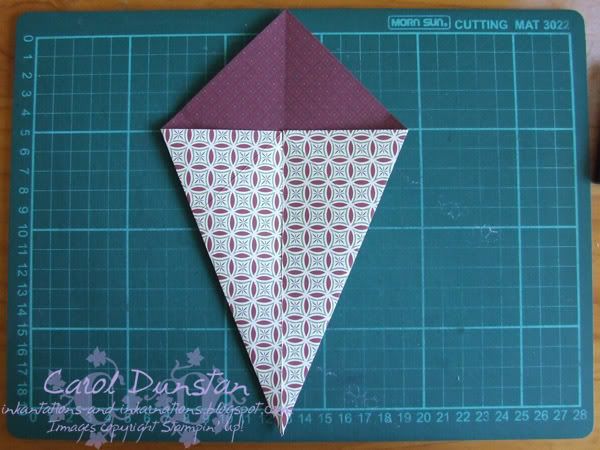
With wrong side facing up and one corner pointing at you, fold the two side corners in so the bottom edges meet along the centre line (forming a kite shape). Unfold and repeat this at each corner.

When you unfold your piece of paper and turn it over so the right side is facing up it should look like this.


Step 4:
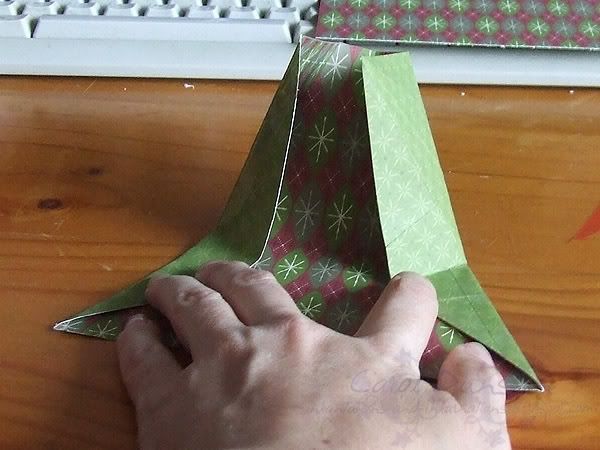
With the wrong side facing up, bring in the two sides and apply adhesive on the inside of the fold lines as shown in the photo.


Step 5:
Remove any backing from your adhesive...


and bring the two sides...


together.


Here you can firmly press along the adhesive because you can squish to your hearts content and not wreak your ornament!


Step 6:
Push the other...


two straight edges...

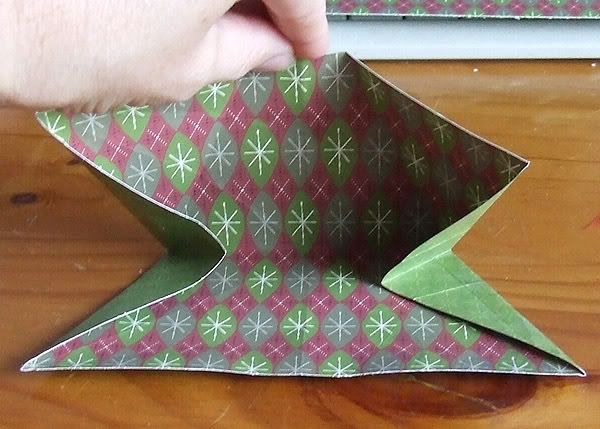
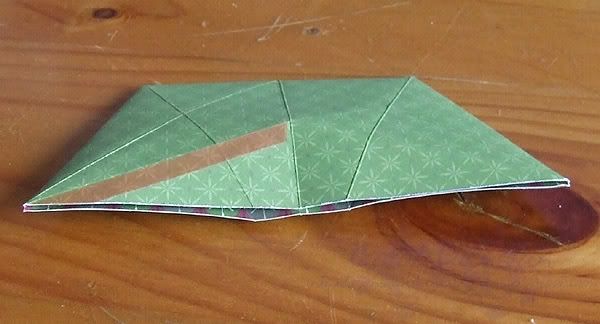
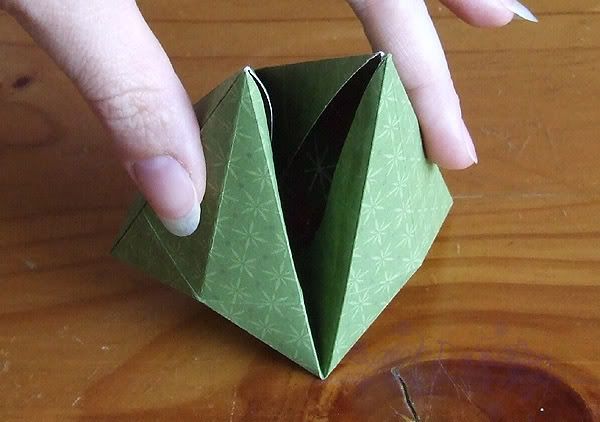
in and apply adhesive on the inside of the fold lines just like Step 4 (I applied the adhesive before as I forgot what directions I had given. Until you become familiar with the folds, I would put the adhesive on once it is in this bent shape, though it is probably easier to apply when the paper is still flat).
Step 7:
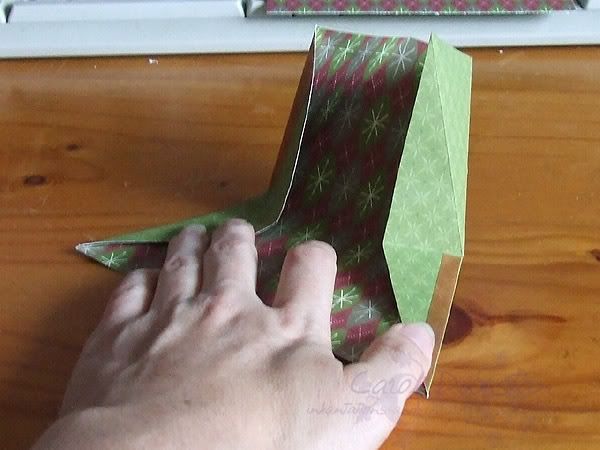
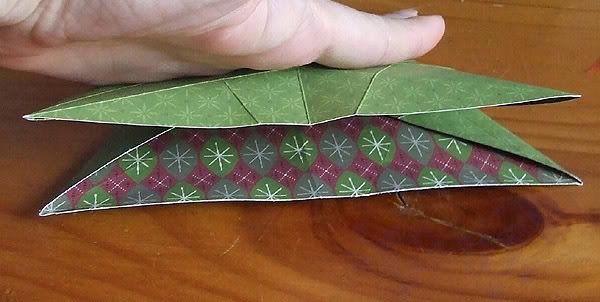
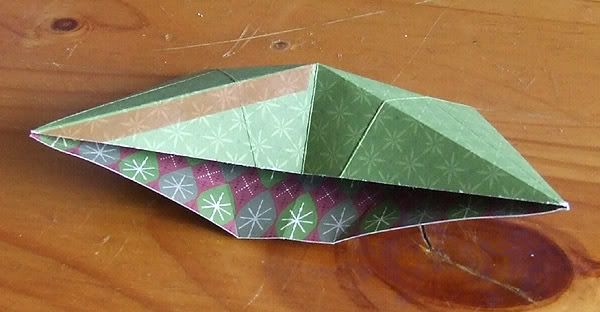
Remove any backing from your adhesive, prepare your hanging material (my ribbon was about 9cm/3 1/2" long) and hold it against one side (not shown in photo as other hand was holding the camera)


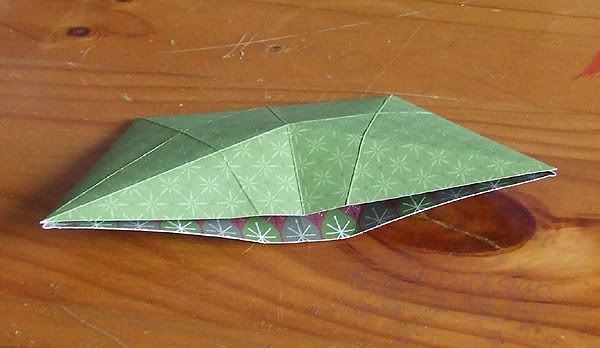
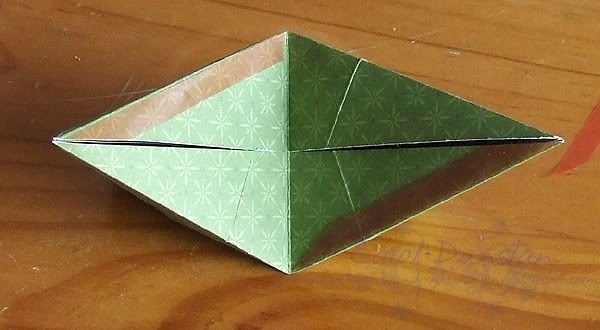
as you fold the other side up (this bit, particuarly in this colour paper, reminds me of Audrey from Little Shop of Horrors...).

Gently, but firmly (if you can) press the sides together so your adhesive sticks. This is where a nice firm paper comes in handy because it won't buckle or crush as easily as flimsy paper. Voila, you have a funky hanging ornament!

You can of course play around with how you decorate your piece, maybe stamp your bit of paper before folding (but make sure the ink is dry before you start folding!), add some glitter etc. Have fun!

This is my first tutorial, so if you have any comments or tips (I know already that it probably wasn't such an idea to keep flipping the paper over to show the right side when that's not what you'd do when making it, I just thought the creases showed up better that way) I'd love to hear them.

Thursday, February 08, 2007

Legolas card

It was my sisters birthday on Sunday, and she's finally got her card (she's just moved and the card to let her know to pick up a parcel didn't say which PO to go to!), so I can finally share it with you!

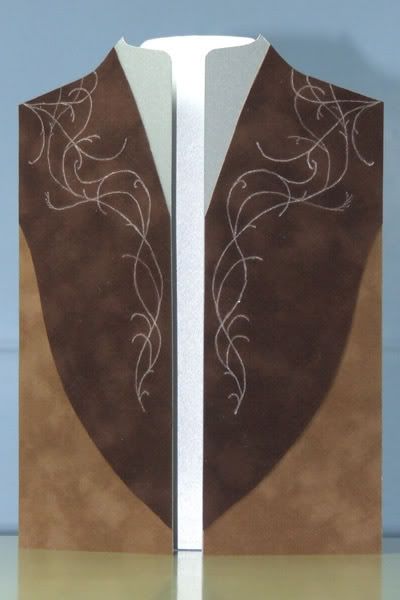
We are both big Lord of the Rings fans (in case you hadn't guessed by my avatar), and I had bought all these jewel toned wrapping papers and ribbons to do up her pressies, so from that had the thought of trying to do something similar to one of Arwen's dresses. But, one day in sorting through my craft stuff I came across some suede paper... and got to thinking... and got to planning. Then I got nervous about it turning out ok, and after wasting a few days just thought "I have to try it, and if it doesn't work, a dress it is!". As you can see above, it worked out pretty good! I printed out a sketch of the jerkin from Alley Cat Scratch LOTR costuming site, at the size I wanted to make the card (as big as I could!), and also printed out my version of the decoration on the jerkin (something I started working on and never finalised for them to use... oops). Cut my card, cut the suede, then was once again trying to nut out how to "etch" the design into the suede. In the end, of course, the answer was simple. I layed the print out over the suede and merely traced over it with a ball point pen, which pushed on the suede and left a indented mark, which I then went over with a silver gel pen to finish off the look. Of course, my sister was disappointed that opening the jerkin didn't reveal Legolas' bare chest, but you can't have everything (though she did get heaps of other good stuff).

Tuesday, February 06, 2007

Wrapping Paper CASE

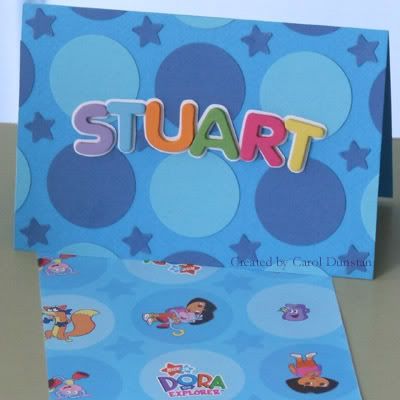
It is my nephew's birthday on Thursday, and I only got around to making his card today (I will be posting it, so it's not like I could do it on the day and it still be on time!). I've had this basic plan in mind for quite some time, but there was a lot of nutting out to do when it came to construction time.

Stuart is a big Dora fan, and I had bought him some Dora jigsaws, then got the wrapping paper to match and began thinking "how can I do a card to match?" I do like to try and match the card to the wrapping or gift, and when I had another look at the paper I realised I should be able to pull this off! I used the EK 1 1/2" circle Whale of a Punch and Carl CP1 star on the card base, the wooden letters are ones I picked up from a cheapie shop some time ago and had never used, and I painted them with some Folk Art paint that I had on hand. I made the white layer for the letters by laying them upside down on the back of the white card and tracing around them with a pencil (letting the pencil's width to create the margin). Now that it is all together I am thinking the circles should have something on them as they look a little bare, but I can't think what I could do to them that wouldn't detract from the name. I also contemplated putting "the birthday boy" on in the same way the Dora logo has "the explorer", but couldn't think of a reasonably simple and quick method. Anyway, no chance to do anything now, it goes postal tomorrow morning.

Thursday, November 23, 2006

stamped candles

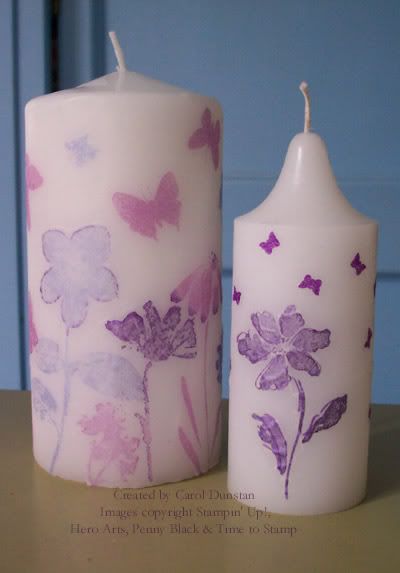
Today I decided to bite the bullet and do some stamped candles. I've had these candles for about a year, but last year I was too scared of stuffing up and so shoved them in the cupboard and forgot about them. There's been quite a few stamped candles on the Splitcoast gallery, so I decided it was time I tried it.

The technique is simple really (stamp on white tissue paper, cut out, heat candle till wax melts and adhears the image), but I think I'll need a few goes to perfect it... I've got wrinkles and edges that I'd rather weren't there. I quite like the silhouette looks, so I chose solid stamps (and the Fiskars hand-plier butterfly punch for the small candle) from a variety of companies, and pulled out all my shimmery purple inks (3 Brilliance and an Encore). I rock'n'rolled the flower parts of the stamps on the large candle in the Brilliance Victorian Violet for a bit of added interest. The punch butterflies are from some Phil Taylor metallic tissue paper that I haven't seen in the shops for years (so I guess you can tell now that I am a bit of a hoarder). If I can tidy these up they'll be part of my Mum's Christmas present (yes, she does like purple too).