Have you got your Christmas cards done? After a few years of having a mad rush in November or even December, this year I once again was determined to start my cards about mid year so I should be done well before December and I could move on to other things. Well, despite a few months break around September I had my cards essentially made come December, but I tend not to do the inside when I do the front... and then there is the writing on them... so it's taken me a bit to be completely done with my Christmas cards! In anticipation of moving on to the next stage of Christmas preparation - wrapping presents and putting them under the tree - the next thing I did was make tags for the presents.
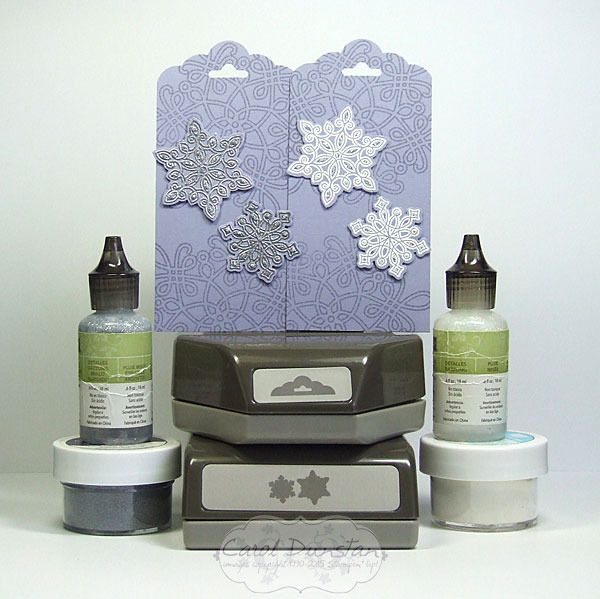
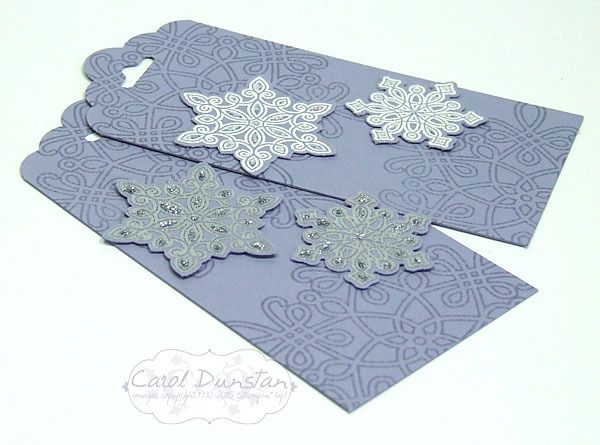
There is a lovely tag kit in the Holiday catalogue, but the colours didn't coordinate with my wrapping paper... yeah, I'm one of those people! I picked a few colours that would work in with the rolls of wrapping paper I have on hand, and thought the Flurry of Wishes set would make nice tags... but then couldn't decide whether silver embossing or white embossing would look best so I did both! The large snowflake was stamped randomly in coordinating ink and then the two smaller snowflakes stamped with VersaMark and heat embossed before being punched out with the Snow Flurry punch. I attached the small snowflakes with glue dots, which don't raise things up anywhere near as much as dimensionals but are a little faster to use.
I also used some Dazzling Details glitter glue on the small snowflakes, which is a little easier to see above. And here's a selection of the colours I did:
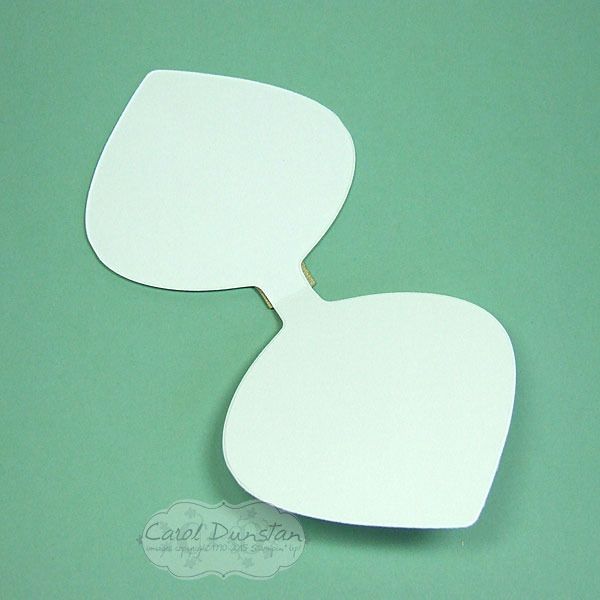
I also had an idea for using the Embellished Ornaments stamps for tags, so made a few of those too. I inked the stamp with a lighter colour all over, then "rock n rolled" the stamp on a darker inkpad to get a darker edge, which I also went over with a dauber to soften the line between the two colours.
These tags actually open up, which I made by putting a crease-line on the white card base before stamping and lined up the top of the stamp with the crease. I then folded the cardstock along the crease before running them through the Big Shot to cut out with the matching "bold" ornament die from the Delicate Ornaments thinlits set, so when it was cut and opened up it would look like this...
Now I just have to sit down and actually start wrapping presents!


No comments:
Post a Comment