Showing posts with label Christmas. Show all posts

Thursday, December 17, 2015

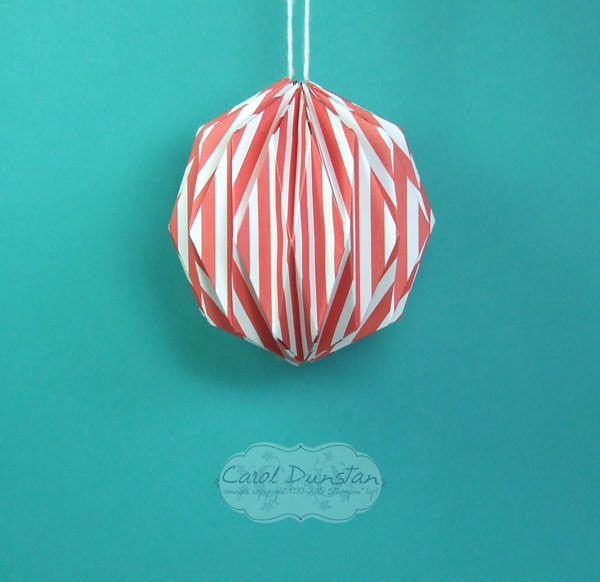
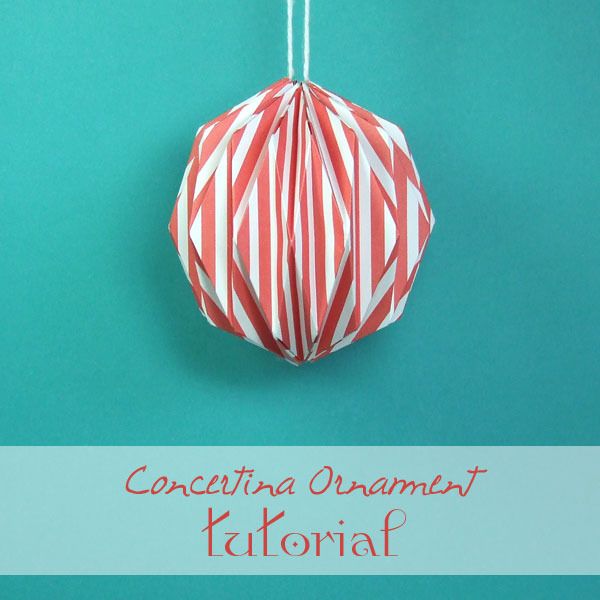
Concertina Ornaments, With Tutorial

I recently came across some instructions for some paper ornaments that were right up my ally. There are templates to print out, but I suspected that there was much wider scope for the design. So I have been madly folding paper to test my theory out, and happy to say I was right! I have seen this style of ornament given a few different names and ordinarily I would avoid muddying the waters further with yet another name, but given I have released the ornaments from the restriction of a template and because of Tori Amos, I am calling them Concertina Ornaments. So without further ado...


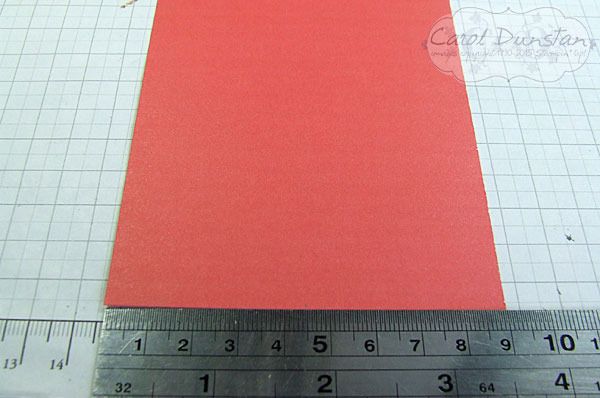
For this tutorial I have used a piece of Watermelon Wonder envelope paper. I simply cut a 9cm wide strip off a sheet of 12x12... so my piece measured 9cmx30.48 cm. More about that later...


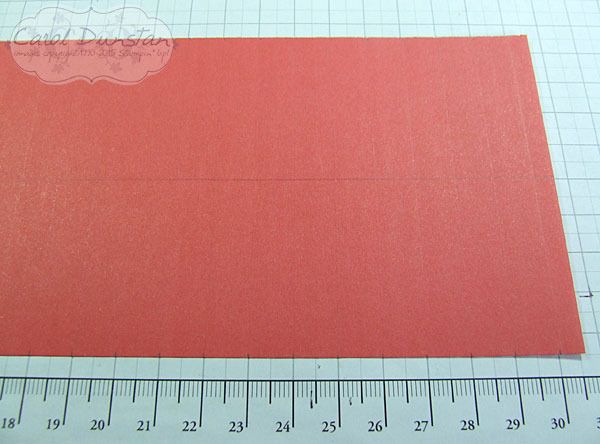
The first thing to do is score vertical lines along the long edge. I chose to work in centimetres for this ornament (more about that later...), so I scored at every centimetre. I used my paper trimmer and it doesn't create a very visible indentation on the paper so it's a little hard to see. After scoring at every centimeter, on the back of the paper I put a small mark at the halfway point on both short edges and drew a line from one to the other. You don't necessarily need to rule the line, but it helps to check that folds are staying on track later.


So the ends of the score lines stood out more I also made small marks for all of those too. Notice that bit of paper from 30cm-30.48 cm? If you are working in centimetres it will make things much easier if you trim your paper down to a whole centimeter...

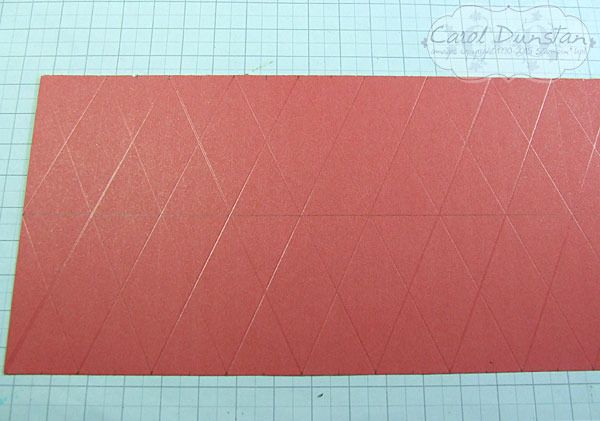
The next step is to create your diagonal score marks. The diagonal score lines should cross the vertical score lines at the middle. On the ends there will be ones that start at the middle point of the short edge... except if you have left part of a centimetre of paper. I strongly recommend trimming that off so you don't accidentally create a score line to the wrong spot. Let my mistakes be a lesson to you!

After all that scoring, it's time to start creasing. I start with the vertical lines, that will be valley folds so you will be folding the paper with the front/right side onto itself.

Once all of those are done it's time to crease the diagonal score lines. These will be mountain folds, so to greate the peak on the front/right side, you fold the paper with the back/wrong side onto itself.

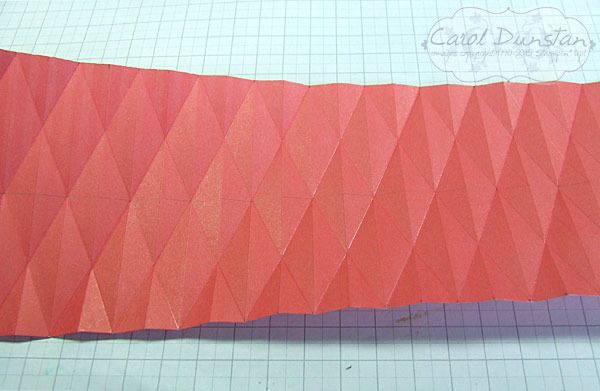
This is what my paper looked like after all the score lines have been creased. You can see from the slight shadows on the paper that little peaks and valleys are starting to take shape.

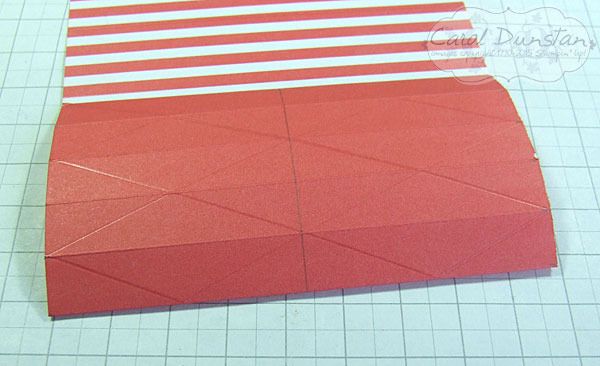
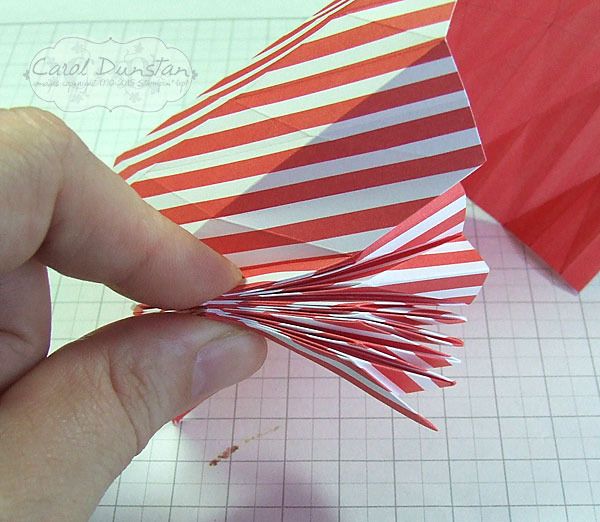
Now it's time to fold all those peaks and valleys at the same time. It can take a little bit to get it started, but I find that pinching the middle where two diagonal lines cross quite effective. The diamond shapes that all the score lines have created should collapse along the folds pretty easily, and then you'll just need to tuck in the triangles along the edge.
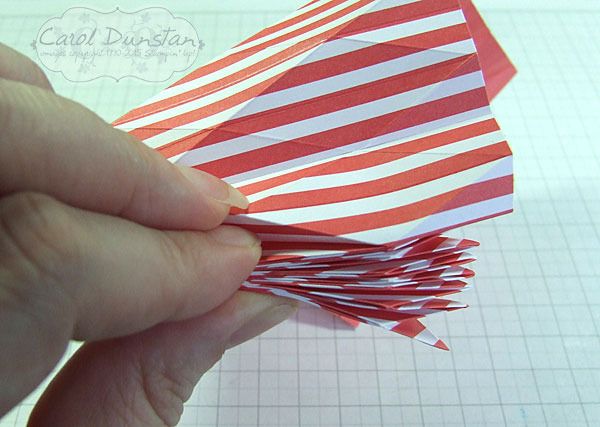
With thumb and index finger pinching what has already been folded I use my middle finger to pull down the next section. Continue like this until your strip is completely folded...

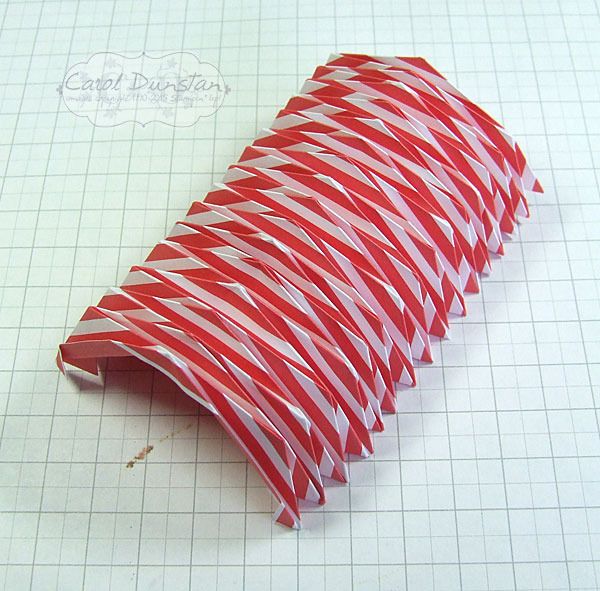
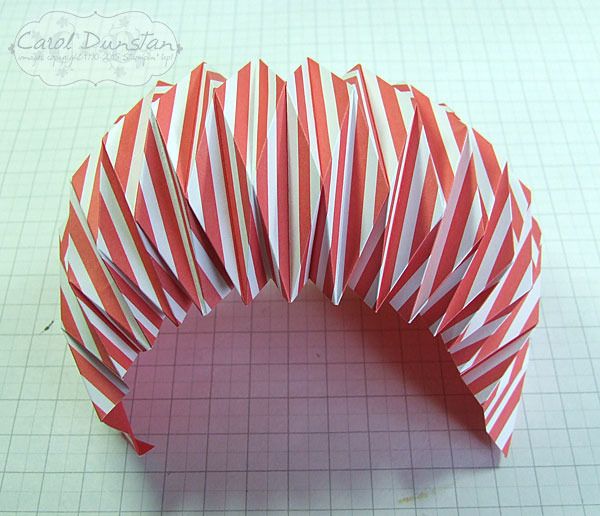
At which point it should look something like this!

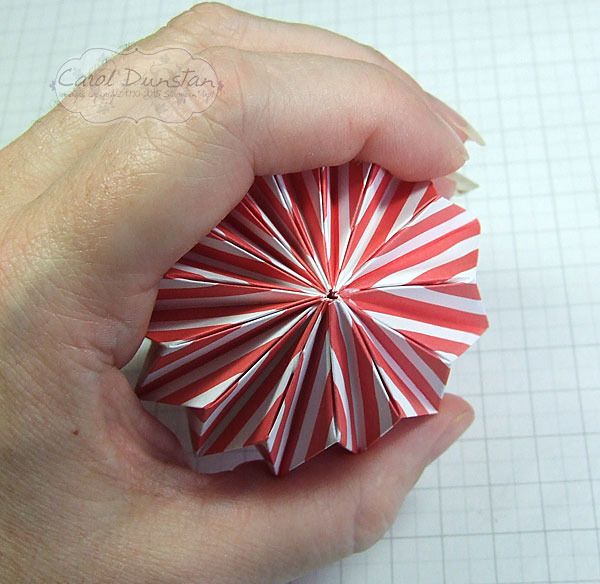
Pull the edges of the paper around to start forming the ornament.

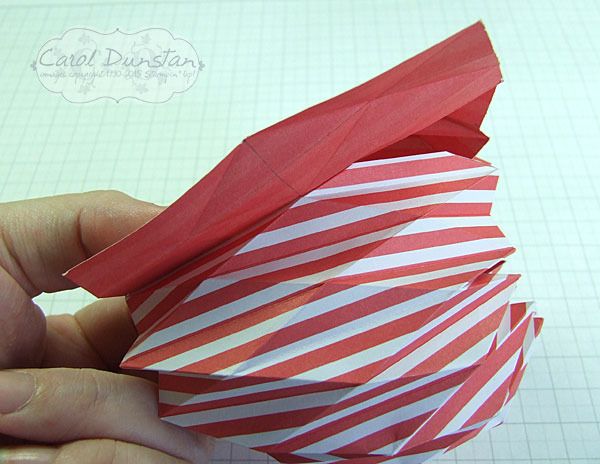
Overlap the ends of the paper. How much you overlap depends on the length of your paper, as it is dependant on the folds lining up on both layers. If you are working in centimetres, even numbered lengths will have a whole segment overlap similar to above (though I still have that extra 0.48cm on it...).

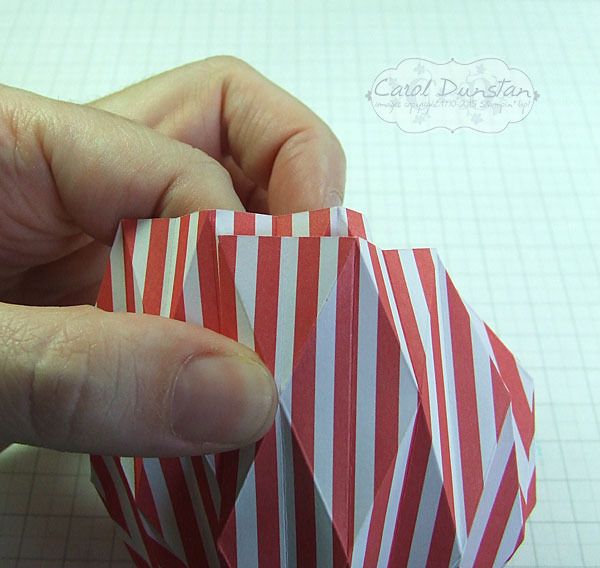
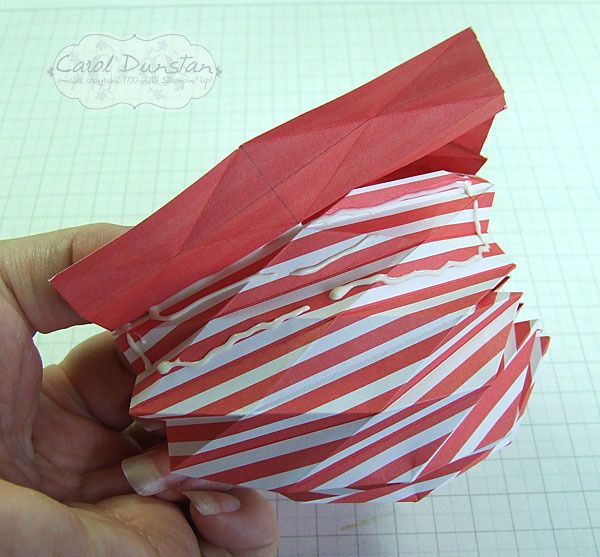
Hold the two layers close to the end of the inside layer and raise the top layer a bit so you can apply adhesive.
I've used Tombow multi glue, and think glues are the better option for sticking the ornament together. This way there is a bit of leeway for moving the layers as you bend the ornament into it's final shape. I put the glue in from the edge so when it spreads it shouldn't ooze out.

I like to have the ends of the ornament close up tight and tidy, so I use more Tombow here. The instructions I linked to at the top used thread to pull these together.

Once the glue is on, hold the ornament for a while for the glue to dry a bit. You may want to find something else to keep the ornament in shape so you can step away and let the glue dry completely, a clean, dry cup or mug might do the trick, depending on the size of the ornament.

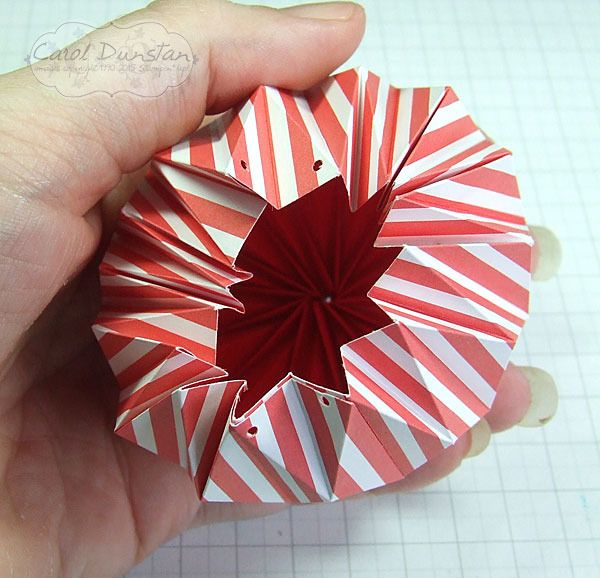
For the top of the ornament, use a small hole punch to make holes on opposite sides of the opening.

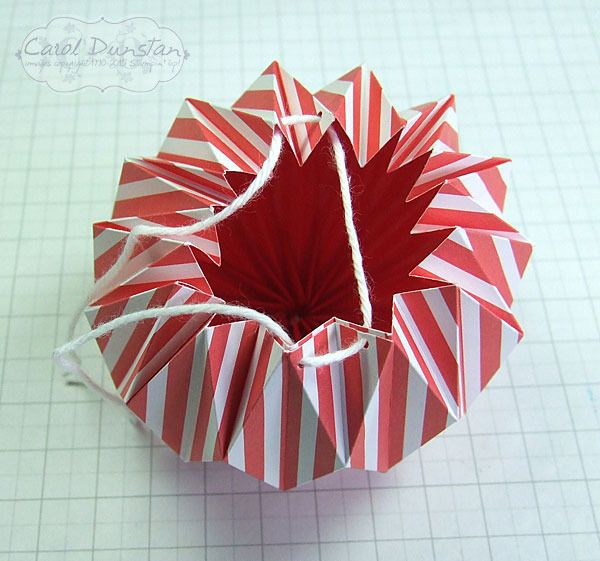
Thread some baker's twine through the holes. Thread the ornament so that the ends will be at peaks of folds when the top is closed, this gives a neater finish.

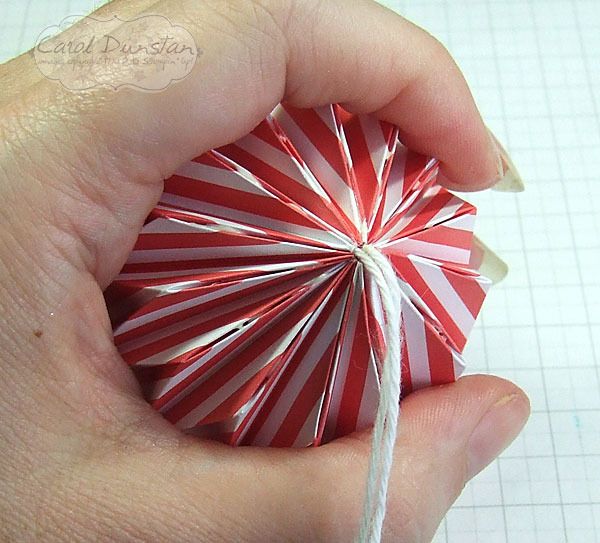
Apply glue same as for the bottom, then hold the ornament to close up the top, pulling through any slack in the twine as you do so.

Voila! Your ornament is finished!


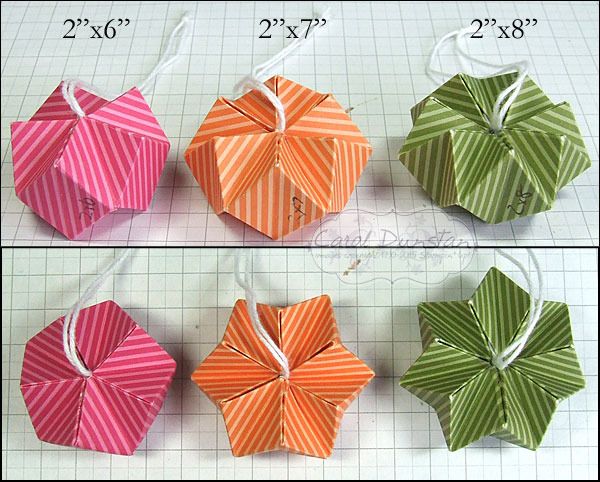
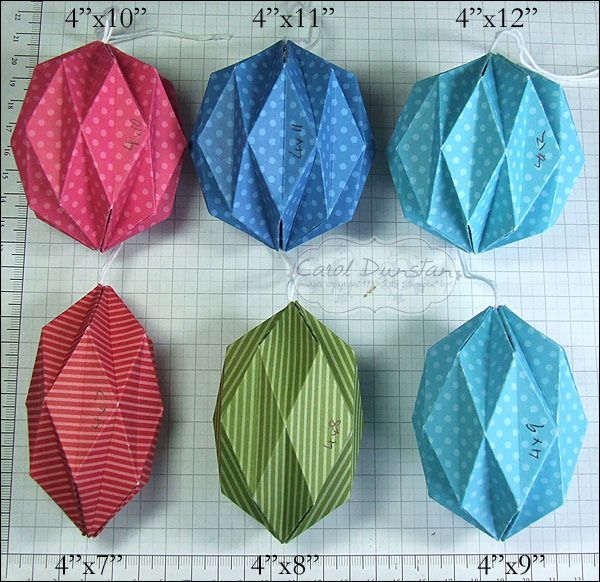
What I love about this ornament is that the basic directions will work for a wide variety of paper sizes. Here are ones I made using Designer Series Paper. After I made a few, I decided I needed to make more to see how the difference in measurements affects the shape of the ornament (because I just couldn't visualise it in my head!). And then I decided I needed to make even more to get an even better idea of this... in the end one of my daughters called them Tribbles due to the regular population explosion!

The measurements on my grid paper are in centimetres with the bold lines being whole cm's and the thinner lines marking half cm's. Being so small these ones were quite fiddly, especially the 2"x8" one as there was so much movement in the center of the ornament it was hard to hold things in the right position while the glue dried.

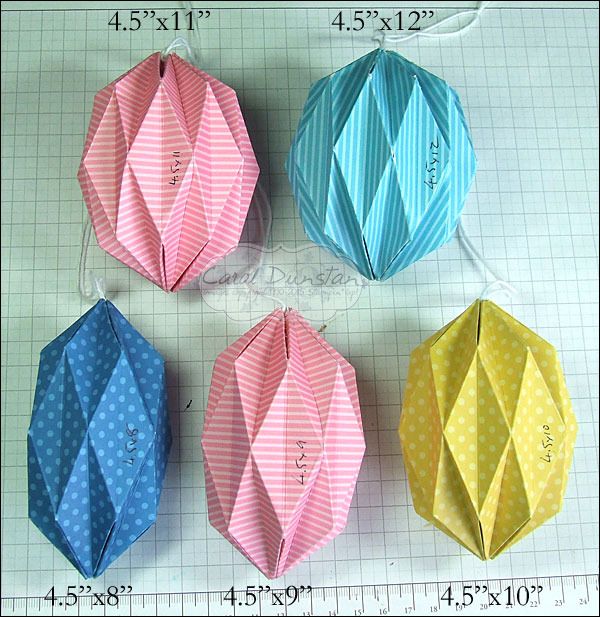
I've threaded a couple of these through the side as an alternative. I think it looks particuarly striking with the striped paper. I've also cut some paper with the stripes going the other way to see how different that might look.


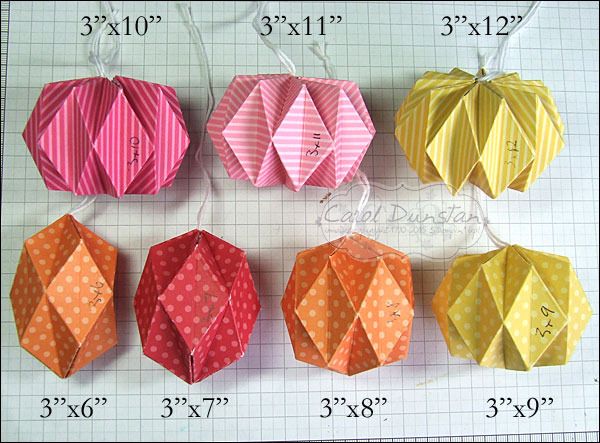
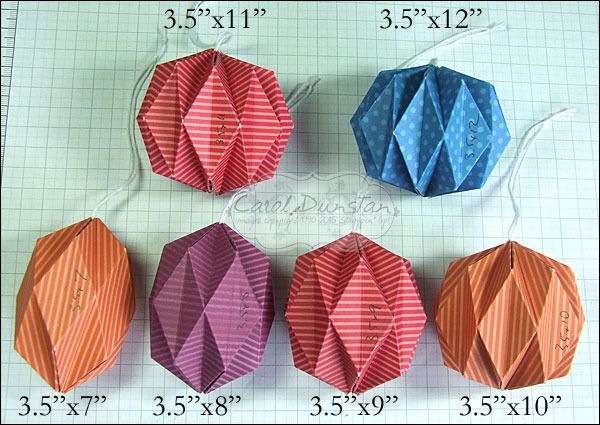
Once you get up to strips 3" wide you can really see how different the ornaments can look depending on how long the strip is.

Basically, the longer the strip is, the shorter and wider the end result will be as the folds are forced into deeper shapes.

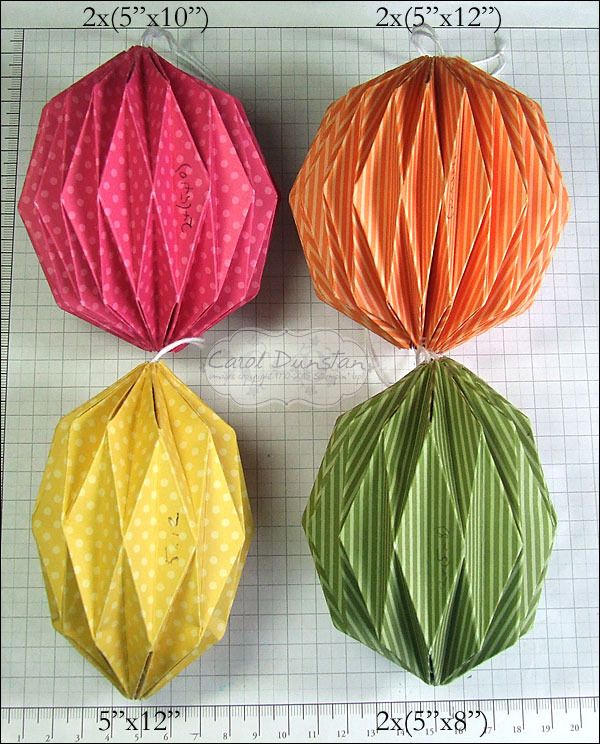
3" and 4" are good sizes if you are cutting into a full 12x12 sheet, as you will get 3-4 ornaments from the one sheet.
The wider the starting strip, the bigger the ornament... and the heavier!

Particuarly if you join two pieces together.

And then there are sizes that just won't have a neat finish on the end.

This one is 6"x12". Some will come together neatly with a bit of jiggling and squishing, but others will just be like this. Which isn't exactly ugly, but I would probably dress it up with a tassle or something.

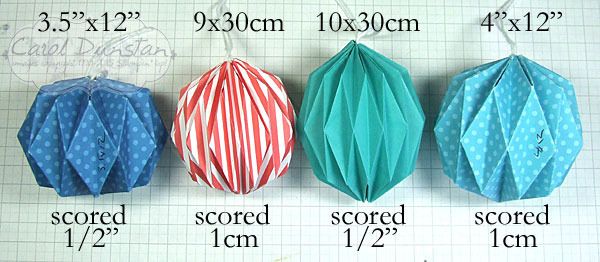
All the ornaments I made with DSP were based on inch measurements. For this tutorial I worked with centimetres, and I also made one with cotton paper 10cm wide. 3.5" is about 8.9cm, and 4" is about 10.16cm. 1/2" is about 1.27cm. With little difference in the width of the starting piece of paper, the small difference between 1/2" and 1cm ends up having quite an influence on the finished shape as well (and yes, I did list both the centimetre ones as being 30cm long though that wasn't actually the case - effectively though they were 30cm with the overlap). Lots of fun to be had here!

Of the papers I used, the envelope paper was the best to work with. The DSP is a good deal thicker, so the folds are more bulky and the ornament heavier - which might be an issue depending on where you plan to hang them. The cotton paper makes nice folds, but is so much flimsier it was probably the hardest to work with.

Friday, December 11, 2015

Christmas Tags

Have you got your Christmas cards done? After a few years of having a mad rush in November or even December, this year I once again was determined to start my cards about mid year so I should be done well before December and I could move on to other things. Well, despite a few months break around September I had my cards essentially made come December, but I tend not to do the inside when I do the front... and then there is the writing on them... so it's taken me a bit to be completely done with my Christmas cards! In anticipation of moving on to the next stage of Christmas preparation - wrapping presents and putting them under the tree - the next thing I did was make tags for the presents.
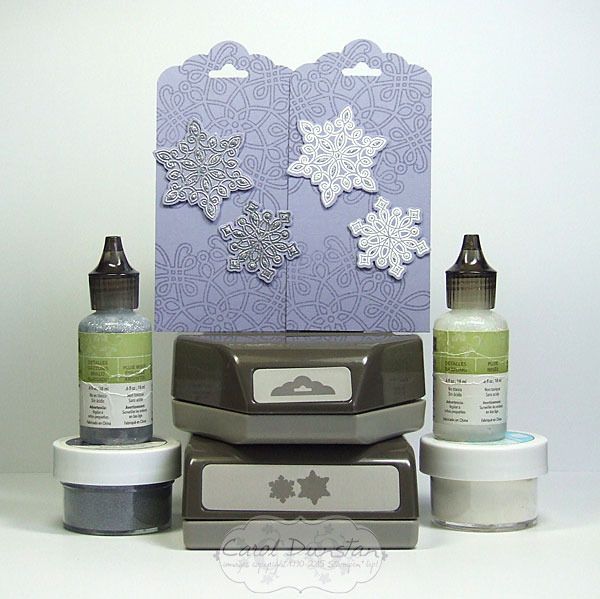
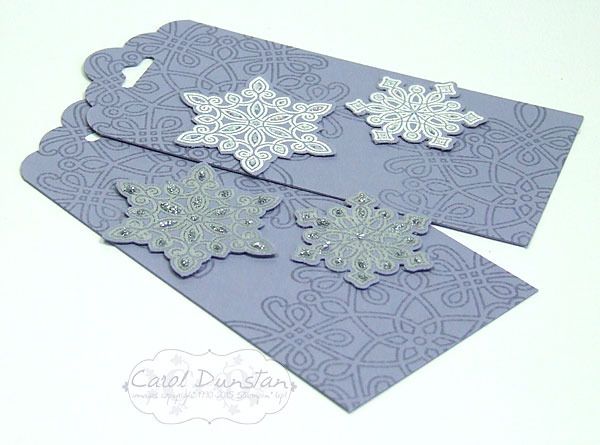
There is a lovely tag kit in the Holiday catalogue, but the colours didn't coordinate with my wrapping paper... yeah, I'm one of those people! I picked a few colours that would work in with the rolls of wrapping paper I have on hand, and thought the Flurry of Wishes set would make nice tags... but then couldn't decide whether silver embossing or white embossing would look best so I did both! The large snowflake was stamped randomly in coordinating ink and then the two smaller snowflakes stamped with VersaMark and heat embossed before being punched out with the Snow Flurry punch. I attached the small snowflakes with glue dots, which don't raise things up anywhere near as much as dimensionals but are a little faster to use.

I also used some Dazzling Details glitter glue on the small snowflakes, which is a little easier to see above. And here's a selection of the colours I did:

I also had an idea for using the Embellished Ornaments stamps for tags, so made a few of those too. I inked the stamp with a lighter colour all over, then "rock n rolled" the stamp on a darker inkpad to get a darker edge, which I also went over with a dauber to soften the line between the two colours.
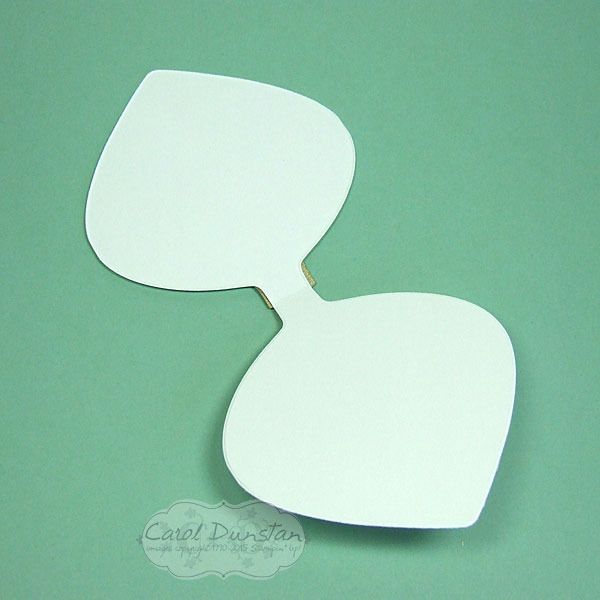
These tags actually open up, which I made by putting a crease-line on the white card base before stamping and lined up the top of the stamp with the crease. I then folded the cardstock along the crease before running them through the Big Shot to cut out with the matching "bold" ornament die from the Delicate Ornaments thinlits set, so when it was cut and opened up it would look like this...
Now I just have to sit down and actually start wrapping presents!

Built for Free Using: My Stampin Blog

Thursday, December 10, 2015

Santa's Gifts

We are moving ever closer to the end of the year, and the end of the 2015 Holiday catalogue. Remember that many of the products in the catalogue are retiring and are only available while stocks last, so your chance to snap them up is growing smaller every day. Santa's Gifts is on that list, a very cute set that is great for watercolouring, like I did for the card I am sharing today:


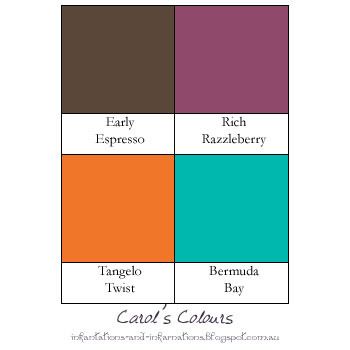
Aw, look at that adorable reindeer... how can you say no to this guy? I still have a few sheets of the old watercolour paper floating around, so I used a full piece for this. I stamped Santa and the reindeer with Basic Black archival ink, then made a little mask for Santa's hand by stamping the image on a sticky note so that when it was cut out I had some of the sticky on the back and it would stay in place while I stamped the gift. Masking is such a nifty little technique! Once I had all of these stamped on the water colour paper I did a wash of Bermuda Bay in the background. Yep, all of that is Bermuda Bay. By using a lot of water and little ink I could achieve a nice pale colour. While I had the Bermuda Bay ink out I did the reindeer's scarf, using a lot less water and a lot more ink to get a more intense colour. For Santa's face I used Blushing Bride ink, which I left out of the colour combo graphic because... well it was such a small bit and doesn't stand out that much. For Santa's suit I used Rich Razzleberry. Such a lovely colour, and true to it's name - rich! It's a nice middle ground between the traitional red for Santa, and my favourite colour of purple. Santa's boots, and belt, along with the reindeer hooves, were done with Early Espresso - lots of ink and little water in the brush for those so the colour is so dark it is nearly black. The body of the reindeer is all Early Espresso. I know I have talked in the past about how brown shades in particular are made up of a mix of colours and tend to separate into these when you watercolour with them. I deliberately made use of that this time, the side taking on a warm reddish-brown tone and the face and inner ear a tan with a tinge of pink where I pulled the colour into areas where I already had a lot of water on the cardstock so the colour became quite diluted. To finish off the watercolouring, and for some real "pop" on the card, I used Tangelo Twist on the present.


Built for Free Using: My Stampin Blog

Monday, December 07, 2015

Colourful Delicate Ornaments

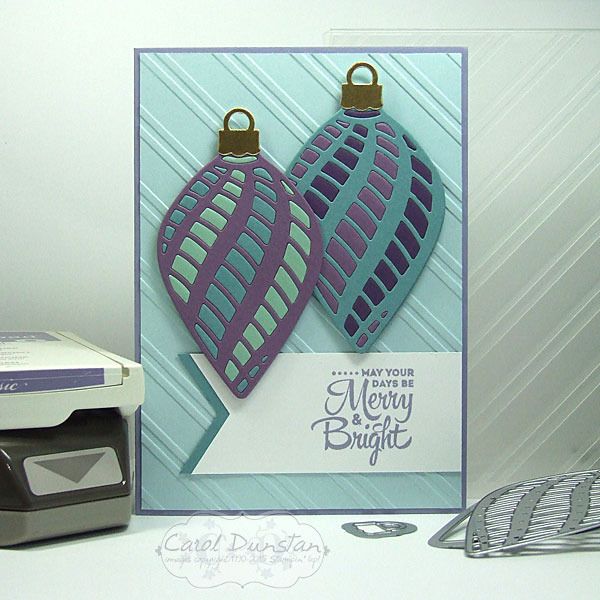
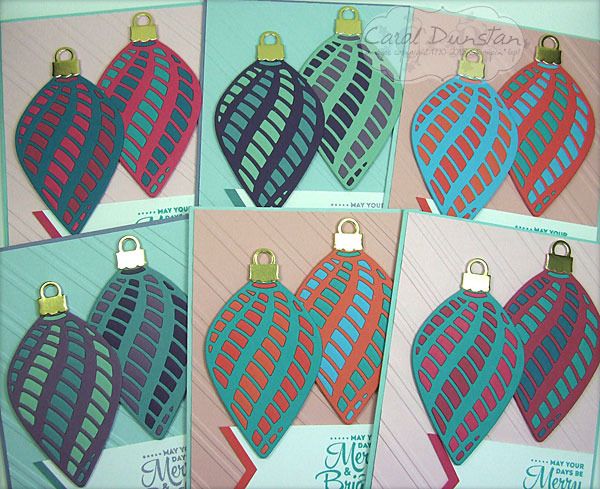
I have more Delicate Ornament cards to share with you today. These ones use the long ornament dies.


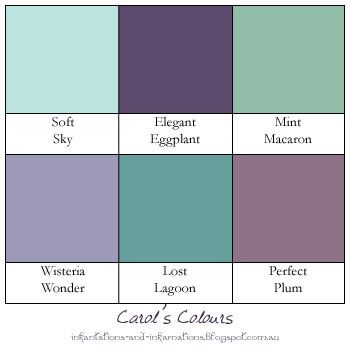
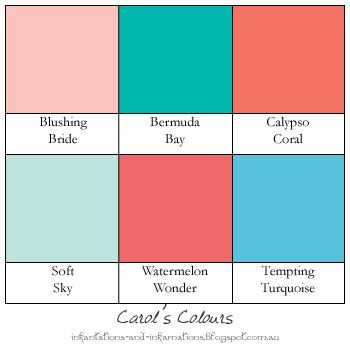
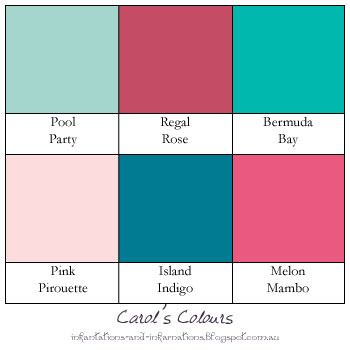
Once again I made a set of six cards, however my plans changed drastically once cutting a lot of the dies out. With some of the little pieces popped out I could start positioning them where I wanted them on the ornament and I decided that things weren't going to look quite how I wanted them. So Plan B was to change the colour combinations a little and cut more ornaments so there were two on each card.


 All of the ornament cards I have posted over the last few weeks I actually started on the same day. On the Saturday I cut all of the ornaments out (except for the extra ones I did for this once I changed my mind), and on the Sunday I started putting them together - as you can see in these Instagram photos. These are definately the easiest of the ornament dies to do this technique with as the majority of the pieces are a decent size - easier to pop out and easier to handle. I did start with these when putting them together, but they were the last to be made into actual cards. I did finish them all over the space of a few days but wanted to spread out the posts for them so you weren't looking at ornament cards for a whole week! After preparing this post I saw a card by Mary Brown on Pinterest that is remarkably similar - clearly a case of great minds think alike! I'm really glad to see someone else doing this :D

Very non traditional colours in these!


Built for Free Using: My Stampin Blog

Thursday, December 03, 2015

Lighthearted Christmas

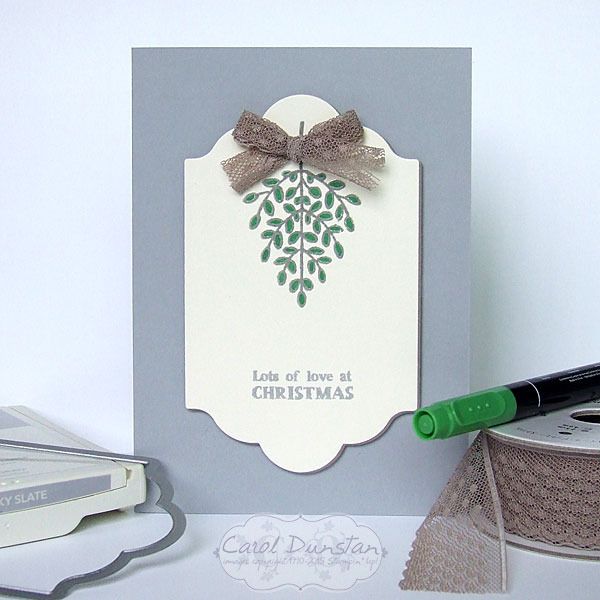
We still have a month left of the Holiday catalogue, but the items on the Holiday catalogue retiring list are only available while stocks last. Today I am sharing a card using two of the retiring sets, Santa's Gifts and Lighthearted Leaves.


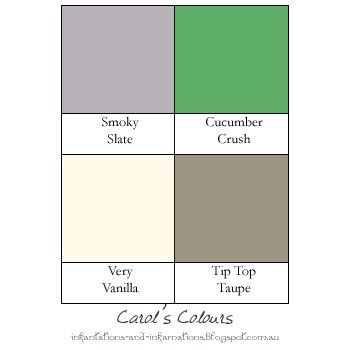
If it hasn't been said enough before, I'm adding another voice to the chorus: Lighthearted Leaves is such a versatile set! While the set comes with sentiments, the leaf images can easily be used for a wider variety of occasions. For this card I have used one of the images as mistletoe. For something different, I wanted the outline to be Smoky Slate. So the colour wouldn't run, I stamped the image in  Smoky Slate first, then stamped over the top with VersaMark and then embossed the image with clear embossing powder. One of the great things about photo-polymer stamps, as this set is, is being able to see through and see exactly where you are stamping. This is a little complicated when you are stamping with VersaMark as you can't see the clear ink! So to make it all easier, the Smoky Slate image was stamped with the assistance of the Stamp-a-ma-jig, which I left in place while cleaning the stamp and reinking with VersaMark. By keeping the Stamp-a-ma-jig in position when stamping both images it makes it even easier to have things line up exactly.

Todays colours are...

Built for Free Using: My Stampin Blog

Monday, November 30, 2015

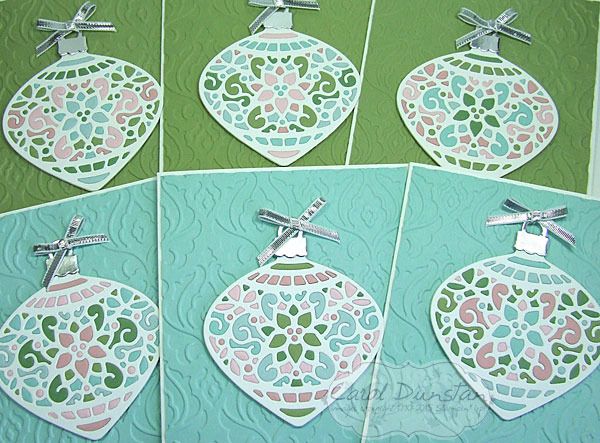
Delicate Pastel Ornaments

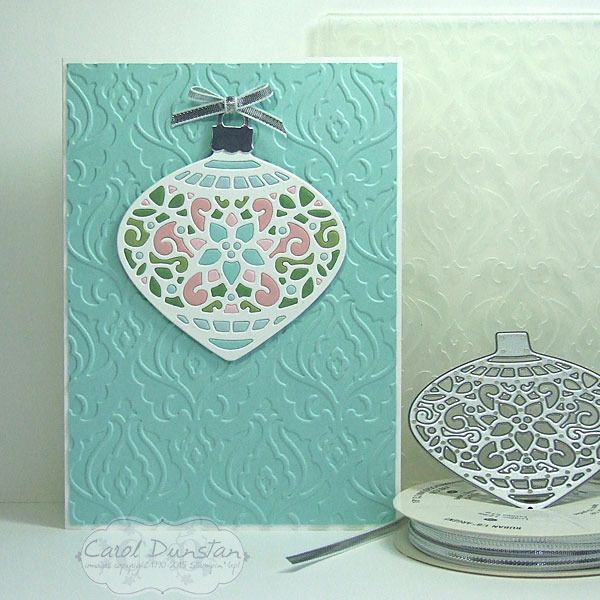
Last week I showed you another Delicate Ornaments card. This week I will show you what I did with the other pieces from those ornaments.


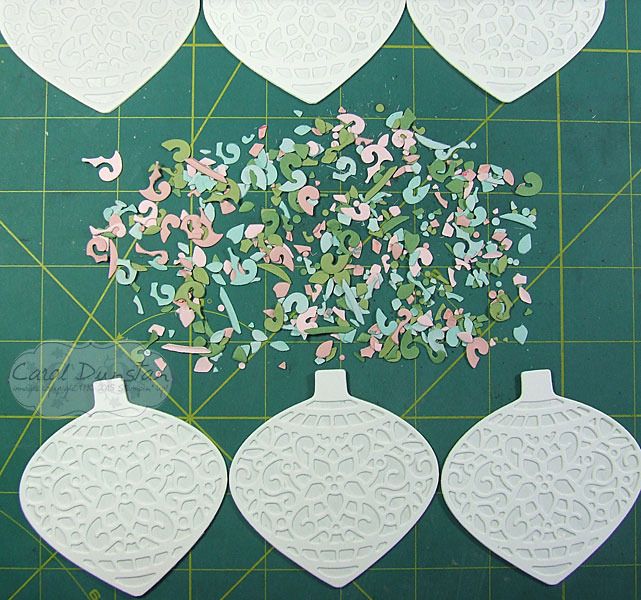
I kept the styling very similar to the matching ornament cards, but since the ornament frame was white I used a coloured background instead. I think I like these ones slightly more than their counterparts, I think it's the multiple colours in the ornaments themselves, but think both types come out really pretty. However, these ones were a bigger headache to make... if you think about it, with the other ones I was popping the white pieces straight out and into the coloured frame. So all those pieces from the coloured frames had to have already come out right? And I wasn't thinking terribly clearly when I did that. This is what I was working with for these cards:


What a mess! At least after a little while I stopped looking for specific pieces and just randomly picked up pieces to see if their shape could quickly tell me where they went. Eventually I caved to the idea that I should have done when popping them out of their frames: keep the colours separated. Oh well, I got there in the end! Here are all 6 cards finished:


I did "stuff up" a little when putting these together, as I had planned to put those ornaments with a lot of blue on the green background and vice versa, but I shuffled things around a bit too much and didn't realise till I had already stuck most of them down. Another "Oh well"! They still look nice, just not exactly what I had planned.

Colours and supplies are the same as the Pastel Delicate Ornaments.

Thursday, November 26, 2015

Glimmering Sleigh Ride

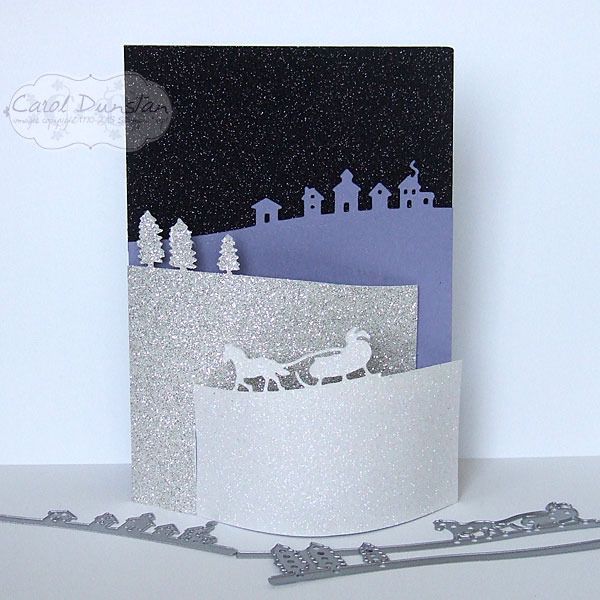
Sometimes I can be a real doufus. For weeks now I have been admiring other peoples cards using the Jingle All The Way stamp set and Sleigh Ride edgelits, and kicking myself for not ordering them. Then the other day I finally noticed the edgelits in amongst all my other framelit dies... I'd completely forgotten they were in a square envelope instead of the more regular rectangular envelope. I was still a doufus though, as I hadn't ordered them as a bundle to get the coordinating stamp set! Annoying as that was, I was determined to come up with a card that rendered this mistake a moot point. Glimmer paper to the rescue!
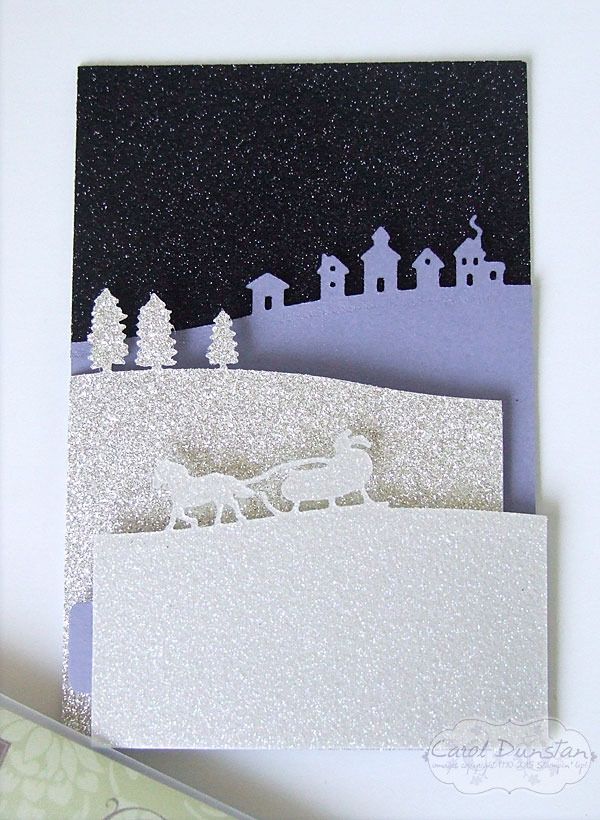
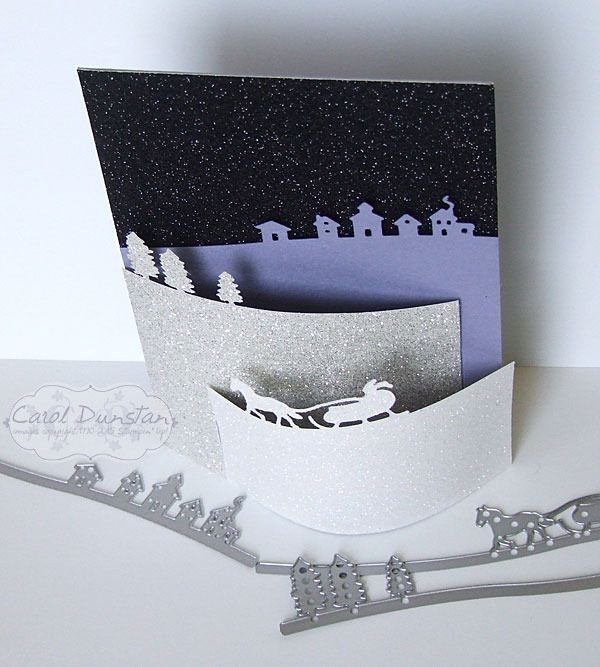
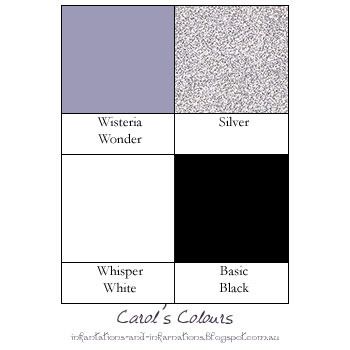
This style of card is called a bendy card, which I hadn't seen until the Holiday catalogue came out and it seemed everyone was using the Sleigh Ride edgelits for it - they are wonderfully suited to it! The tutorial I looked at was written by Beccy Muir, though I changed it a little so I could use an A4 sheet of cardstock. I'd been wanting to use the black glimmer paper for a night sky ever since I ordered it, and finally I had the perfect project for it. From there I thought it obvious to use the Dazzling Diamonds glimmer paper for snow, and then the silver glimmer paper for distant snow... and well, I needed purple on the card too but alas there is no purple glimmer paper. So the Wisteria Wonder layer didn't feel left out I gave it a spritz with the retired Vanilla Shimmer Smooch Spritz.

This is what the card looks like laying flat.

And here it is opened. You probably still can't really see the shimmer on the Wisteria layer, but it looks a little speckled. I haven't sorted out a sentiment for the inside yet, I tend to do that to most if not all my Christmas cards in bulk just before I write on them. Once the tabs are placed into the slits the card stands up on it's own.

Both the black glimmer paper and the Sleigh Ride edgelits are on the Holiday catalogue retiring list, so it you are thinking of buying them you'll need to get in quick as they are only available while stocks last!

Today's colours:

Built for Free Using: My Stampin Blog