Showing posts with label punches. Show all posts

Sunday, May 01, 2016

Farewell Hexagon Hive

Todays card doesn't focus on a stamp set, but a diecut thinlit. In fact, todays card has no stamping at all!

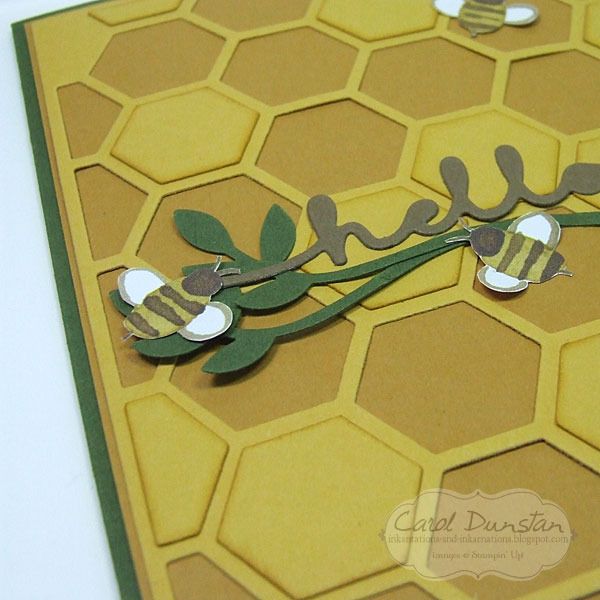
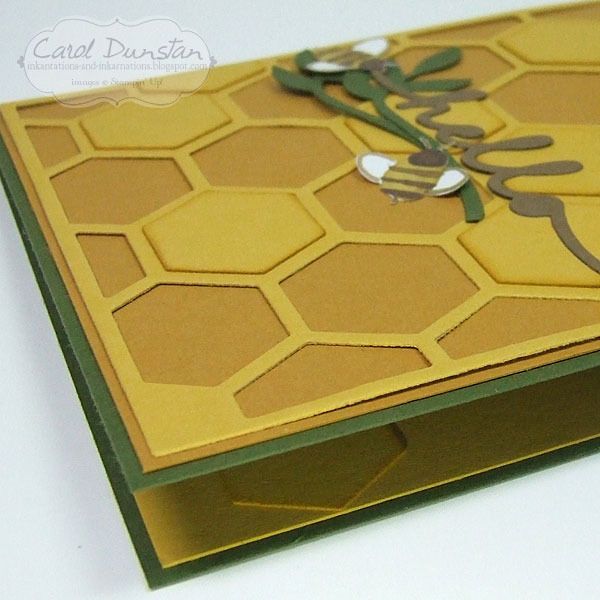
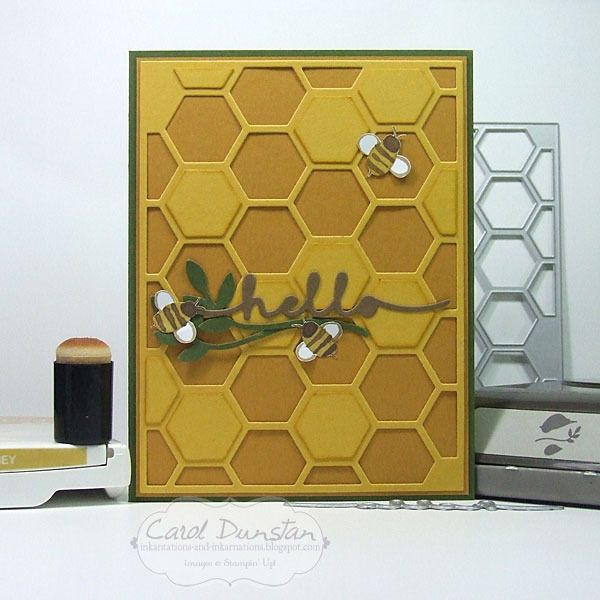
And back to the more involved cards! Going all-out with the honey/bee references, I ran some Hello Honey cardstock through the Big Shot with the hexagon thinlit. I had a few scraps of the bee paper from the English Garden DSP, so rather than stamp me some bees I cut them out of the paper. I did get a little inky by lightly sponging some Hello Honey ink on the edges of some of the cut out pieces from the hexagon thinlit and layered these in spaces where hexagons weren't cut out in the thinlit.


The leafy twigs are from the Bird Builder punch (which I'm still a bit stunned is retiring). I wasn't going to have any layers popped up on dimensionals, so give the card a little more dimension I didn't stick the twigs down flat all over. Just a little glue from the fine tip glue pen where the twigs overlapped, and a mini glue dot under one leaf on each twig to secure them at the other end.The bees are also attached with a mini glue dot, just one under their bodies so their wings can be bent up a little.


I used a couple of the sponged hexagon shapes inside the card to dress it up a little in there too.

Whenever I am working with yellow and green I find myself thinking of "green & gold" - often Australia's sporting colours - but by minimising the green I think I successfully avoided this card eliciting an "Aussie Aussie Aussie, oi oi oi!" effect.

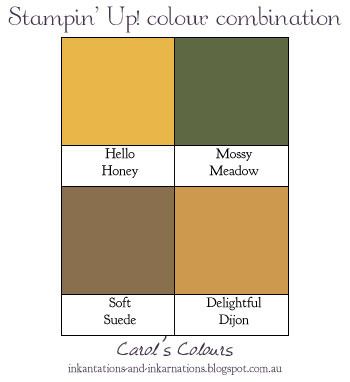
133685 Hello Honey A4 cardstock, 133683 Mossy Meadow A4 cardstock, 138345 Delightful Dijon A4 cardstock, 119982 Soft Suede A4 cardstock, 138440 English Garden DSP, 133643 Hello Honey stamp pad, 132965 Hexagon Hive thinlit die, 138275 Greetings thinlit dies, 117191 Bird Builder punch, 133773 sponge daubers, 138309 Fine-tip glue pen, 103683 mini glue dots

Thursday, April 28, 2016

Farewell Enjoy The Little Things

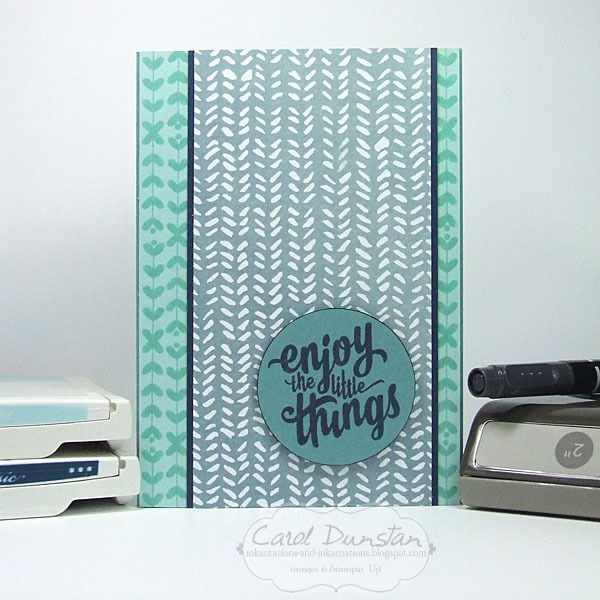
Enjoy The Little Things is a set from the Occasions catalogue that won't be carrying over to the new Stampin' Up! catalogue. It coordinates with the Enjoy The Little Things Project Kit, but the set has some nice sentiments that work just as well for cards. For todays card I'm using a sentiment I've used before because I really love the font.


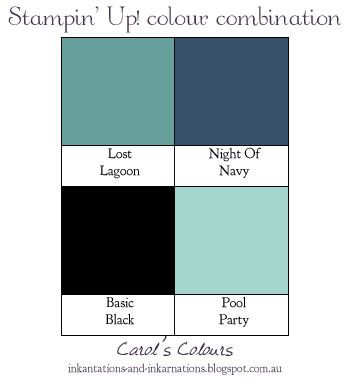
The long leafy image in the set reminded me of the Lost Lagoon paper in the English Garden DSP, so I came up with a design that worked in both. I deliberately stamped it so the image went off the edge both top and bottom and it would look a little more natural. After punching out the sentiment I edged the circle with a Basic Black marker to give the edge a bit more definition and make it pop out against the DSP behind it.


The Lost Lagoon cardstock, English Garden DSP, and the Enjoy The Little Things stamp set are all retiring and all still currently available.

140958 Enjoy The Little Things photopolymer stamp set, 133686 Lost Lagoon A4 cardstock, 124391 Pool Party A4 cardstock, 106577 Night Of Navy A4 cardstock, 138440 English Garden DSP, 126982 Pool Party stamp pad, 126970 Night Of Navy stamp pad, 100082 Basic Black marker, 133782 2" circle punch, 104430 dimensionals

Friday, April 22, 2016

Farewell Flowering Flourishes

The Flowering Flourishes stamp set has been a long favourite of mine. Swirly bits, flowers, even the shape of individual leaves... I love every bit of it. The way OnStage events run is that we received the new catalogue at the event and the retiring list was announced a few days later. When flicking through the new catalogue you will particuarly notice many new items, and it might not be until your third or fourth look through that you will notice things that aren't there. I noticed a few new stamp sets with a vaguely similar style when I flicked through the catalogue the first time, but it wasn't till later when I was having a slower more thorough look that I realised that Flowering Flourishes was absent. Even though there are some new leafy/flowery/swirly sets in the new catalogue I don't think I will ever let go of Flowering Flourishes.


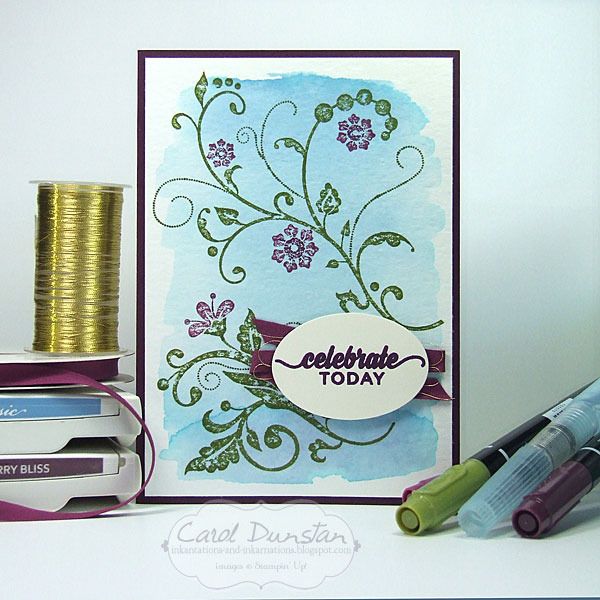
For todays card I was still in the mood for something with a simple look. This is one of those cards that while simple in appearance, is not a quick one. I started with a Marina Mist watercolour wash on watercolour paper for my background. Before I could stamp on the watercolour paper the wash background needed to dry. You can speed this up with a heat gun, but I prefer the natural approach and let it air dry.

While it can take some time for a large washbackground to dry, a few things essentially cancelled this out. The first was that I made two cards at the same time. So while the background for this card was starting to dry, I was creating another. Also, doing the wash background was the first step I did in making the card, so I had other elements to work on while the backgrounds continued to dry. There was the card base to cut and fold, sentiment to stamp and punch out, ribbon and gold thread to measure (well, guess-timate) and cut, and stamps to prepare.

The floral background is made up of two stamps with the one at the top of the card a good deal larger than the other. Even if I have used a stamp before I like to give it a test stamp on scrap/grid paper before stamping it on my cardstock to check for any issues and get some ink on the rubber. The theory with the later is that by already having some ink on the rubber, when I go to stamp my image for real more of the ink will transfer to the cardstock. I've no idea if anyone has done a scientific study on this, but that's the notion I have had in my head for years. With the main image being so large, it takes a little while to ink up with markers, so after doing a test stamp and reinking the image and all those other things I did after making the backgrounds, the first background was dry and ready to stamp on - no time wasted!


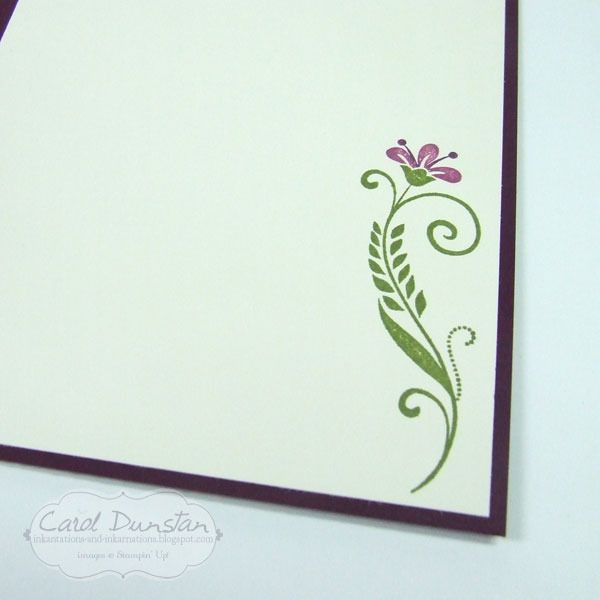
There are three stamps in the  Flowering Flourishes set, and I couldn't let the third miss out on this card... so it is stamped on the inside.

Aside from the Flowering Flourishes stamp set, other retiring products used for this card are the sentiment (which comes from the Enjoy The Little Things set), the oval punch, Blackberry Bliss cardstock and marker and the Rich Razzleberry cotton ribbon.


Flowering Flourishes clear-mount stamp set 126367, Enjoy The Little Things photopolymer stamp set 140958, Blackberry Bliss A4 cardstock 133682, Watercolour paper 122959, Very Vanilla A4 cardstock 106550, Marina Mist stamp pad 126962, Blackberry Bliss stamp pad 133642, Black Berry Bliss marker from the 2014-2016 In Colors marker pack 133654, Rich Razzleberry and Old Olive markers from the Brights collection marker pack 131259 or Many Marvelous Markers pack 131264, aquapainter 103954, Rich Razzleberry cotton ribbon 134564, gold metallic thread 138401, Large Oval punch 119855, dimensionals 104430

Saturday, April 02, 2016

Sunburst Shine

Today's card has been brewing in my head for some time and I'm glad I finally got to work out my vision for it.

When I saw the Sunburst die in the Occasions catalogue, I got the idea of using the die off-cuts - as is my habit of late - for additional sun rays. Once I got to fiddling around with the bits I decided that I would use them on top of the main die cut part. This is what it looked like once I had all the Sunburst pieces put together.


I have also had the idea of using the metallic threads for stitching kicking around in my head for some time, and I thought it would work really well with the Sunburst die as more sun rays. When I was doing the colours for the sun I realised that the die had little holes in it that would work great as a guide for the stitching.


I used three In Colors in this card, two of which will be retiring soon. I know I have said it before, but I see it happen every year... people wait till the retirement list comes out to purchase In Colors products and sometimes they have sold out within the first day and they miss out. So this is another reminder - get in and order those 2014-2016 In Colors before it's too late!


Sunburst Sayings clear mount stamp set & Sunburst thinlits die bundle  140807, Tangelo Twist A4 cardstock 133684, Blackberry Bliss A4 cardstock133682, Crushed Curry A4 cardstock 131288, Delightful Dijon A4 cardstock 138345, Perfect Plum A4 cardstock 108615, Blackberry Bliss133642 stamp pad , Perfect Plum stamp pad 126963, gold metallic thread 138401, Metallics sequin assortment 138390, 2" circle punch 133782, Circle collection framelit dies 130911, dimensionals 104430

Monday, February 01, 2016

Balloon Let Us Celebrate

With the new year well under way it's time to get stuck in to the birthday cards and try to get ahead of the rush. Do you have some months that are particuarly packed with birthdays of friends and family members? For me it's May and September, so I do have a bit of breathing space before those peak birthday months hit but it can easily catch up. So, first birthday card off the rank!


I finally got Balloon Celebrations out of it's case. I love the "let us celebrate" image that can be used as the balloon string. Even with that sentiment on the card I wanted to still use the more standard "Happy Birthday". I thought it would be nice to have Happy Birthday on the balloons, and as luck would have it by inking and stamping one word at a time it fits really nicely within the balloon. I also used the small dotted image in the set to create a bit of interest on the card background. To layer the balloons on the card front I mounted them on die cut shape. The Labels Collection framelits were a favourite of mine, and I was very sad to see them retire last year. The Lots Of Labels framelits are a nice style, but they weren't quite the look I was after.

The colour combination I used for this card is a variation on my old favourite of purple and aqua/teal.


Balloon Celebration stamp set & punch bundle 140810, thick Whisper White A4 cardstock 140490, Soft Sky A4 cardstock 131292, Soft Sky stamp pad 131181, Old Olive stamp pad 126953, Wisteria Wonder stamp pad 126985, Lost Lagoon stamp pad 126986, Labels Collection framelits (retired), dimensionals 104430

Monday, January 04, 2016

Enjoy The Little Things Again

Yes, I'm combining the Enjoy The Little Things stamp set with the Botanical Gardens suite again, but I think you'll agree this card has a very different look to last weeks card!
The basic idea for this card stayed way back in November while I was at Melbourne airport waiting for my flight back to Newcastle. I spotted a ladies skirt with panels of a bold floral print on a black background mixed in with solid black panels and in between each panel was a little black glittery trim. Even though the style of floral was completely different, I straight away thought of this paper and knew I would be able to create a card with a similar look. Inspiration can strike any where! I made a conscious choice to jumble the patterned panels so the print didn't line up - it's a personal preferance I have that just so happened to match how the inspiring skirt was done.

The black glimmer sheets are of course from the Holiday catalogue, and were listed on the list of retiring products from that catalogue... and I am sorry to say they have actually sold out. You might think I am being a bit of a tease with this card, but if you did order the black glimmer paper before it was all gone, well here's some more inspiration for it's use!

If you look hard at the edge of the white circle you might notice some little dots of Mint Macaron. I had stamped the sentiment, then stamped the circle image from the You're So Lovely set around in before punching out... and deciding I didn't like how it looked with so much "white space" around it, so re-punched it with the smaller 2" circle punch... which all but removed any trace of the circle image! I contemplated stamping it a few more times with the circle off-set a little so more of it would show, but decided that was more fussing around than I was in the mood for. I've come to tell myself that those hints of dots work in well with the tiny flowers on the Designer Series Paper and I am content with the card ;)

Don't forget - the Holiday catalogue ends today, so you only have a few hours left to get in and snap up retiring product! And if you don't yet have a copy of the Occasions catalogue that starts tomorrow (or the Sale-a-bration catalogue that also starts tomorrow), email me or call 0422 936 139 and I can help you with that.

Today's colours are the same as the Botanical Garden's Designer Series Paper:

Built for Free Using: My Stampin Blog

Monday, December 28, 2015

Happy New Year

It's not quite New Year's Day or even the eve yet, but when it comes to making cards it's a good idea to think ahead. This card also has a little sneak peek at a product from the up-coming Occasions Catalogue.
Can you pick what the sneaky product is? It's the balloon punch! This little beauty is one of three in the Party Punch Pack, along with a little cupcake and a candle. They do coordinate with a stamp set (which you can get in a bundle for 15% off), but of course you can always use them on their own. I was really feeling like a "classy" card while making this, black and metallics are always so striking. Sending cards for New Year's doesn't seem as big a thing as Christmas cards, but they can also work as invitations if you are hosting a New Year's Eve event.

Here's my little colour graphic if you'd like it for future reference:

Built for Free Using: My Stampin Blog

Friday, December 11, 2015

Christmas Tags

Have you got your Christmas cards done? After a few years of having a mad rush in November or even December, this year I once again was determined to start my cards about mid year so I should be done well before December and I could move on to other things. Well, despite a few months break around September I had my cards essentially made come December, but I tend not to do the inside when I do the front... and then there is the writing on them... so it's taken me a bit to be completely done with my Christmas cards! In anticipation of moving on to the next stage of Christmas preparation - wrapping presents and putting them under the tree - the next thing I did was make tags for the presents.
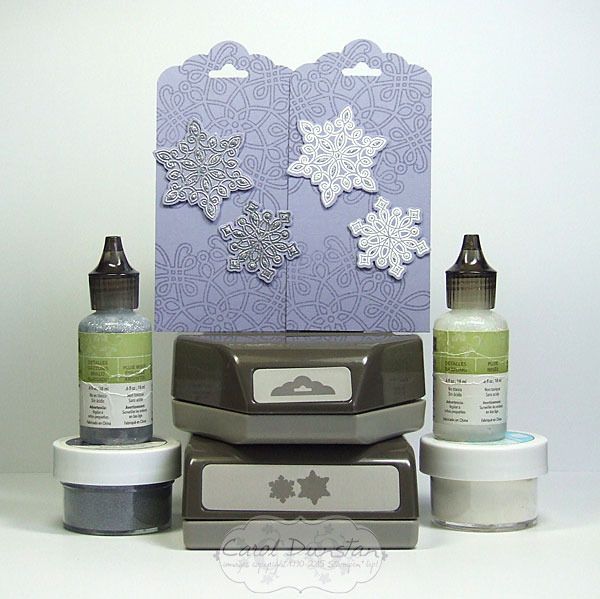
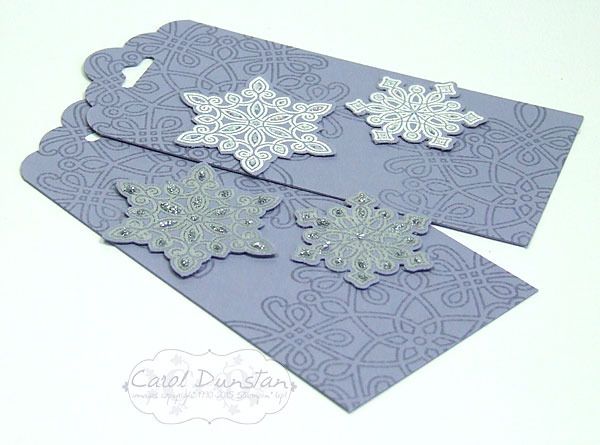
There is a lovely tag kit in the Holiday catalogue, but the colours didn't coordinate with my wrapping paper... yeah, I'm one of those people! I picked a few colours that would work in with the rolls of wrapping paper I have on hand, and thought the Flurry of Wishes set would make nice tags... but then couldn't decide whether silver embossing or white embossing would look best so I did both! The large snowflake was stamped randomly in coordinating ink and then the two smaller snowflakes stamped with VersaMark and heat embossed before being punched out with the Snow Flurry punch. I attached the small snowflakes with glue dots, which don't raise things up anywhere near as much as dimensionals but are a little faster to use.


I also used some Dazzling Details glitter glue on the small snowflakes, which is a little easier to see above. And here's a selection of the colours I did:

I also had an idea for using the Embellished Ornaments stamps for tags, so made a few of those too. I inked the stamp with a lighter colour all over, then "rock n rolled" the stamp on a darker inkpad to get a darker edge, which I also went over with a dauber to soften the line between the two colours.
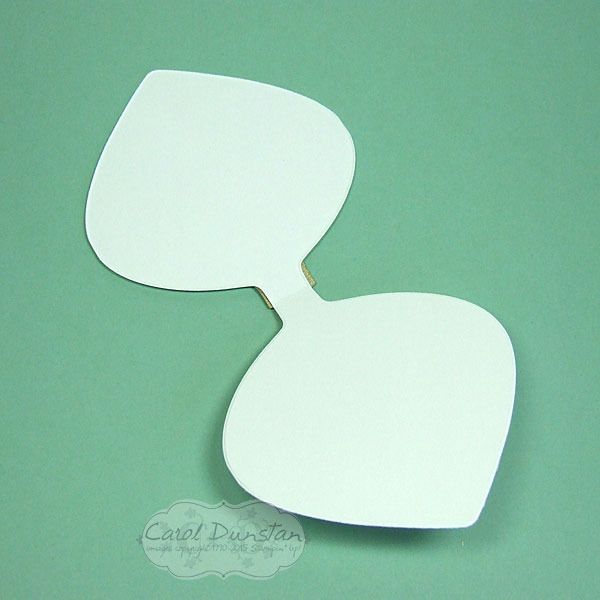
These tags actually open up, which I made by putting a crease-line on the white card base before stamping and lined up the top of the stamp with the crease. I then folded the cardstock along the crease before running them through the Big Shot to cut out with the matching "bold" ornament die from the Delicate Ornaments thinlits set, so when it was cut and opened up it would look like this...
Now I just have to sit down and actually start wrapping presents!

Built for Free Using: My Stampin Blog

Tuesday, November 24, 2015

Lovely As A Wonderland

Back today with another Wonderland card for you. It really is going to be sad to see this one go, it pairs so nicely with Lovely As A Tree.


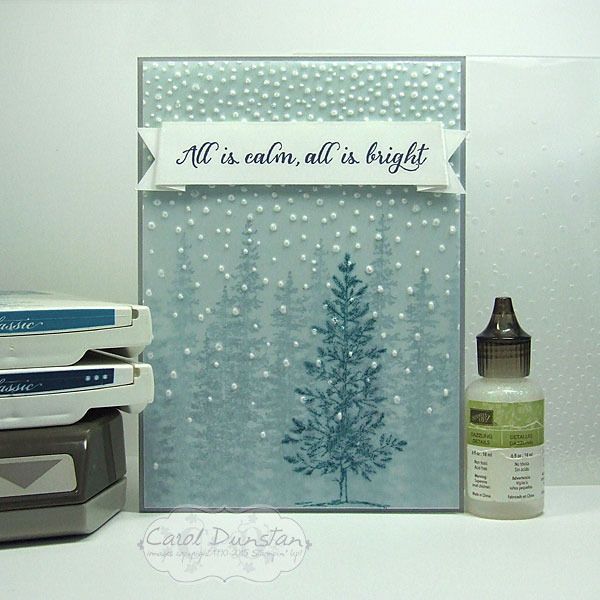
For this card I started off with a piece of Soft Sky cardstock and using Island Indigo ink stamped the Wonderland trees on it a few times side by side, then I stamped them inbetween after first stamping off on scrap paper to make the colour less intense. I then stamped the Lovely As A Tree image on a piece of vellum cardstock with the Island Indigo ink. Dye based inks are quick drying, except when you stamp them on something like vellum that won't absorb the ink straight away. While I was waiting for that to dry I stamped the sentiment on a strip of Whisper White cardstock and marked in some slightly slanted score lines so that when the banner was folded you would see a little underneath and the ends wouldn't be in-line with the main part. Once I had those score lines in place I could work out where I wanted the banner ends to go. The Triple Banner punch is made with guides for cardstock that is 1" (approx. 2.5cm), 1 1/5" (approx 3.8cm) and 2" (approx 5cm) wide. The strip I  was using was 2cm wide, but by holding it steady in the Triple Banner punch I was able to get a nice even banner finish to my cardstock. By now the ink on the vellum was dry so I was able to run it through the Softly Falling embossing folder in the Big Shot. It came out exactly how I hoped it would, the embossed dots turning the vellum white and looking a lot like snow. I put a bit of Fast Fuse behind the banner to attch the vellum at the top, then also placed a glue dot behind the tree, with a couple of little bits of glue dot snipped off and positioned behind and embossed dot to help hold the corners down. Once the card was all stuck together, I looked at it and thought "it's nice... but it needs a snowy sparkle" so I added just a touch of Dazzling Details glitter glue to the embossed dots - which of course doesn't show up int he photo but trust me it's there!

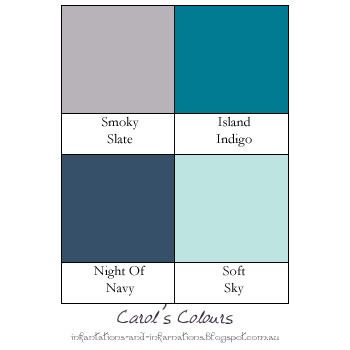
The colours for this card were inspired by Catelyn Stark from Game Of Thrones (Winter Wonderland is coming? hehehehe):

Built for Free Using: My Stampin Blog

Friday, November 20, 2015

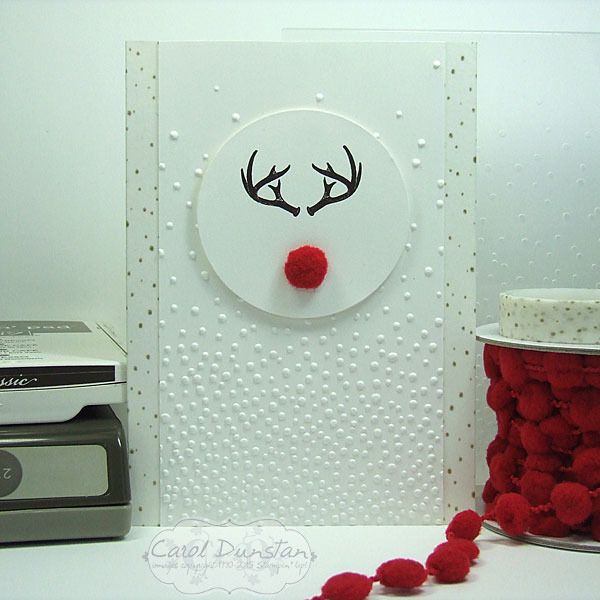
Minimalist Rudolph

One very popular set that is on the Holiday catalogue retiring list is Wonderland, which was the basis of today's card.


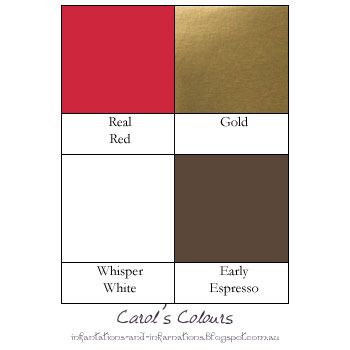
When I first saw this set my eyes quickly caught onto the antler image and I immediately thought of Hannibal. Fans of the show will know what I mean! I'm sure at some point in my future I will make a Hannibal related card with this stamp, but that was not my inspiration today. I'd seen a few cards like this on Pinterest, firstly Billie Moan and then Dani Dziama (who had actually inspired Billie). Then this week I saw a kids shirt with something similar while out shopping. Like all of these, I wanted to keep my card mostly white, but also wanted subtle interest in the background and a touch of gold. The Winter Wonderland washi tape with the flecks of gold was perfect to edge the sides of the card with, and worked nicely with the Softly Falling embossing folder. I even edged the inside of the card with the washi tape to dress it up a little as well. With a fuzzy nose cut from the Real Red pompom trim, don't you just want to give his nose a little rub?


Built for Free Using: My Stampin Blog

Monday, November 16, 2015

Stained Glass-esque Tutorial

Before I start sharing new and exciting stuff from the OnStage Local event I attended over the weekend (check back later tomorrow for that!), here's the tutorial for the Delicate Ornaments that I promised.


Firstly, this was obviously not my first time doing this - the day I cut these particular ornaments out I also did a bunch of others I will be sharing over the next few weeks. That said, putting some of those other ornaments together before these particular ones I learned a thing or two, and there's possibly still a few thing I could do to improve it a little but for now this is my best way for doing it. Secondly, yes it is fiddly but it's clearly not so mind-numbingly frustrating that I will never do it again. It may not be for everyone but it is right up my alley!

So on with the tutorial! Firstly, some preparation:
I die-cut ten black ornaments and popped all the little bits out. If you are planning on keeping the bits, do this over a scrap of paper that you can then use to funnel the bits into a zip-lock bag or onto the open flap of an envelope so you can just tip it up and the bits will slide into the envelope when you are done. You will notice there are some little raggedy bits of cardstock from where the other bits were removed. I like to get rid of as much of this as I can, so...
I turn the ornament over a run a sanding block (sadly no longer available, but you might still have some, or a similar item you can use) across the back. It of course works much better if you hold the ornament down, but I needed my hands for holding the camera... so just imagine there's a couple of fingers on the left pressing down on the ornament.
Take away the sanding block and you can see a good deal of stuff has been removed.
Take away the ornament and ooooh pretty pattern!
Then rotate the ornament to rub the sanding block over the rest of the ornament. Remember - this is on the back!
After sanding all over the ornament is much tidier, but there are still a few little bits hanging on. We'll soon fix that up!
To get rid of the stragglers I run a small round file around inside all the little holes (these are also no longer available from Stampin' Up!, but as before you might still have them or something similar you can use).

Once the ornament is nice and tidy I punched ten Basic Black 1 3/4" circles and smothered them in Snail. You need to make sure it is well covered in adhesive as there are some very small bits that you will be putting in and they need something to stick to to stay put. Gently lay the die-cut over the circle to make sure you haven't missed any key areas before sticking it down completely. Then it's time to start sticking the coloured bits in!
From working on the other ornaments I found the best way to do this is to pop them out of the coloured ornament and stick them where you want them straight away. This minimises losing any of the little bits (though you may find some do pop out before you are ready for them, as you can see above I have a few of the Daffodil Delight pieces sitting over to the left waiting their turn) and makes things go a little faster as you are not spending time looking for particular shapes among the jigsaw pieces. For the really small ones that just won't move by simply pressing on them with fingers I use the small end of the tool from the Simply Scored board and they usually pop out pretty easily without having to press too hard. Oh and you'll need to put something behind that slit at the top so those bits have something to stick on to...

After working through all the colours you will end up with something like this:
This is where you sit back and admire your stunning work. I love just looking over these and seeing how the different position of colours changes and how the look of each ornament is subtlely different.

I thought rather than putting up an image of the ornaments after each colour was done - and making this post even longer than it already is - I would just include this:

Once I mounted these to my card fronts it looked something like this:

So there you go! I hope I have inspired some of you to give this a go. It did take me a couple of hours to do all ten ornaments, but that was also with stopping to take photos. I would probably easily spend more time making ten cards normally though it might take a little longer than making ten of the same card in normal production-line card making. I think for the stunning outcome it is worth it, but do understand it might be a little daunting to consider if it's the first time you've done anything like this! If you don't like the idea of putting all those pieces in to fill the whole ornament, you could try just doing the strip across the middle, or just the flowers. If you do have a go, I'd love to see yours so leave a comment and let me know where I can find yours to have a look at :)

Thursday, November 12, 2015

Pow! Bam! Batman!

Tomorrow I am heading off to Melbourne for an OnStage Local event put on by Stampin' Up! At their events Stampin' Up! collect cards for Ronald McDonald House Charities, and this is the card I will be donating:
The Batman symbol was created by first cutting a piece of Daffodil Delight and Basic Black using oval dies. I then used punches - some I traced the shape and some I actually used to punch out some of the black - and a little bit of snipping with scissors to finish it off. But what actually got me started with the idea of making a Batman card was the bat washi tape from the Happy Haunting washi tape pack. Looking at the image in the catalogue I thought it looked like the top edge should be able to line up with the bottom so you could do rows of it and creat a wider strip - or you could do a whole card front if you wanted! If you look really, really closely you can see the edges of the washi tape, but I am very pleased with how my hunch turned out.

The colours used are:

Built for Free Using: My Stampin Blog

Friday, October 30, 2015

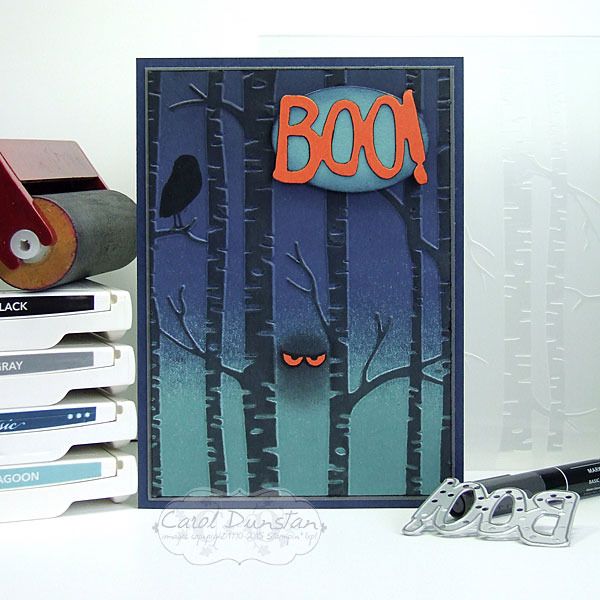
Boo! Among The Branches

Haven't had a lot of time for stamping lately, but thankfully this week I had a little more time on my hands - just in time for Halloween!

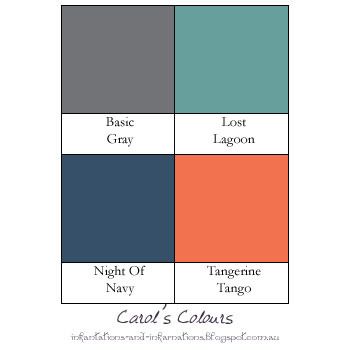
This card is actually a birthday card, for a Halloween birthday sleep-over which I am sure will be a scream!  I was inspired by this fabulous card by Michelle Zindorf. Though my brayering wasn't as smooth as normal (I didn't want the Lost Lagoon bit to get so dark it started looking like Island Indigo so the cardstock probably wasn't as damp as it should have been for a more smooth gradient of colour where the Night Of Navy overlaps) the effect works for a spooky card. After brayering the background, and running the cardstock through the embossing folder I brayered over the raised tree trunks with Basic Gray ink. I'd read you needed a very light touch to not get ink inbetween the trunks... and knowing I was unlikely to succeed with that I took a punt that some strategically placed washi tape would help prevent such mistakes. Which it did... but need to be very careful pulling that off at the end! The eyes were hand cut after stamping the "spooky" image from Among The Branches set on Tangerine Tango cardstock with Basic Black ink. I hadn't originally planned on using a sentiment, but after doing everything else to the card felt it needed something more. It was only after I stuck the "Boo!" with the oval onto the card that I thought the card had a very Scooby Doo feel to it. What do you think?

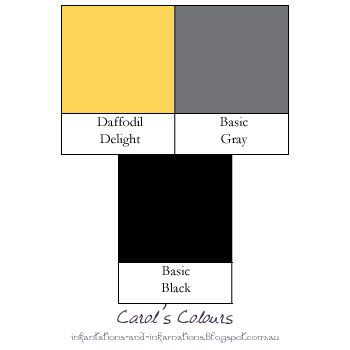
These were the colours I used (with a touch of Basic Black as well):

Built for Free Using: My Stampin Blog

Monday, October 26, 2015

Lighthearted Birthday

While I think there are a lot of fantastic sets in the Stampin' Up! Holiday catalogue, one of the more popular ones seems to be the Lighthearted Leaves set. I'm not immune to it's charms either!
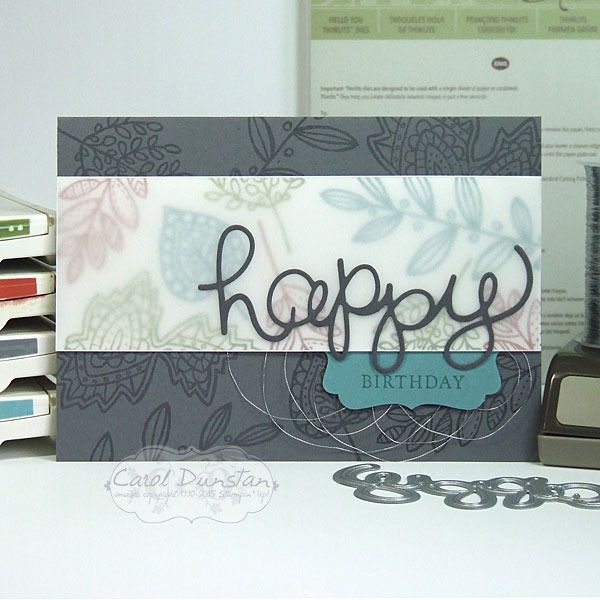
For this card I didn't colour in the leaves, or cut them out with the coordinating Leaflets Framelits dies. I chose to just randomly stamp the various leaves in in Basic Gray for the card base, and for the feature panel I used a mix of Old Olive, Lost Lagoon... and Cajun Craze. I love playing with all colours, but Cajun Craze is probably my least favourite Stampin' Up! colour. I've tried using it before but really wasn't happy with the end result. This time I was much happier, and that was even before I put vellum over it! Sometimes what makes or breaks a colour combination is how you balance the colours: how much you use of the colours and where you put them. Using a lot of white is one trick to try if you aren't sure of a combination, but for this card I was determined to give Cajun Craze a fair showing. Unfortunately the background was a little busy and made reading the "happy" difficult, so I softed things with the layer of vellum. I didn't have a current set with "birthday" in a font or size that really worked with everything else, so I went back to the trusty Basic Phrases for that one.

Here's the graphic for the colour combo:

Built for Free Using: My Stampin Blog