I recently came across some
instructions for some paper ornaments that were right up my ally. There are templates to print out, but I suspected that there was much wider scope for the design. So I have been madly folding paper to test my theory out, and happy to say I was right! I have seen this style of ornament given a few different names and ordinarily I would avoid muddying the waters further with yet another name, but given I have released the ornaments from the restriction of a template and because of
Tori Amos, I am calling them Concertina Ornaments. So without further ado...
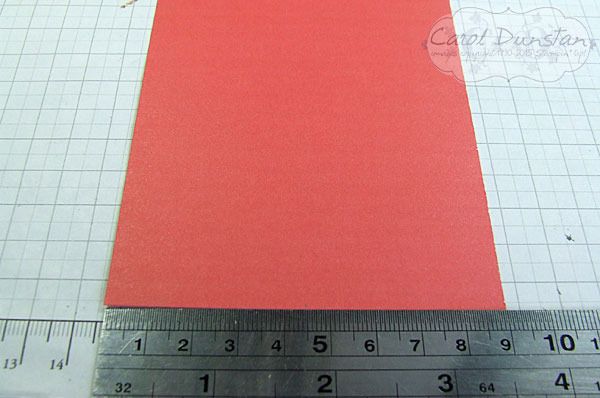
For this tutorial I have used a piece of Watermelon Wonder envelope paper. I simply cut a 9cm wide strip off a sheet of 12x12... so my piece measured 9cmx30.48 cm. More about that later...
The first thing to do is score vertical lines along the long edge. I chose to work in centimetres for this ornament (more about that later...), so I scored at every centimetre. I used my paper trimmer and it doesn't create a very visible indentation on the paper so it's a little hard to see. After scoring at every centimeter, on the back of the paper I put a small mark at the halfway point on both short edges and drew a line from one to the other. You don't necessarily need to rule the line, but it helps to check that folds are staying on track later.
So the ends of the score lines stood out more I also made small marks for all of those too. Notice that bit of paper from 30cm-30.48 cm? If you are working in centimetres it will make things much easier if you trim your paper down to a whole centimeter...
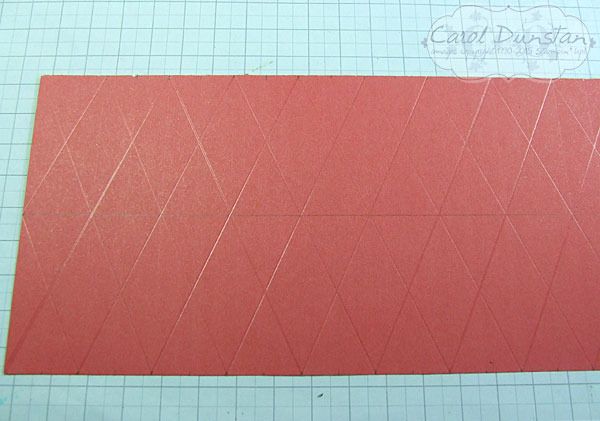
The next step is to create your diagonal score marks. The diagonal score lines should cross the vertical score lines at the middle. On the ends there will be ones that start at the middle point of the short edge... except if you have left part of a centimetre of paper. I strongly recommend trimming that off so you don't accidentally create a score line to the wrong spot. Let my mistakes be a lesson to you!
After all that scoring, it's time to start creasing. I start with the vertical lines, that will be valley folds so you will be folding the paper with the front/right side onto itself.
Once all of those are done it's time to crease the diagonal score lines. These will be mountain folds, so to greate the peak on the front/right side, you fold the paper with the back/wrong side onto itself.
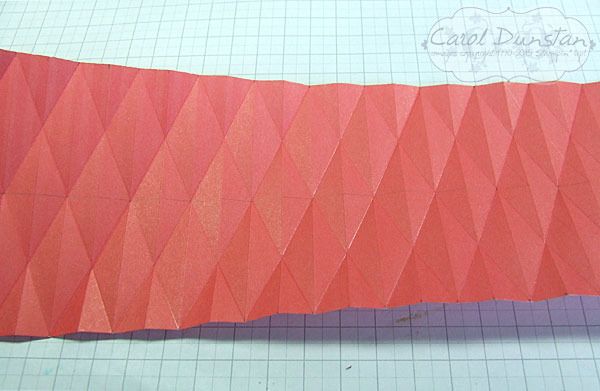
This is what my paper looked like after all the score lines have been creased. You can see from the slight shadows on the paper that little peaks and valleys are starting to take shape.
Now it's time to fold all those peaks and valleys at the same time. It can take a little bit to get it started, but I find that pinching the middle where two diagonal lines cross quite effective. The diamond shapes that all the score lines have created should collapse along the folds pretty easily, and then you'll just need to tuck in the triangles along the edge.
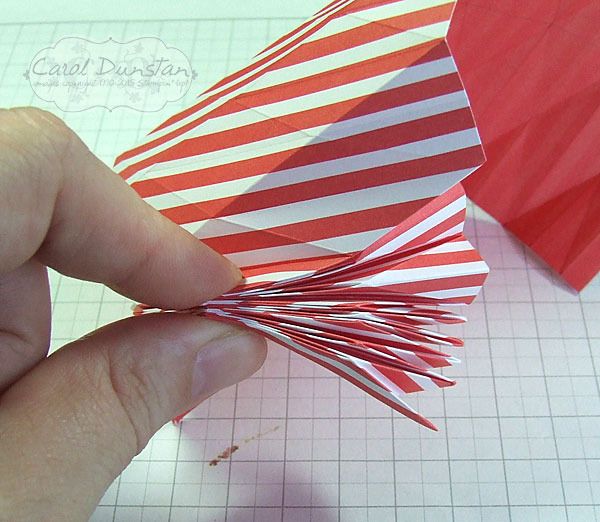
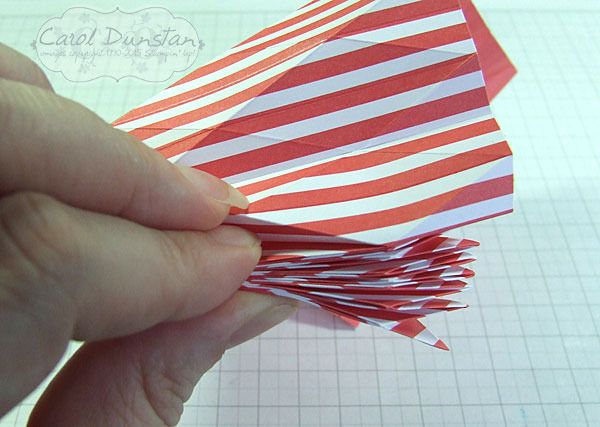
With thumb and index finger pinching what has already been folded I use my middle finger to pull down the next section. Continue like this until your strip is completely folded...
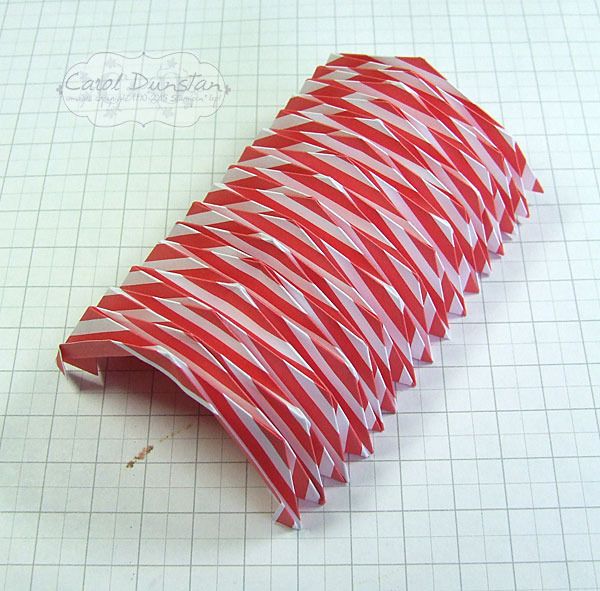
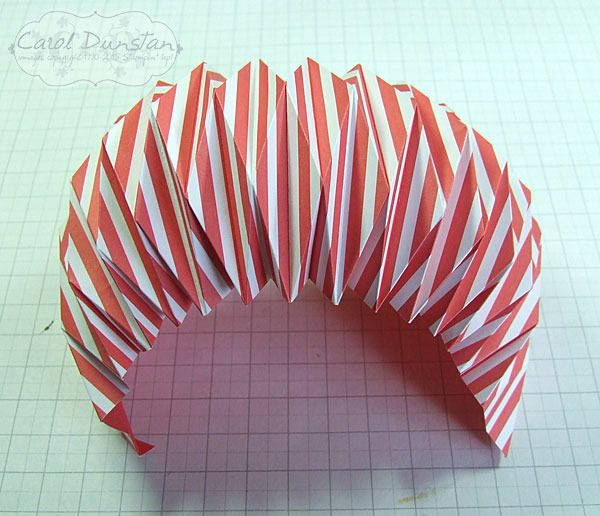
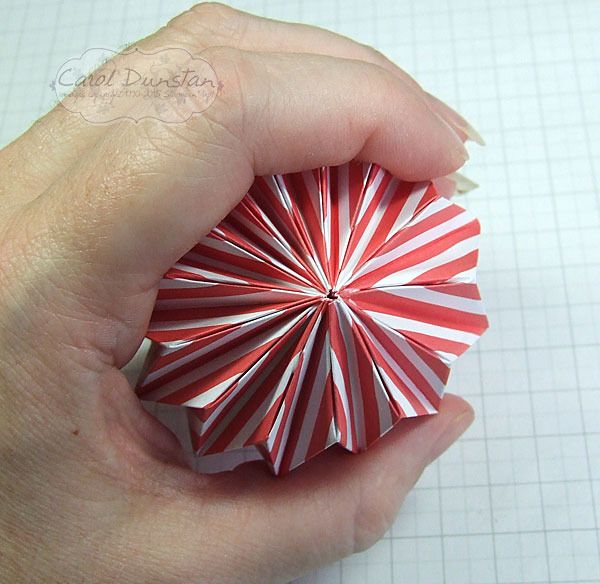
At which point it should look something like this!
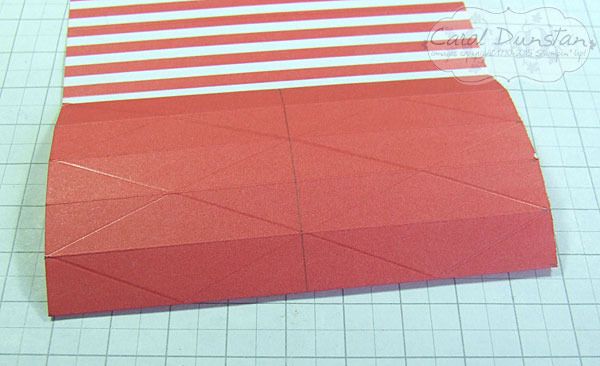
Pull the edges of the paper around to start forming the ornament.
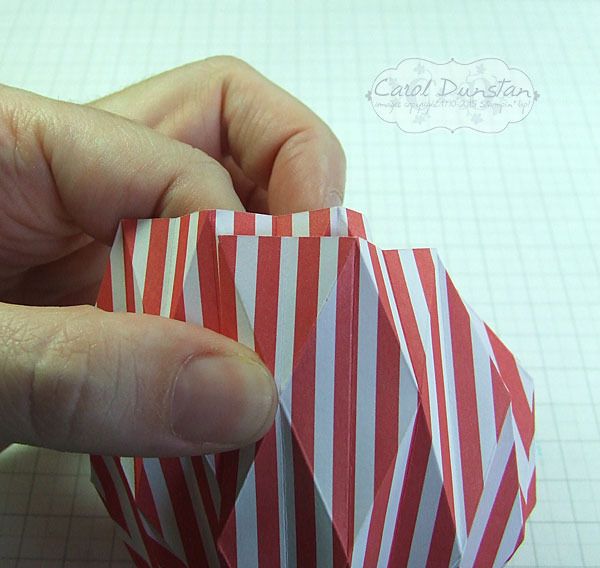
Overlap the ends of the paper. How much you overlap depends on the length of your paper, as it is dependant on the folds lining up on both layers. If you are working in centimetres, even numbered lengths will have a whole segment overlap similar to above (though I still have that extra 0.48cm on it...).
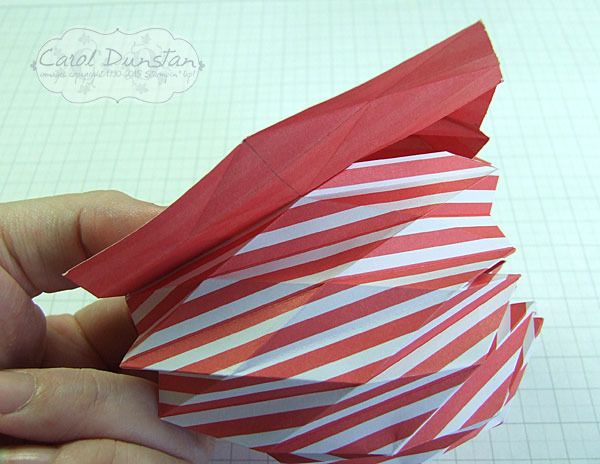
Hold the two layers close to the end of the inside layer and raise the top layer a bit so you can apply adhesive.
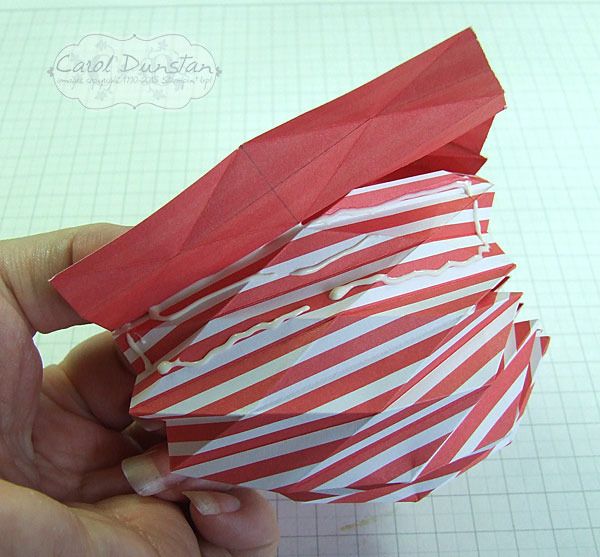
I've used Tombow multi glue, and think glues are the better option for sticking the ornament together. This way there is a bit of leeway for moving the layers as you bend the ornament into it's final shape. I put the glue in from the edge so when it spreads it shouldn't ooze out.
I like to have the ends of the ornament close up tight and tidy, so I use more Tombow here. The
instructions I linked to at the top used thread to pull these together.
Once the glue is on, hold the ornament for a while for the glue to dry a bit. You may want to find something else to keep the ornament in shape so you can step away and let the glue dry completely, a clean, dry cup or mug might do the trick, depending on the size of the ornament.
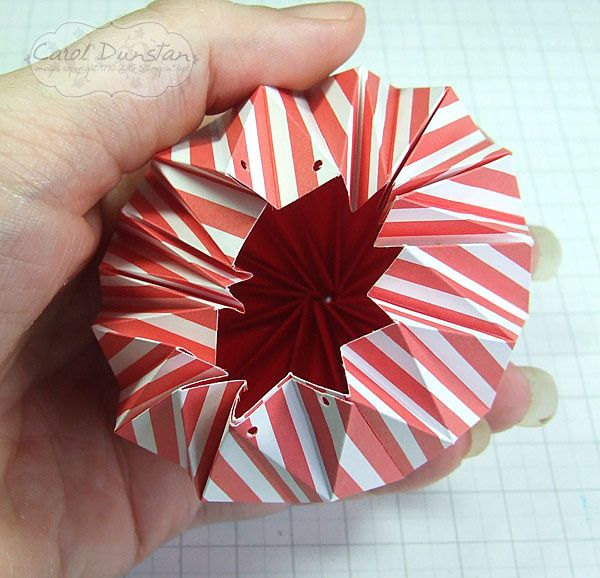
For the top of the ornament, use a small hole punch to make holes on opposite sides of the opening.
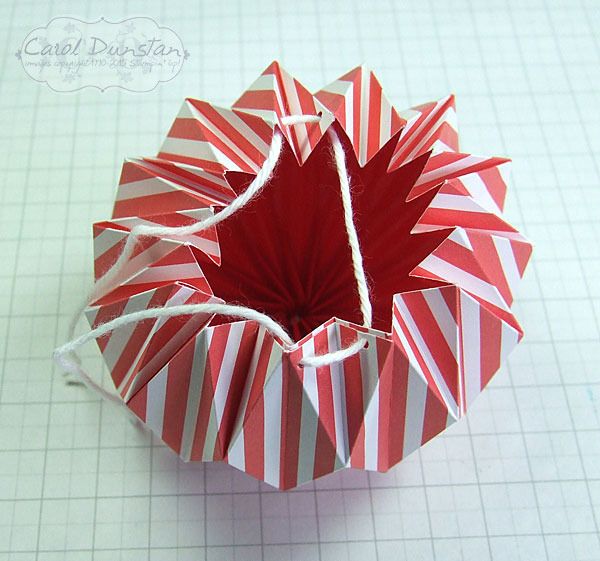
Thread some baker's twine through the holes. Thread the ornament so that the ends will be at peaks of folds when the top is closed, this gives a neater finish.
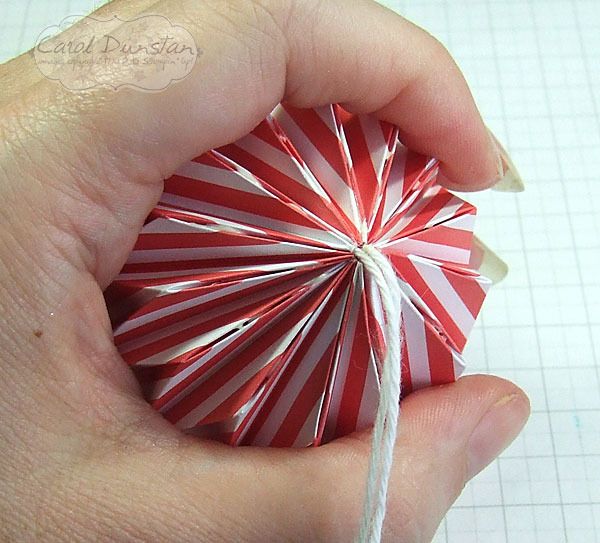
Apply glue same as for the bottom, then hold the ornament to close up the top, pulling through any slack in the twine as you do so.
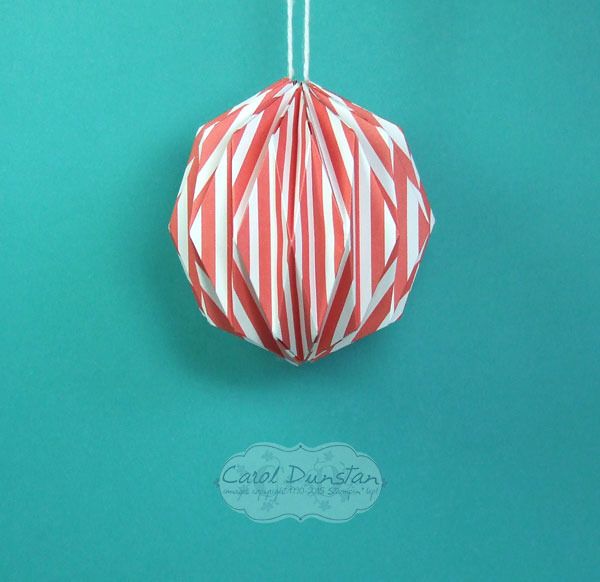
Voila! Your ornament is finished!
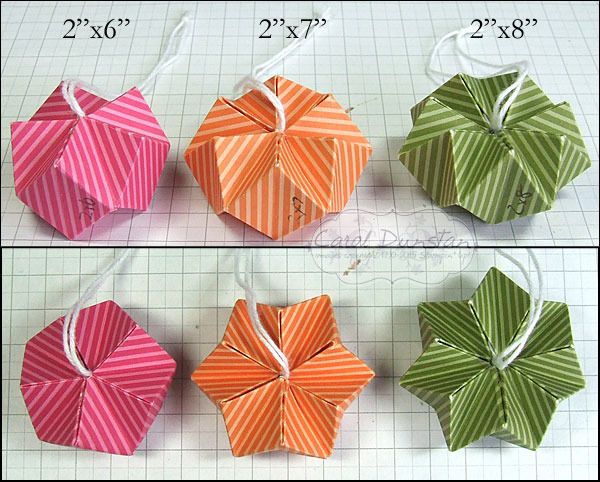
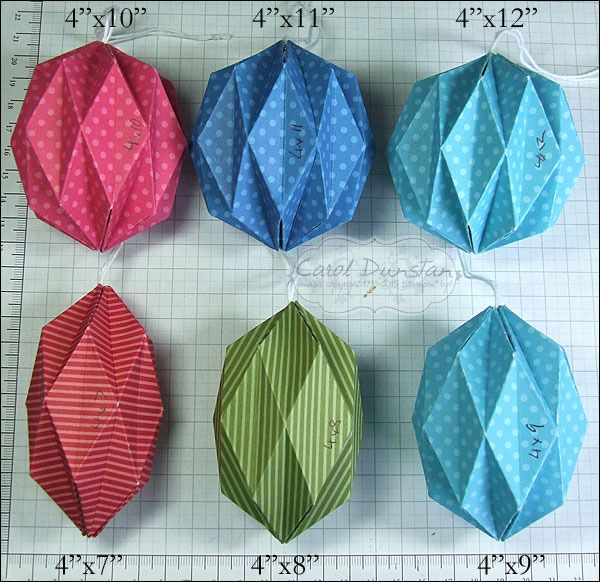
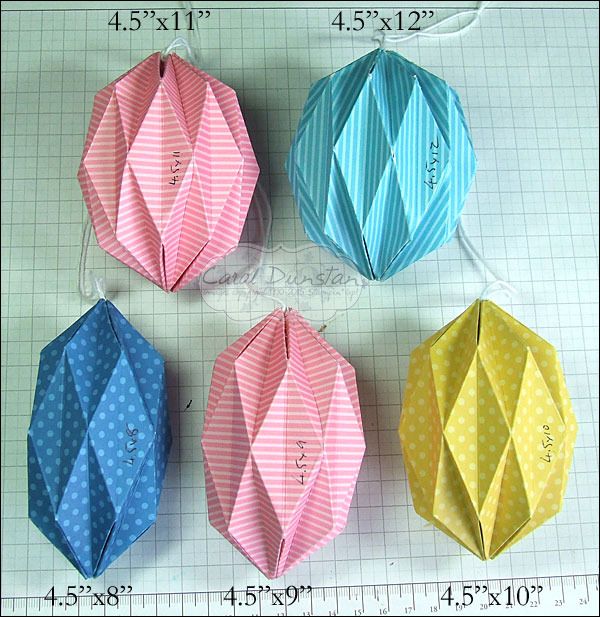
What I love about this ornament is that the basic directions will work for a wide variety of paper sizes. Here are ones I made using Designer Series Paper. After I made a few, I decided I needed to make more to see how the difference in measurements affects the shape of the ornament (because I just couldn't visualise it in my head!). And then I decided I needed to make even more to get an even better idea of this... in the end one of my daughters called them Tribbles due to the regular population explosion!
The measurements on my grid paper are in centimetres with the bold lines being whole cm's and the thinner lines marking half cm's. Being so small these ones were quite fiddly, especially the 2"x8" one as there was so much movement in the center of the ornament it was hard to hold things in the right position while the glue dried.
I've threaded a couple of these through the side as an alternative. I think it looks particuarly striking with the striped paper. I've also cut some paper with the stripes going the other way to see how different that might look.
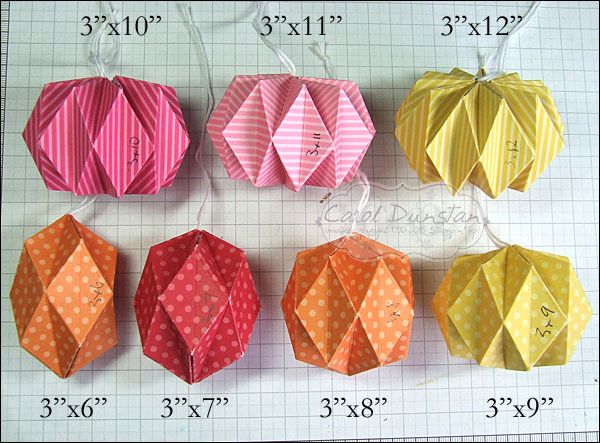
Once you get up to strips 3" wide you can really see how different the ornaments can look depending on how long the strip is.
Basically, the longer the strip is, the shorter and wider the end result will be as the folds are forced into deeper shapes.
3" and 4" are good sizes if you are cutting into a full 12x12 sheet, as you will get 3-4 ornaments from the one sheet.
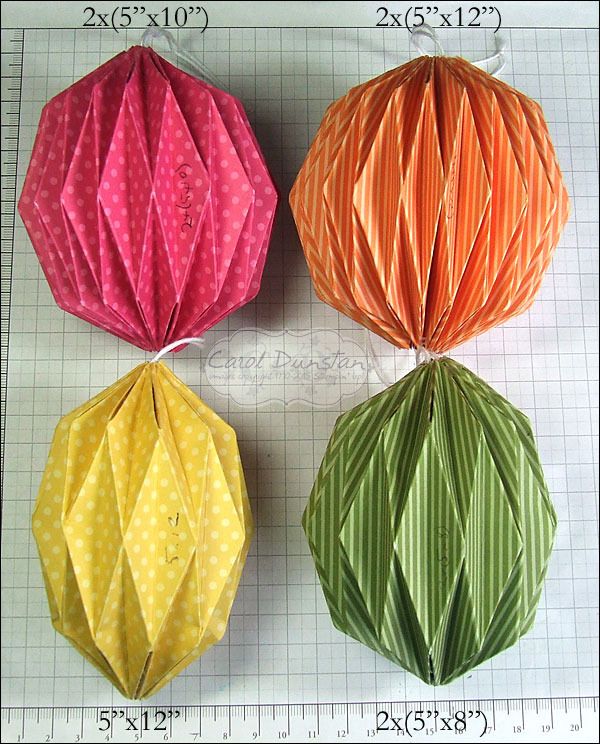
The wider the starting strip, the bigger the ornament... and the heavier!
Particuarly if you join two pieces together.
And then there are sizes that just won't have a neat finish on the end.
This one is 6"x12". Some will come together neatly with a bit of jiggling and squishing, but others will just be like this. Which isn't exactly ugly, but I would probably dress it up with a tassle or something.
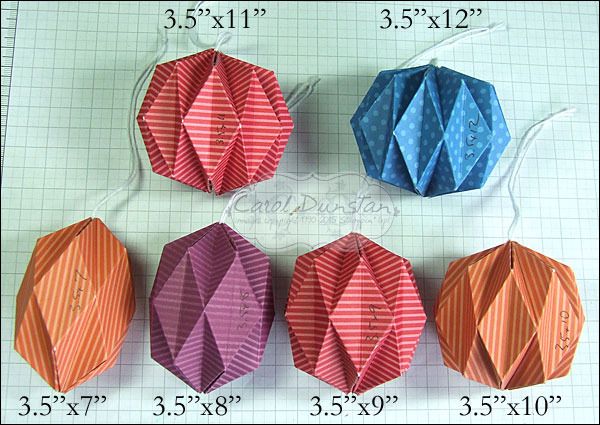
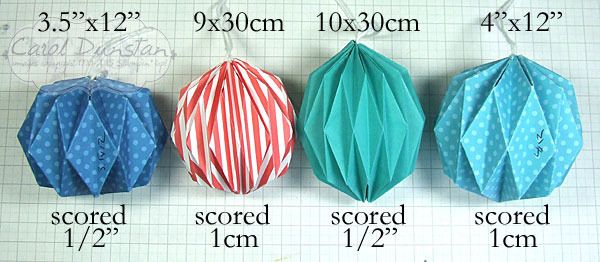
All the ornaments I made with DSP were based on inch measurements. For this tutorial I worked with centimetres, and I also made one with cotton paper 10cm wide. 3.5" is about 8.9cm, and 4" is about 10.16cm. 1/2" is about 1.27cm. With little difference in the width of the starting piece of paper, the small difference between 1/2" and 1cm ends up having quite an influence on the finished shape as well (and yes, I did list both the centimetre ones as being 30cm long though that wasn't actually the case - effectively though they were 30cm with the overlap). Lots of fun to be had here!
Of the papers I used, the envelope paper was the best to work with. The DSP is a good deal thicker, so the folds are more bulky and the ornament heavier - which might be an issue depending on where you plan to hang them. The cotton paper makes nice folds, but is so much flimsier it was probably the hardest to work with.


3 comments:
Thank you so much for sharing your tutorial on this ornament. I can't wait to try it!
Wow! Thanks for sharing such a fabulous tutorial. So much work you've done. These ornaments look absolutely gorgeous.
Oh my word Carol, thankyou for your beautifully detailed tutorial and the extra tips and tricks - the effort you have put into this is just wonderful and I see many ornaments on trees around the country in your honour my friend! You rock and I am thankful for you and your dedication xox Merry Christmas to you and your family my honey xox
love
Adele
xox
Post a Comment