Showing posts with label tutorial. Show all posts

Thursday, December 17, 2015

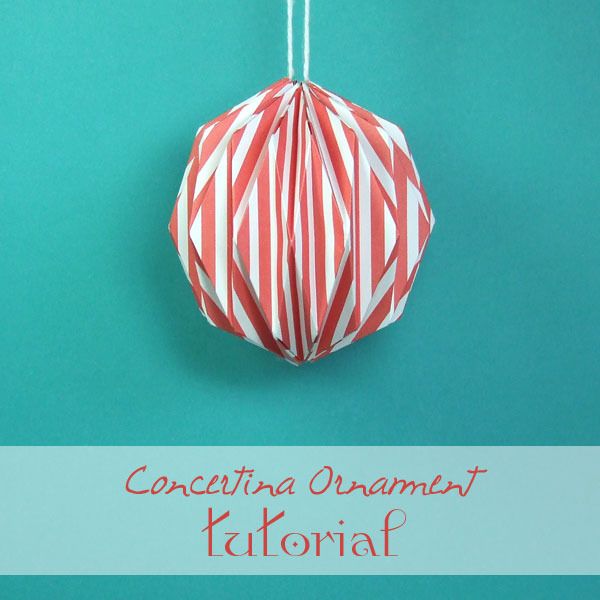
Concertina Ornaments, With Tutorial

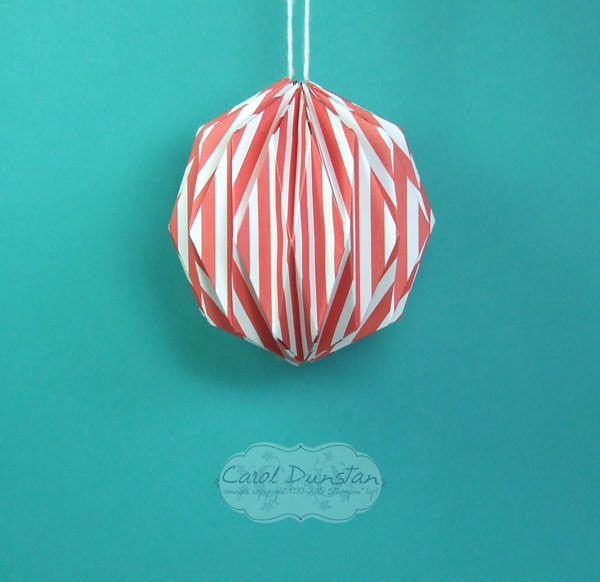
I recently came across some instructions for some paper ornaments that were right up my ally. There are templates to print out, but I suspected that there was much wider scope for the design. So I have been madly folding paper to test my theory out, and happy to say I was right! I have seen this style of ornament given a few different names and ordinarily I would avoid muddying the waters further with yet another name, but given I have released the ornaments from the restriction of a template and because of Tori Amos, I am calling them Concertina Ornaments. So without further ado...


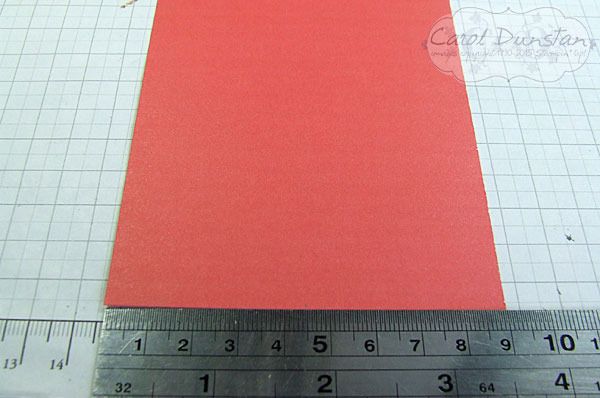
For this tutorial I have used a piece of Watermelon Wonder envelope paper. I simply cut a 9cm wide strip off a sheet of 12x12... so my piece measured 9cmx30.48 cm. More about that later...


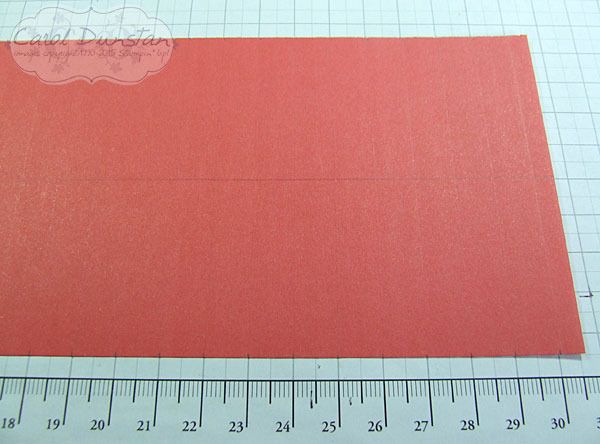
The first thing to do is score vertical lines along the long edge. I chose to work in centimetres for this ornament (more about that later...), so I scored at every centimetre. I used my paper trimmer and it doesn't create a very visible indentation on the paper so it's a little hard to see. After scoring at every centimeter, on the back of the paper I put a small mark at the halfway point on both short edges and drew a line from one to the other. You don't necessarily need to rule the line, but it helps to check that folds are staying on track later.


So the ends of the score lines stood out more I also made small marks for all of those too. Notice that bit of paper from 30cm-30.48 cm? If you are working in centimetres it will make things much easier if you trim your paper down to a whole centimeter...

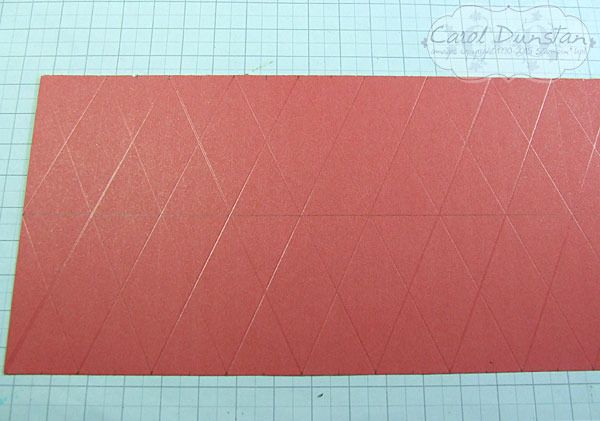
The next step is to create your diagonal score marks. The diagonal score lines should cross the vertical score lines at the middle. On the ends there will be ones that start at the middle point of the short edge... except if you have left part of a centimetre of paper. I strongly recommend trimming that off so you don't accidentally create a score line to the wrong spot. Let my mistakes be a lesson to you!

After all that scoring, it's time to start creasing. I start with the vertical lines, that will be valley folds so you will be folding the paper with the front/right side onto itself.

Once all of those are done it's time to crease the diagonal score lines. These will be mountain folds, so to greate the peak on the front/right side, you fold the paper with the back/wrong side onto itself.

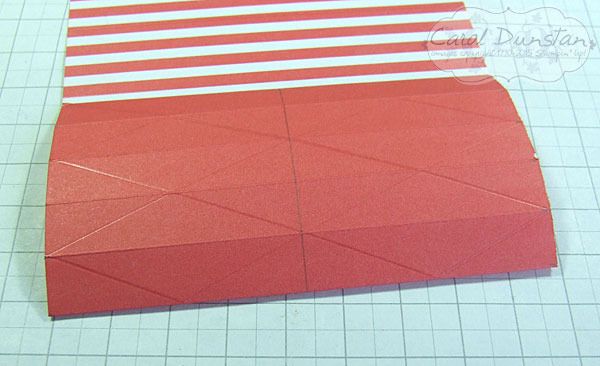
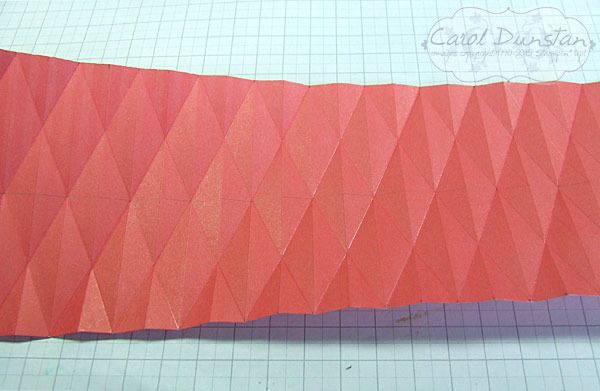
This is what my paper looked like after all the score lines have been creased. You can see from the slight shadows on the paper that little peaks and valleys are starting to take shape.

Now it's time to fold all those peaks and valleys at the same time. It can take a little bit to get it started, but I find that pinching the middle where two diagonal lines cross quite effective. The diamond shapes that all the score lines have created should collapse along the folds pretty easily, and then you'll just need to tuck in the triangles along the edge.
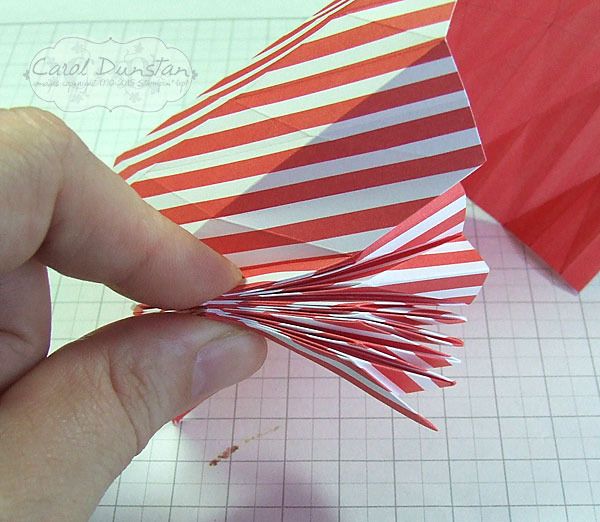
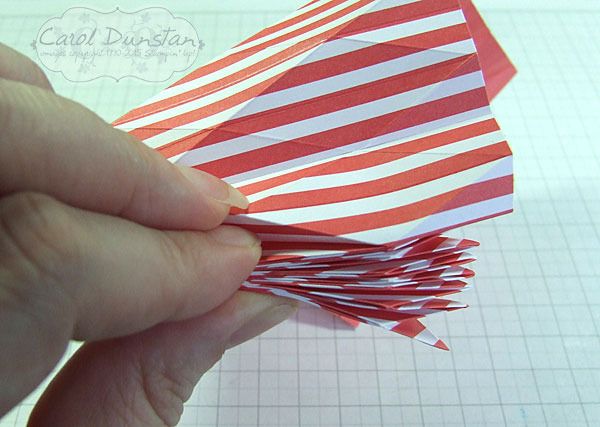
With thumb and index finger pinching what has already been folded I use my middle finger to pull down the next section. Continue like this until your strip is completely folded...

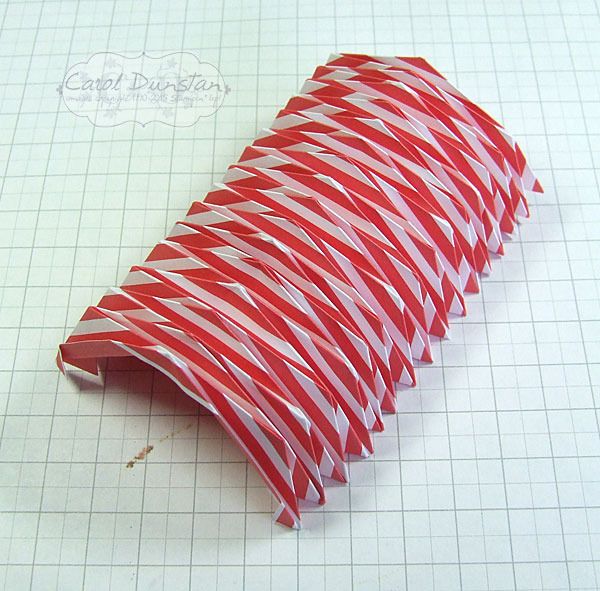
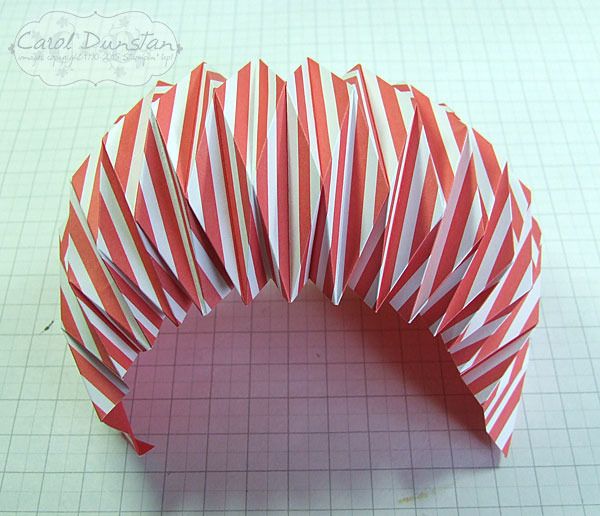
At which point it should look something like this!

Pull the edges of the paper around to start forming the ornament.

Overlap the ends of the paper. How much you overlap depends on the length of your paper, as it is dependant on the folds lining up on both layers. If you are working in centimetres, even numbered lengths will have a whole segment overlap similar to above (though I still have that extra 0.48cm on it...).

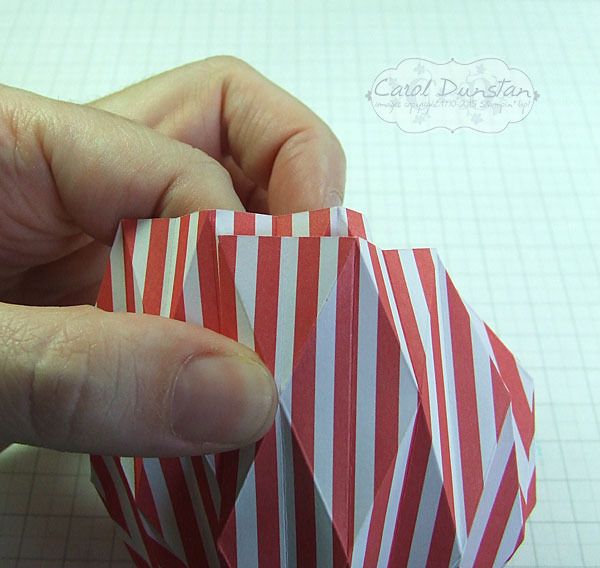
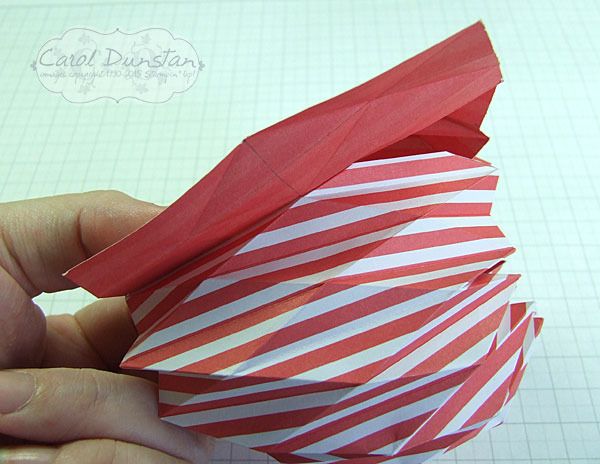
Hold the two layers close to the end of the inside layer and raise the top layer a bit so you can apply adhesive.
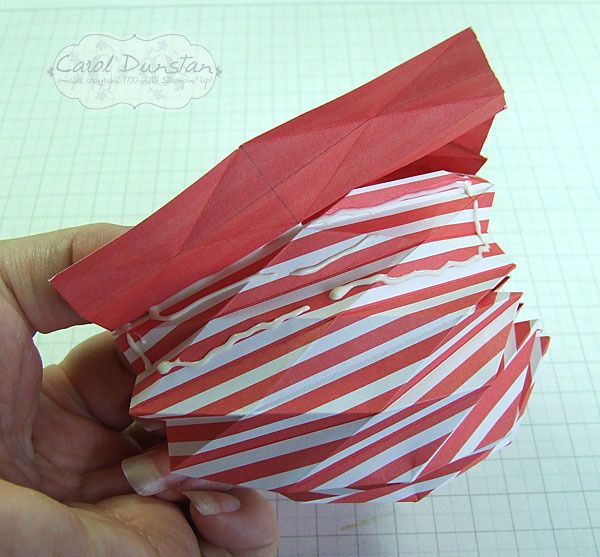
I've used Tombow multi glue, and think glues are the better option for sticking the ornament together. This way there is a bit of leeway for moving the layers as you bend the ornament into it's final shape. I put the glue in from the edge so when it spreads it shouldn't ooze out.

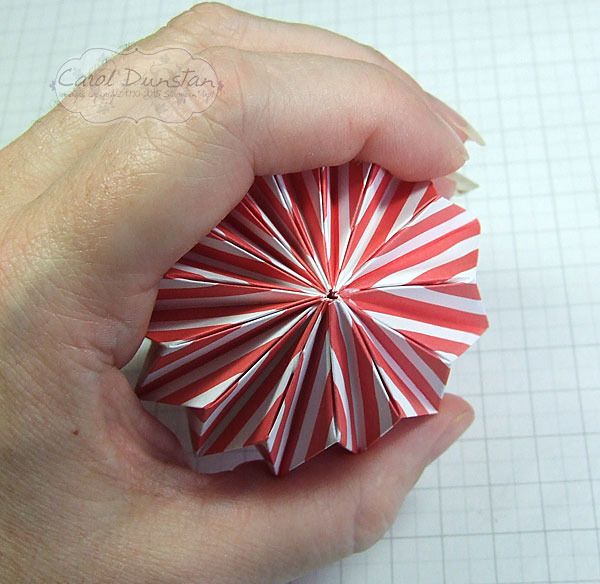
I like to have the ends of the ornament close up tight and tidy, so I use more Tombow here. The instructions I linked to at the top used thread to pull these together.

Once the glue is on, hold the ornament for a while for the glue to dry a bit. You may want to find something else to keep the ornament in shape so you can step away and let the glue dry completely, a clean, dry cup or mug might do the trick, depending on the size of the ornament.

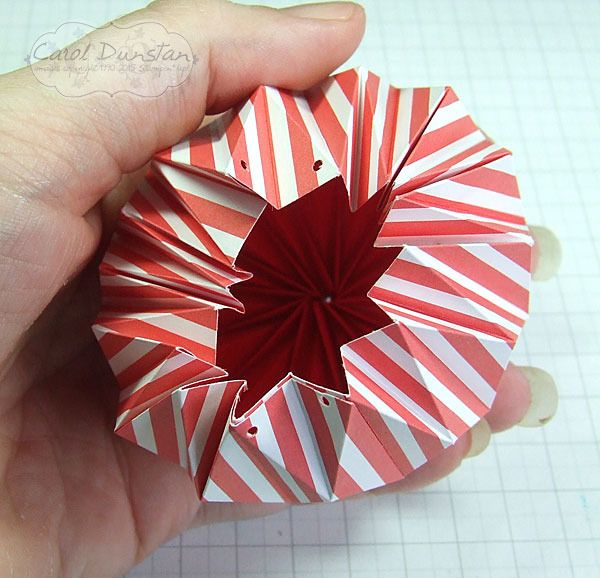
For the top of the ornament, use a small hole punch to make holes on opposite sides of the opening.

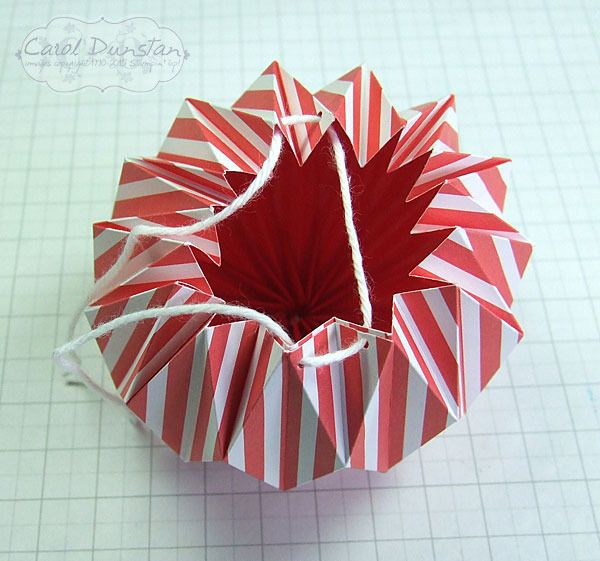
Thread some baker's twine through the holes. Thread the ornament so that the ends will be at peaks of folds when the top is closed, this gives a neater finish.

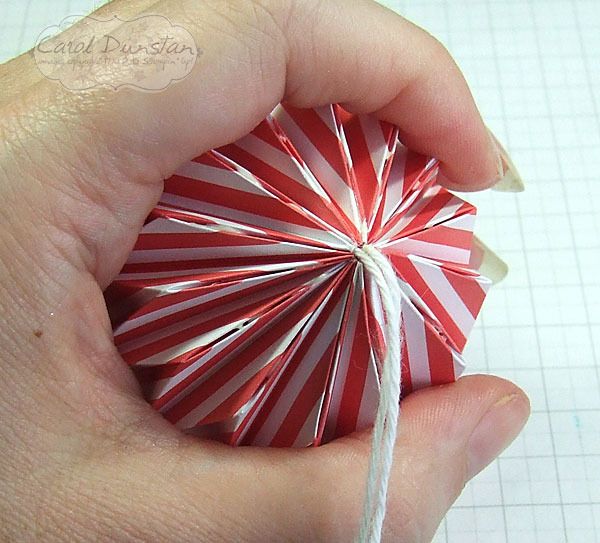
Apply glue same as for the bottom, then hold the ornament to close up the top, pulling through any slack in the twine as you do so.

Voila! Your ornament is finished!


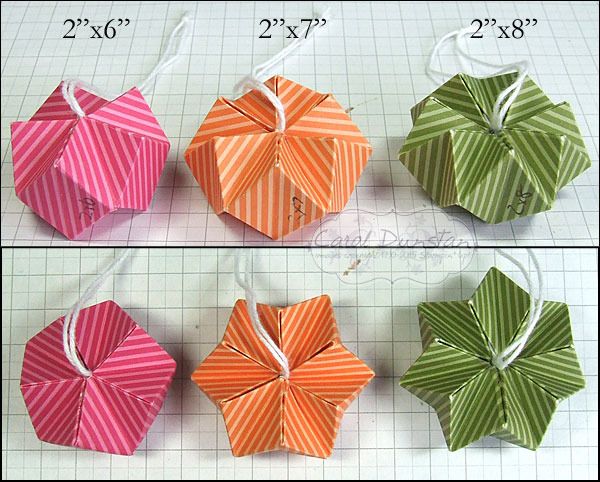
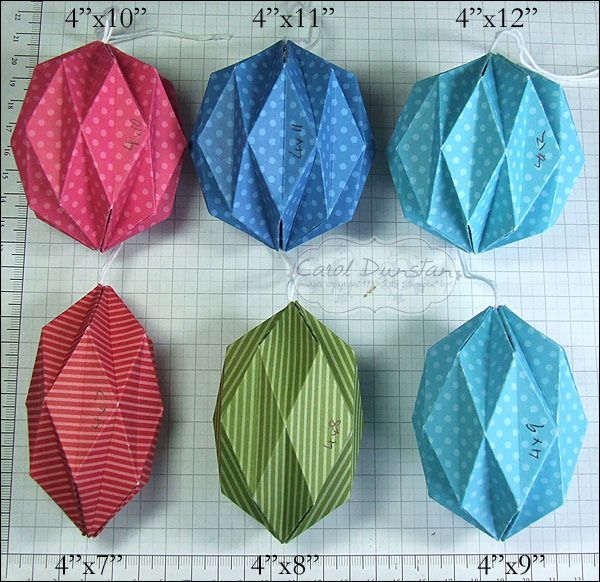
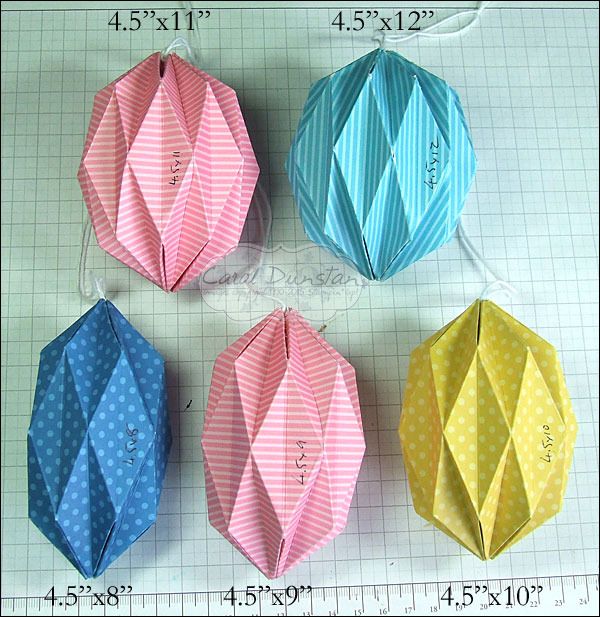
What I love about this ornament is that the basic directions will work for a wide variety of paper sizes. Here are ones I made using Designer Series Paper. After I made a few, I decided I needed to make more to see how the difference in measurements affects the shape of the ornament (because I just couldn't visualise it in my head!). And then I decided I needed to make even more to get an even better idea of this... in the end one of my daughters called them Tribbles due to the regular population explosion!

The measurements on my grid paper are in centimetres with the bold lines being whole cm's and the thinner lines marking half cm's. Being so small these ones were quite fiddly, especially the 2"x8" one as there was so much movement in the center of the ornament it was hard to hold things in the right position while the glue dried.

I've threaded a couple of these through the side as an alternative. I think it looks particuarly striking with the striped paper. I've also cut some paper with the stripes going the other way to see how different that might look.


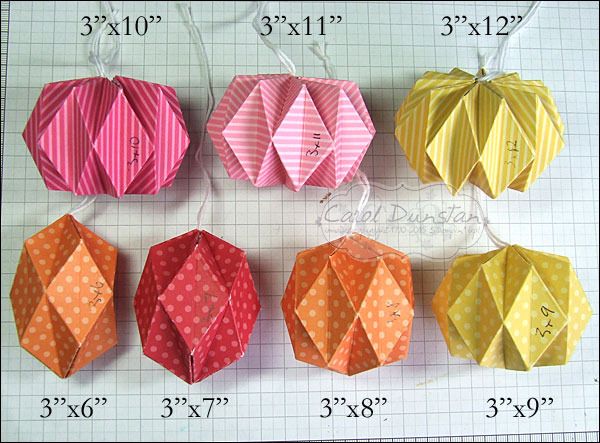
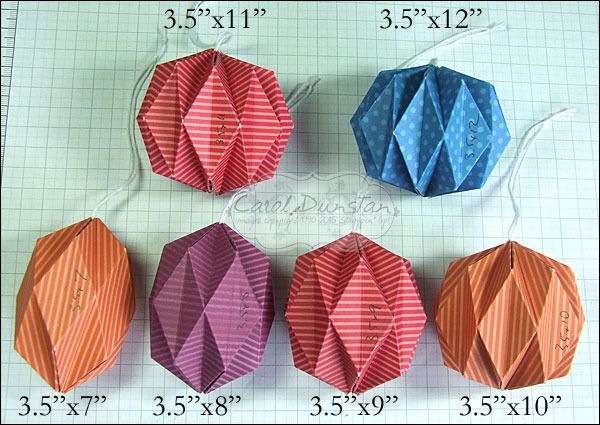
Once you get up to strips 3" wide you can really see how different the ornaments can look depending on how long the strip is.

Basically, the longer the strip is, the shorter and wider the end result will be as the folds are forced into deeper shapes.

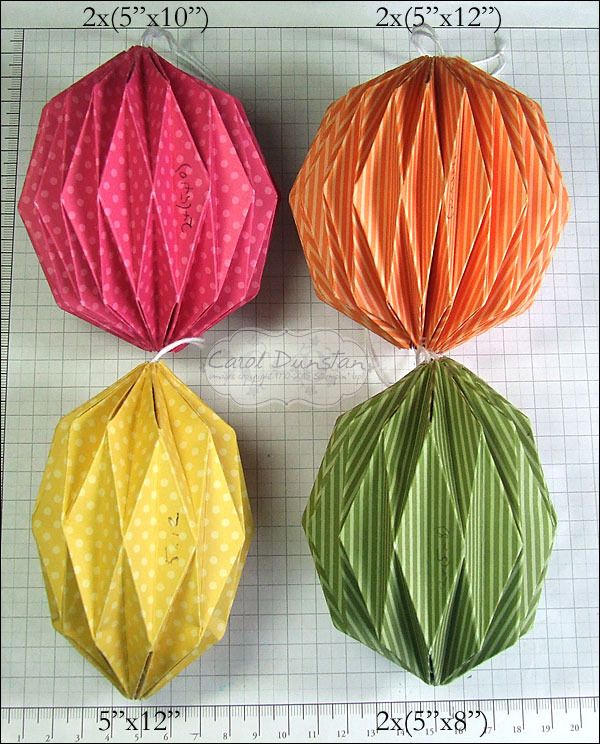
3" and 4" are good sizes if you are cutting into a full 12x12 sheet, as you will get 3-4 ornaments from the one sheet.
The wider the starting strip, the bigger the ornament... and the heavier!

Particuarly if you join two pieces together.

And then there are sizes that just won't have a neat finish on the end.

This one is 6"x12". Some will come together neatly with a bit of jiggling and squishing, but others will just be like this. Which isn't exactly ugly, but I would probably dress it up with a tassle or something.

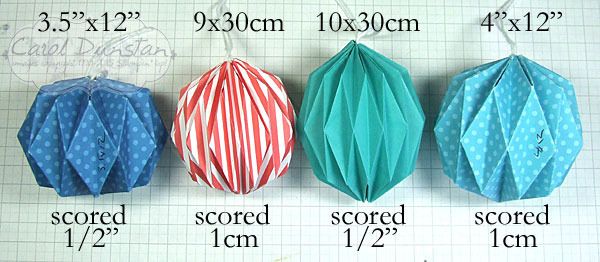
All the ornaments I made with DSP were based on inch measurements. For this tutorial I worked with centimetres, and I also made one with cotton paper 10cm wide. 3.5" is about 8.9cm, and 4" is about 10.16cm. 1/2" is about 1.27cm. With little difference in the width of the starting piece of paper, the small difference between 1/2" and 1cm ends up having quite an influence on the finished shape as well (and yes, I did list both the centimetre ones as being 30cm long though that wasn't actually the case - effectively though they were 30cm with the overlap). Lots of fun to be had here!

Of the papers I used, the envelope paper was the best to work with. The DSP is a good deal thicker, so the folds are more bulky and the ornament heavier - which might be an issue depending on where you plan to hang them. The cotton paper makes nice folds, but is so much flimsier it was probably the hardest to work with.

Monday, November 16, 2015

Stained Glass-esque Tutorial

Before I start sharing new and exciting stuff from the OnStage Local event I attended over the weekend (check back later tomorrow for that!), here's the tutorial for the Delicate Ornaments that I promised.


Firstly, this was obviously not my first time doing this - the day I cut these particular ornaments out I also did a bunch of others I will be sharing over the next few weeks. That said, putting some of those other ornaments together before these particular ones I learned a thing or two, and there's possibly still a few thing I could do to improve it a little but for now this is my best way for doing it. Secondly, yes it is fiddly but it's clearly not so mind-numbingly frustrating that I will never do it again. It may not be for everyone but it is right up my alley!

So on with the tutorial! Firstly, some preparation:
I die-cut ten black ornaments and popped all the little bits out. If you are planning on keeping the bits, do this over a scrap of paper that you can then use to funnel the bits into a zip-lock bag or onto the open flap of an envelope so you can just tip it up and the bits will slide into the envelope when you are done. You will notice there are some little raggedy bits of cardstock from where the other bits were removed. I like to get rid of as much of this as I can, so...
I turn the ornament over a run a sanding block (sadly no longer available, but you might still have some, or a similar item you can use) across the back. It of course works much better if you hold the ornament down, but I needed my hands for holding the camera... so just imagine there's a couple of fingers on the left pressing down on the ornament.
Take away the sanding block and you can see a good deal of stuff has been removed.
Take away the ornament and ooooh pretty pattern!
Then rotate the ornament to rub the sanding block over the rest of the ornament. Remember - this is on the back!
After sanding all over the ornament is much tidier, but there are still a few little bits hanging on. We'll soon fix that up!
To get rid of the stragglers I run a small round file around inside all the little holes (these are also no longer available from Stampin' Up!, but as before you might still have them or something similar you can use).

Once the ornament is nice and tidy I punched ten Basic Black 1 3/4" circles and smothered them in Snail. You need to make sure it is well covered in adhesive as there are some very small bits that you will be putting in and they need something to stick to to stay put. Gently lay the die-cut over the circle to make sure you haven't missed any key areas before sticking it down completely. Then it's time to start sticking the coloured bits in!
From working on the other ornaments I found the best way to do this is to pop them out of the coloured ornament and stick them where you want them straight away. This minimises losing any of the little bits (though you may find some do pop out before you are ready for them, as you can see above I have a few of the Daffodil Delight pieces sitting over to the left waiting their turn) and makes things go a little faster as you are not spending time looking for particular shapes among the jigsaw pieces. For the really small ones that just won't move by simply pressing on them with fingers I use the small end of the tool from the Simply Scored board and they usually pop out pretty easily without having to press too hard. Oh and you'll need to put something behind that slit at the top so those bits have something to stick on to...

After working through all the colours you will end up with something like this:
This is where you sit back and admire your stunning work. I love just looking over these and seeing how the different position of colours changes and how the look of each ornament is subtlely different.

I thought rather than putting up an image of the ornaments after each colour was done - and making this post even longer than it already is - I would just include this:

Once I mounted these to my card fronts it looked something like this:

So there you go! I hope I have inspired some of you to give this a go. It did take me a couple of hours to do all ten ornaments, but that was also with stopping to take photos. I would probably easily spend more time making ten cards normally though it might take a little longer than making ten of the same card in normal production-line card making. I think for the stunning outcome it is worth it, but do understand it might be a little daunting to consider if it's the first time you've done anything like this! If you don't like the idea of putting all those pieces in to fill the whole ornament, you could try just doing the strip across the middle, or just the flowers. If you do have a go, I'd love to see yours so leave a comment and let me know where I can find yours to have a look at :)

Thursday, May 17, 2012

Multi-Colour Lace Ribbon Tutorial

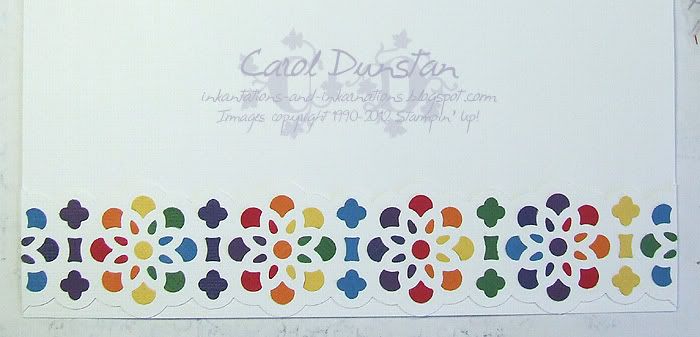
So here it is, a tutorial for the Lace Ribbon punch. Instead of simply remaking the original card for this I made a completely different card for two reasons: black can make it hard to see things sometimes, and you don't have to have an 18-shade rainbow (just in case you were wondering ;) ).

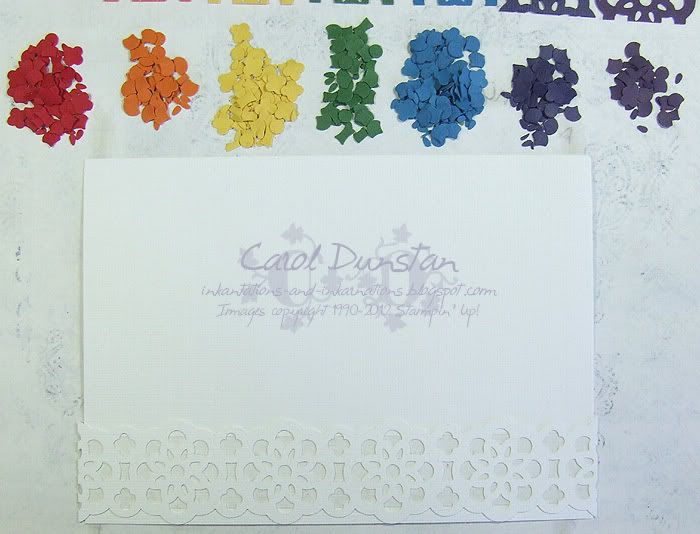
So to start, I punched the strip I will be insterting the little pieces into. I thought white would be nice this time.
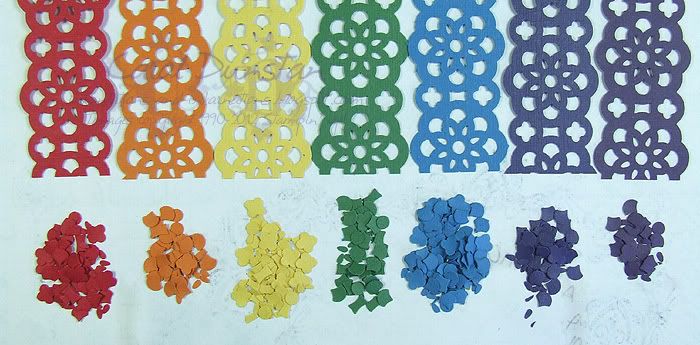
Then punch the colours you want inside the lace ribbon. Still liking rainbows here so I chose these ones. These are actually left over from the other card, I kept the little pieces in zip-lock bags. The really little ziplock bags you get spare buttons and things in when you buy an item of clothing come in really handy for this. Individual ones save sorting out later (speaking from experience...), but I also keep the colour families in a larger ziplock bag to make it a little easier to organise.

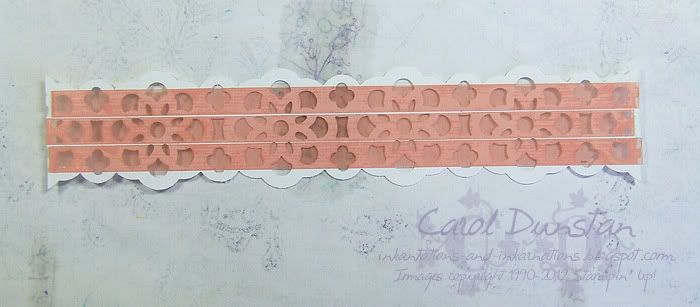
Attach sticky strip to the back of your lace ribbon piece. Three pieces fit nicely.

Attach lace ribbon to your cardfront or layer. It's hard to see the sticky strip now that the red backing has been removed, but it's there peeking through the 'holes'. I like to attach a slightly larger than needed piece and then trim it down as it is easier to center.

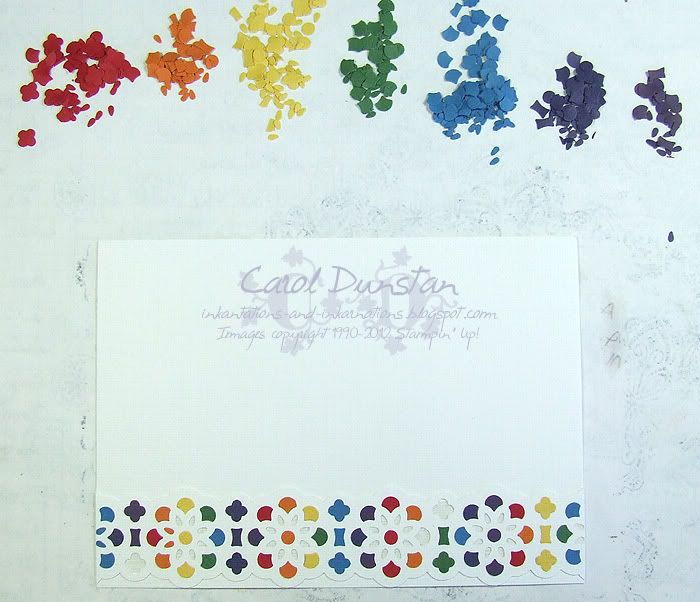
I think start filling the "holes" in. I do the large ones first and then do the smaller inside pieces next to reduce the chance of sticking yourself tot he card (speaking from experience). There's a couple of pieces I ran out of so I had to punch a few more to finish it off.

And here it is, all filled in! You may have noticed that I changed the colour of some of the small inside pieces. I had put a few in place, then after looking at it with all the larger pieces in realised it would look better if I changed how i did those inside pieces. Sticky Strip being very sticky in nature, I had to use the paper piercing tool to carefully dig them out.

And here's the finished card! I like keeping the rest of the card very simple so the lace ribbon really stands out.

All supplies by Stampin' Up!
Cardstock: Whisper White, textured cardstock in Concord Crush, Elegant Eggplant, Real Red, Pumpkin Pie, Daffodil Delight, Garden Green, Pacific Point
Stamp set: Perfect Punches
Ink: none!
Accessories: Lace Ribbon punch, Decorative Label punch, Extra Large Oval punch, markers in Concord Crush, Elegant Eggplant, Real Red, Pumpkin Pie, Daffodil Delight, Sticky Strip, dimensionals
Show watched while creating: Sherlock

Saturday, November 07, 2009

Double-Ball Ornament

I'm very excited to let you all know that I have had a tutorial published! Beate asked me to provide a tutorial of the double-ball oraments I shared last year (second image on this post) for Splitcoast Stampers, and today it is up! They are very easy, and only use small pieces of DSP so it can even be made with scraps. Head over to Splitcoast for the full list of supplies as well as photo and videos of the tutorial. I've just thought of a tweak for these too, so I shall give that a go later and share with you too :)