
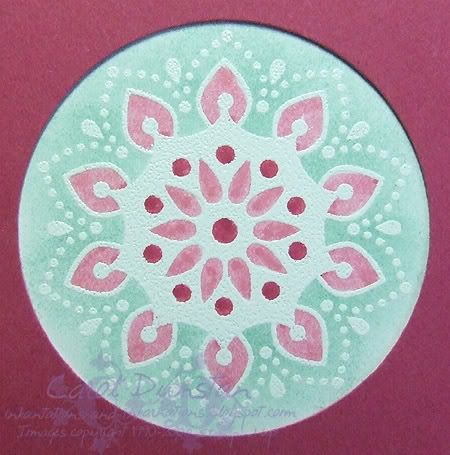
To start things off I thought I would share some comparison shots. When I first posted my card I mentioned that I had rejected a similarly coloured image for that card. You can see this reject below, showing what an image could look like just using the markers to colour.
 The central petal shapes have a dark spot in the middle and the outer petal shapes have a dark spot at their point where the marker has gone over the same place twice, concentrating colour in this small area.
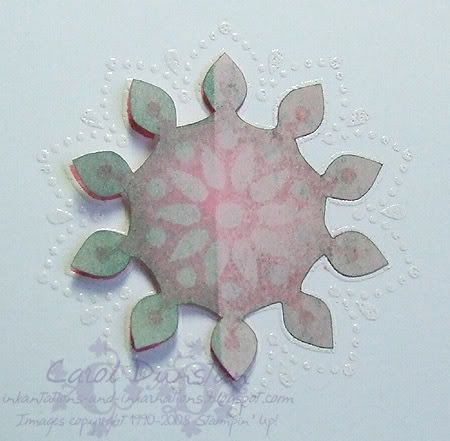
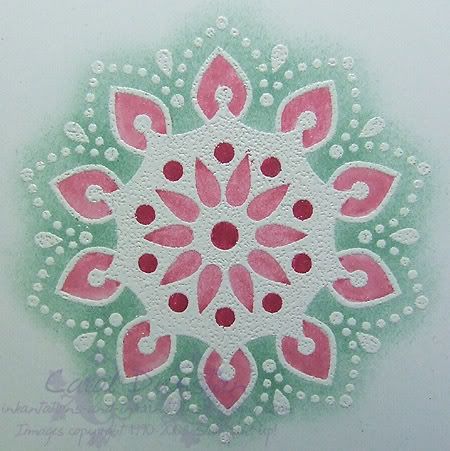 This is a close up of the motif I did use on the card I posted, where I wet some areas with my Aquapainter before colouring. As I was colouring it on the fly, I didn't use water on the inner petal shapes. I did however change the direction I coloured the central petals, starting at the point, down one side and then up the other. The over-lap is quite noticable on some petals, but by changing where the marker was last in contact with the cardstock I have deliberately used what may be an undesirable effect, that dark spot where colour pools, as part of my design. The outer petals were each coloured by first wetting the area with the aquapainter and then colouring with the marker. Having the cardstock damp before you start to colour helps the colour spread, minimising harsh lines of overlapping.
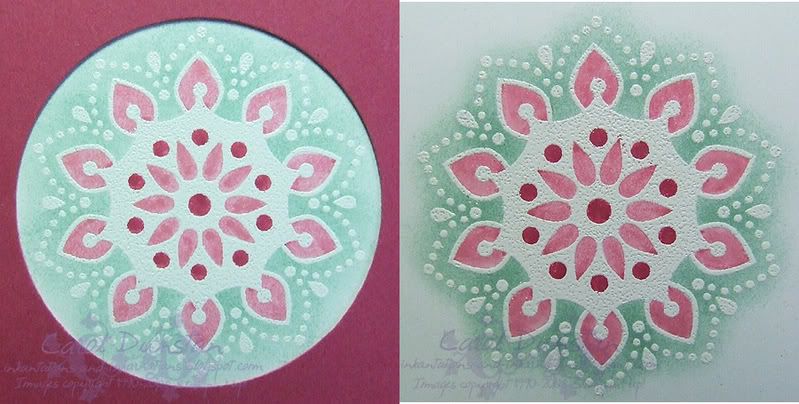 I thought I'd give you a side by side shot of these first two images for easier comparison. Click to view larger.
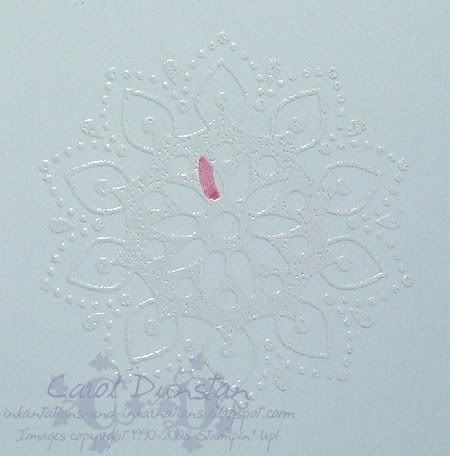
OK, now on to step-by-step instructions! To start, you'll need to stamp and emboss your image. I stamped in VersaMark and embossed with detail white because that's what I had close at hand, hence the uneven coverage over the solid area. If the image looks like it has a pink tinge that is because I hadn't cleaned it after stamping the background of my second card and there was still some Regal Rose on it. Oops! You'll also want your aquapainter and marker of choice.
 I decided to start this off with a "worst case scenario" shot, colouring in one side of the area and lifting the marker. Notice how the colour has pooled where the marker last had contact with the surface?
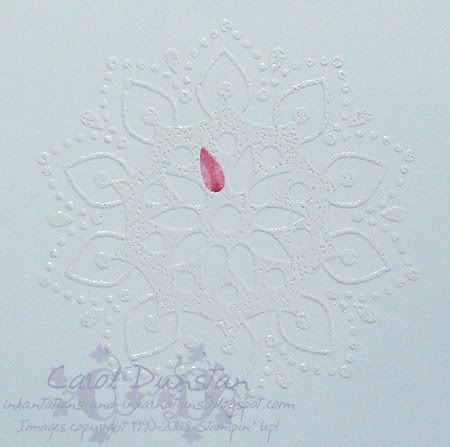 Here it's twice as bad, as it now has twice the ink on it! In this instance there is also a large area in the middle where the strokes have overlapped. You could of course use this as an effect, replicating it in each petal, but that's not why we are here!
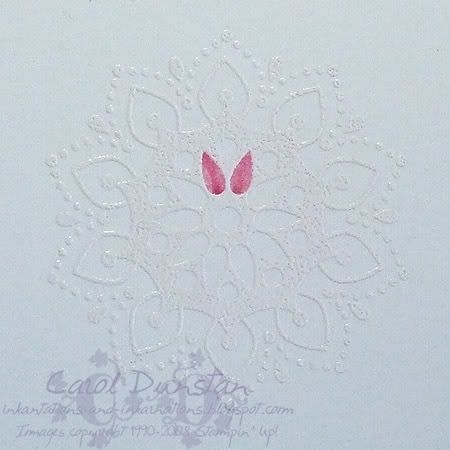 This shot is a slightly less "worst case scenario", I have coloured the area with a single stroke. The colour is much more even but there is still quite a puddle of darker colour where the marker was lifted up from.
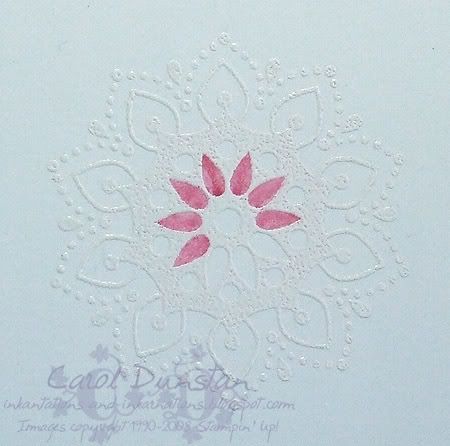 Here I have coloured the rest of the petals by first swiping the aquapainter over the area, then colouring it. I do each section individually: wet then colour, wet then colour etc. This way the area is still quite damp when you add the colour. You should be able to notice that the colour is even more evenly distributed and there is very little "pooling effect".
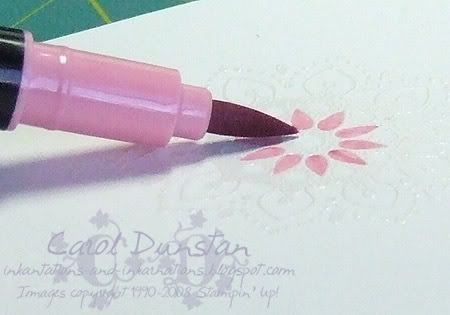 To colour the petals most efficiently this is the angle I hold the marker. Sometimes you may miss colouring a small bit (eg along one edge). I have found it is best to touch these up with the fine or writing end of the markers, and the sooner the better while the cardstock is still slightly damp to help minimise any harsh over-lap lines.
 I didn't bother wetting the circle areas before colouring as there was little variance in colour on my other attempts at this. You'll notice some haven't been completely coloured, check the later images and see if you can notice where I have touched them up.
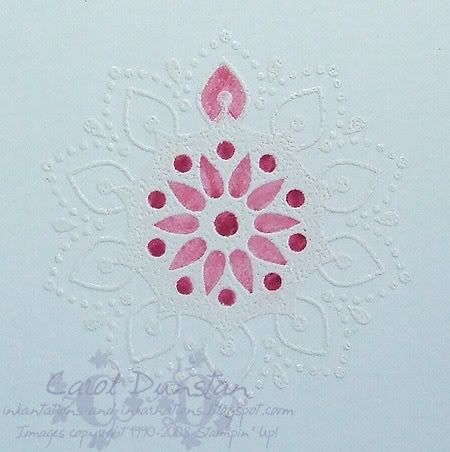 Now to colour the outer petal shapes. Once again I have started by not using water. This one was coloured with one stroke, starting at the bottom left, up tot eh top then down to the bottom right. You can see at the top that there is a dark spot where I paused with the marker before changing direction.
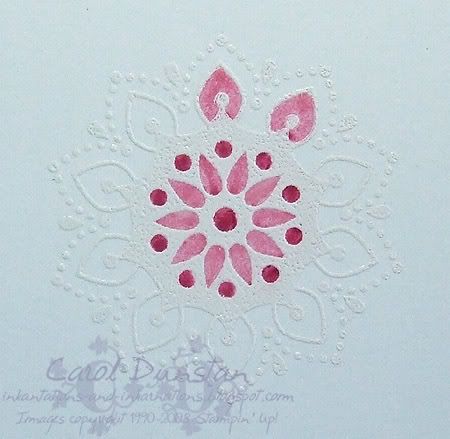 The second petal has been coloured the same way, but the cardstock has been wet first. the "pause spot" isn't quite so dark and defined. It's still not as good as it could be though.
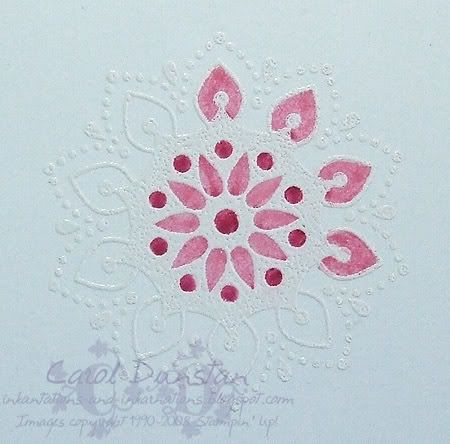 The next two petals have been coloured by wetting first then using the marker. The third petal still has a pause mark as I came at it from the same angle. The fourth one was coloured by turning the cardstock so I could colour from side on, as seen below.
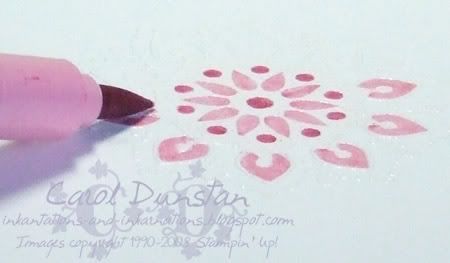 Instead of colouring from bottom-top-bottom or vice-versa, I have coloured the remaining petals by starting at the bottom right, going to the left and then sweeping up to the top right. By colouring it from this angle I can get a more continuous movement and thus barely pausing as I change direction.
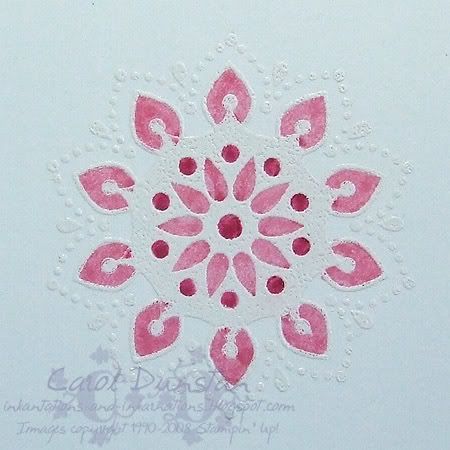 And here we are with all the petals coloured in. Ignore the large blob on the bottom petal, that is where the marker slipped while I was taking a photo! Personally I don't think these outter petals have been executed as well as the ones on the card I posted the other day, but I think you can still see the difference. You'll undoubted get some colour on top of the embossing, just wipe it off with a tissue.
And since I showed you all, that I thought I may as well go ahead and finish the image, so here are a few shots of sponging around the motif.
 Firstly, this is my mask to cover areas I don't want to sponge. The image was stamped on a Post-It note and then cut out. On these particular Post-It notes the sticky seemed to resist the ink. It was also when I went to use this for the first time that I discovered just how unsymmetrical this image is! Don't be surprised if you sit there for a minute rotating that bit of paper till you find which way it goes (note to self: mark the top with a T so you don't waste so much time next time!)
 Here I have done my first little bit of sponging: dabbing the dauber on the inkpad a few times then dabbing over the motif. I don't always dab when I sponge, but if I want a really soft effect it is what I find myself doing. I work from the middle out, dabbing lightly to start with and then heavier as the ink is used up and less ink is coming off on to the cardstock.
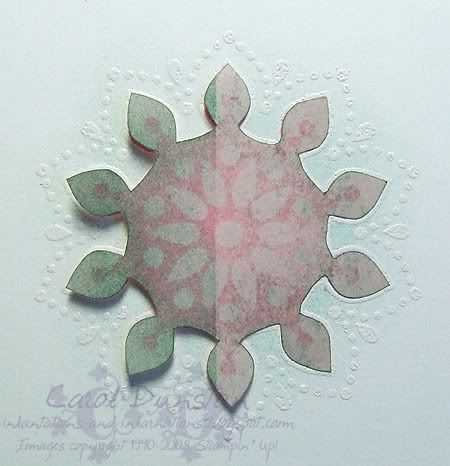 Here I have gone all around the motif at least once (sorry, I didn't take notes as I took the photos!). Most of the colour is between the petals with very little out to their tips and beyond.
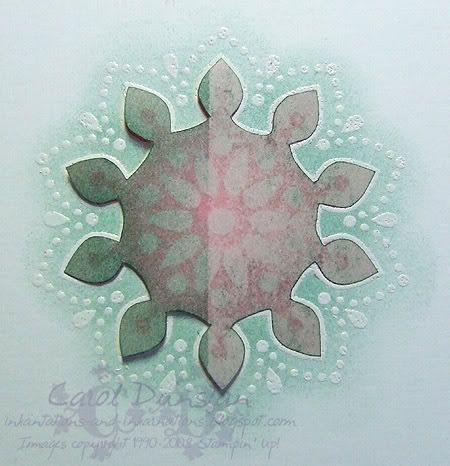 And here we are, fully sponged around the motif so the white embossing shows up better. As I wasn't planning on using this for a card, and I was rushing at this point, I haven't been completely careful with my sponging and can see a few places where I have dabbed a bit too hard towards the edge. If I was going to use this I would continue to work on it, even things up a bit and disguise those dark spots more.
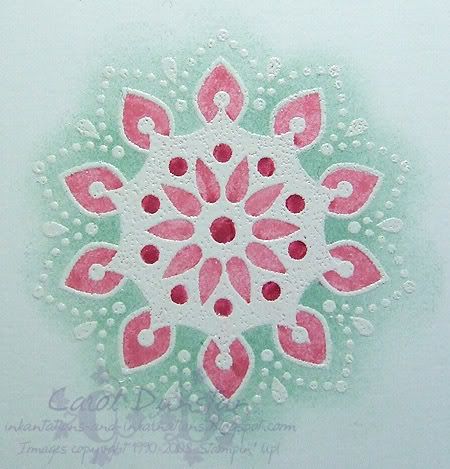 And here we are with the mask removed and our image is finished!
So there you have it, now you hopefully have a better idea of how I coloured that image and I hope find it helpful in getting more use out of your markers. If you want to try this out for yourself my basic tips are:
~ use a light hand. The more pressure you use the more likely you are to rough up the surface of the cardstock, causing pilling and things can get a little ugly then.
~ lift the marker as little as possible. The less you break contact with the surface, the less "pooling" you will get.
~ the more continuous the motion you use to colour, the less likely you are to get "pooling".
~ hold your marker at a low angle to increase the area in contact with the cardstock, thus reducing how many movements or strokes you will need to colour an area.
~ wet each area just before you colour it. You don't want to flood it, just have it nicely damp when you colour (there are no shots of this as the water soaked in too quickly to be visible by the time I had the camera ready). Wetting the cardstock helps the colour spread and give a more even result.
~ touch up with the fine/writing end of your marker
If you do give this a try I'd love to see your results, so leave a comment with a link so I (and others) can check it out
11 comments:
Thanks for that Carol! I never would have thought of dampening the cs first, I always try to blend the marks away after! I have found, however, that this is easier to do on Very Vanilla rather than White...it seems more *forgiving* and I've had some success (on small areas) with colouring and then blending with the aquapainter on the Vanilla.
I have never thought of using a post-it to make a mask...great idea!
This looks great Carol!
Great Tutorial.
Just stunning! fantastic technique and results. Love your tips thank you so much for sharing them! :0)
thanks for a great tutorial =)
Thanks so much for this tutorial Carol! You make it sound very easy and look so effective! :)K
Thanks for the great tutorial on you coloring method Carol!
I've given you an award on my blog - so hop over and check it out!
www.createwithjulia.blogspot.com
Great Tutorial and fantastic idea for your card. Look forward to meeting you tonight!
Dani
too clever :Lavs
Fabulous tutorial!! TFS!!!
Post a Comment