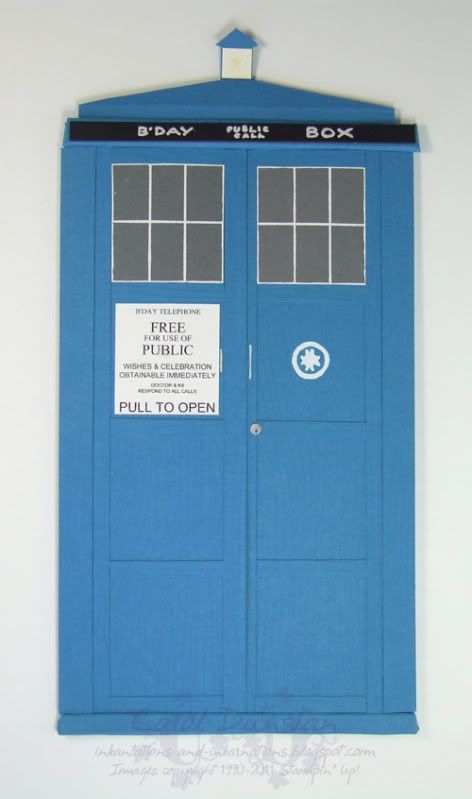
Finally back with a new project to share. This was Tiarna's birthday card this year, and I usually try to make something a little more interesting than your average birthday card when it comes to my kids - inspiration permitting! They have been getting into Doctor Who quite a bit so I decided to try my hand at making the Doctors' TARDIS.
I based my design on the original TARDIS (yes, there has been more than one) as I had better reference pictures for that, but I wanted to incorporate the woodgrain texture that is more prominent on the current TARDIS. I also would have prefered Brilliant Blue for the cardstock (turns out it has a use!) but I didn't have any left so made Pacific Point the new TARDIS Blue. I did make a few other changes such as simplifying the St Johns Ambulance logo, the wording on the phone door sign, the sign across the top, and the windows (the two corner windows in the bottom row on each door should be frosted and the others clear) - I just could not think of a way to pull them off without throwing off other aspects of the construction. The light on top is a bit of a disaster, I kept putting off dealing with it in the hopes a brilliant idea would come to mind but alas that still hasn't happened!
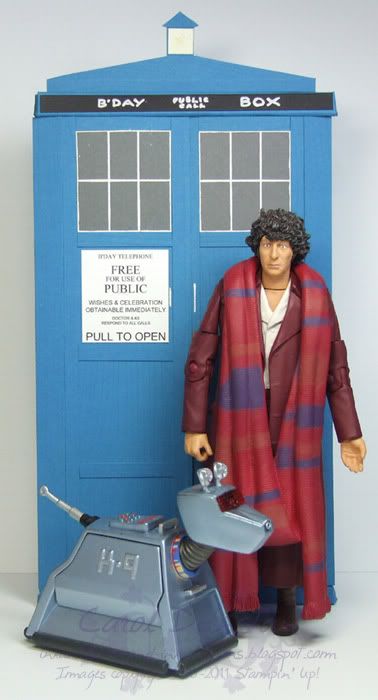
In the above photo you get a better sense of the 3D nature of the card (click on the image to see it full size). I wanted the sign across the top and the base/step at the bottom to be more prominent, and they also help to keep the card shut. They are essentially little boxes that were fiddly to make and attach and are a little worse for wear a month on. The top of the TARDIS slopes back towards the light with Dimensionals along the bottom holding that section up and a tab at the top folding under so it is nearly flush with the back of the card.
And as it turned out, the scale wasn't too bad for the Doctor & K9 action figures she received!
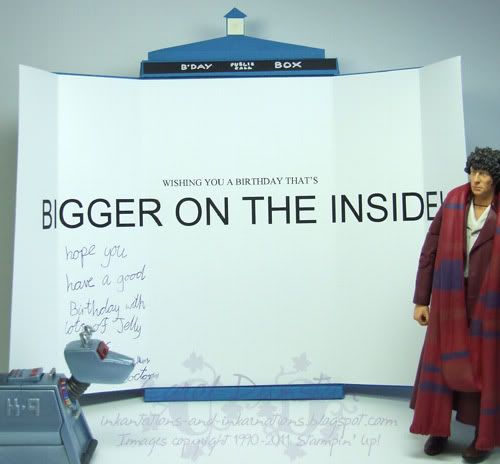
Two things I really wanted to achieve with this card: it had to be gate-fold so the doors opened in the middle as the real TARDIS doors do, and it had to be bigger on the inside as the real TARDIS is. Turned out that was probably the easiest bit of the card!
The card was an absolute hit, which I was pleased about as you can probably imagine. Only thing is I have to come up with something else for the next child's birthday in less than a weeks time... meep!
Most supplies by Stampin' Up!
Cardstock: Pacific Point, Basic Gray, Whisper White, Basic Black, brushed silverStamps: Woodgrain
Inks: Tempting Turquoise, So Saffron
Accessories: White gel pen, dauber, Crop-o-dile, silver gel pen, biro
Showing posts with label stamping. Show all posts
Friday, October 14, 2011
Monday, September 20, 2010
Woot(ten)!
Hello again! Yes it's been a while since I posted (yet again!), had a bit of a break from stamping & completely fell out of the habit of taking photos of things when I did create (let alone the editing, uploading & composing...). But I have finally made it back, and tonight I'd like to introduce you to a little friend of mine.

This is Wootten. You may recall me previously mentioning that my Big Shot was named "Barry" the moment I opened his box. Since then I have dubbed my Circle Scissors "Cecil". Well, the latest tool that I am on a first-name basis with is Wootten the two-step owl punch. The punch itself doesn't look that cute, so the name applies more to the owls I make with it (yet to make a girly one, could be in for some adventures there!). This particular owl was made using the colours from this months Elite Challenges Blog colour challenge. To see the full card and product details, head over to the Elite Challenges Blog. If you attend any of my workshops this month you will see me make a very similar card to this, and see how cute he is for yourself!

This is Wootten. You may recall me previously mentioning that my Big Shot was named "Barry" the moment I opened his box. Since then I have dubbed my Circle Scissors "Cecil". Well, the latest tool that I am on a first-name basis with is Wootten the two-step owl punch. The punch itself doesn't look that cute, so the name applies more to the owls I make with it (yet to make a girly one, could be in for some adventures there!). This particular owl was made using the colours from this months Elite Challenges Blog colour challenge. To see the full card and product details, head over to the Elite Challenges Blog. If you attend any of my workshops this month you will see me make a very similar card to this, and see how cute he is for yourself!
Thursday, July 08, 2010
Inklings Christmas in July Blog Hop
Welcome to The INKlings’ Team’s Christmas in July blog hop. You may have arrived here from Dani's blog or just be visiting my blog, whichever way once you’ve checked out my creations you can continue the hop through the links at the end of this post to the next team member.
How quick is this year going! Have you started to think about your Christmas cards and projects yet? The INKlings team has and we thought that this month was the perfect time to host a Christmas in July blog hop. You'll find lots of great ideas provided by 17 team members’ fantastic blogs.
Want to win some Blog Candy? Simply leave a comment on each blog and then email Christie Wallace and let her know you’ve done so and you’ll be in the running for a fantastic prize of 17 handmade cards plus other goodies.
Sorry Blog Candy prize not available to SU! demonstrators but you're more than welcome to leave us a comment!
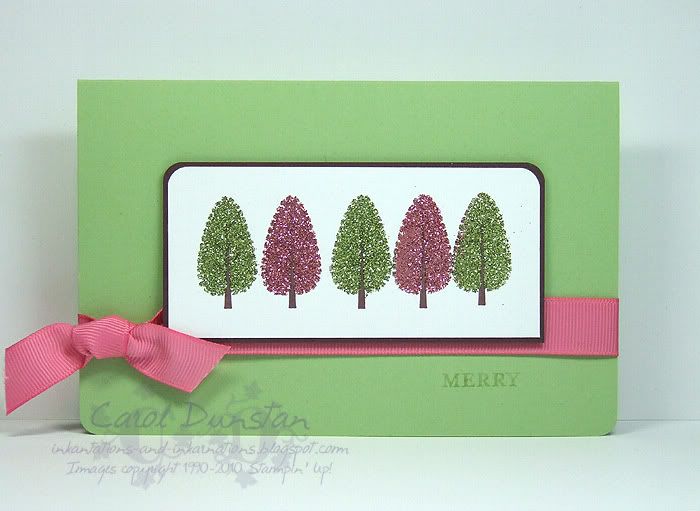
For my Christmas in July project I thought I would show you a Christmas card made using a non-Christmas set. Not surprisingly it's not a traditionally styled Christmas card, but it works!
I have used the Trendy Trees set in conjunction with Heat & Stick powder and the Supernova glitter to make this fun and funky card. I started by stamping the tree trunks, and then each tree top was done individually. The tree top is first stamped with VersaMark then sprinkled with Heat & Stick powder, and the excess powder tipped off before heating with a heat gun - just like embossing powder. When the Heat & Stick powder has just melted it will be tacky, so turn off the heat gun and cover the image with the glitter of your choice, once again tipping off the excess (and it can be returned to the container). Reheat the Heat & Stick with the heat gun and the glitter will set, and very little glitter will then come off to haunt you, or the card recipient, for the rest of your days...
All supplies by Stampin' Up!
Cardstock: Certainly Celery, Chocolate Chip, Whisper White
Stamp Sets: Trendy Trees, Punches Three
Inks:Certainly Celery, Chocolate Chip, VersaMark
Accessories: Heat & Stick powder, Fine Supernova glitter, 3/16" corner rounder, Regal Rose 5/6" grosgrain
That’s it from me. Your next stop on the INKlings’ Team Blog Hop is Michelle. Have fun and don't forget to leave a comment on each blog to win some great Blog Candy.
Bloghop for Christmas in July
1. Christie
2. Dani H
3. Carol
4. Michelle D
5. Jayne
6. Kylie
7. Kari
8. Dani F
9. Beth
10. Nicky A
11. Clare
12. Amy
13. Fiona B.
14. Michelle F-S
15. Fiona
16. Divya
17. Rachel
Tuesday, June 15, 2010
She's Got Dame Edna Eyes
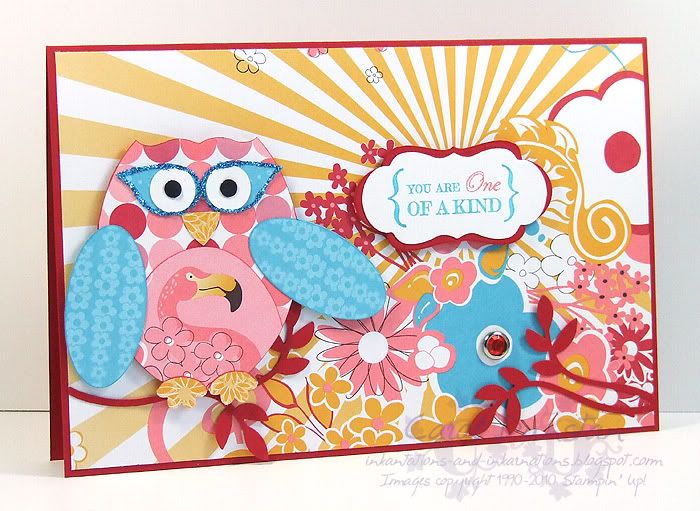
I love owls, and I love creating them with punches. While I've really liked the owls I have created, I wanted to be able to make something larger, an owl that would dominate a card front. So I turned to Barry (my Big Shot) and put him to work with the ovals die. I was obviously going to be making some bigger owls, with bigger ovals for the base, but I looked at my punches and tried to think of some other new features I could make with them. And then I noticed a spare wing on my desk, from using the Two-Step Bird punch on another project.
And Dame Edna Owl was born!
Hello owlies!
Of course I had to use bright colours for the Dame, so I pulled out the Pink Flamingo DSP pack and selected my papers and got Barry to work on them. With the papers all spread out, I spotted the "sun rays" sheet and immediately knew how I wanted the rest of the card to go. When I came to put it together however, I realised that it just wasn't all going to fit on a standard card front. Some years ago I was given a bunch of larger envelopes, and I still have quite a few left (all really bright ones... think Yoyo Yellow). I grabbed one of these envelopes and measure it up and made my card to fit. Now the Dame had space to stretch her wings! And because I loved the effect so much, I once again layered the Lots of Tags die on the similar Frames With A Flourish image for the sentiment.
Remember, Pink Flamingo is one of the 5 DSPs on special this week as part of Deals Of The Week. But tonight is your last chance to order it at the special price, so be quick & don't miss out!
All supplies by Stampin' Up!
Cardstock: Real Red, Whisper White
Stamp Sets: Frames With A Flourish, One Of A Kind
Inks: none
Accessories: Pink Flamingo DSP, Ovals die, Lots of Tags die, Two-Step Bird punch, large oval punch, Curly Label punch, Boho Blossoms punch, 3/4" circle punch, 1/2" circle punch, Crop-a-dile, 5 Petal Flower punch, Circle Fire rhinestone brads, Real Red marker, Tempting Turquoise marker, Cameo Coral marker, Tombow mono glue, fine Supernova glitter, dimensionals
Show Watched While Creating: True Blood (WARNING: there will be season 3 spoilers on this page so careful what you look at or read!)
Monday, June 07, 2010
Colour Renovation Re-do
Stampin' Up! recently announced they were renovating their colours, with a complete shake up of how they group colours and what colours they will carry over the next few years. As part of this change they will be introducing 5 new colours as well as making Kraft a new core colour so it will have a coordinating inkpad and many more coordinating accessories (oh I am so cheering for that one!). Another aspect of this change is many current colours will be retiring at the end of our current catalogue. While I am sad to be waving good-bye to some of them, others I am very glad to finally give the boot (Yoyo Yellow & Only Orange you know I am talking about you!).
Why I am I telling you all of this? There are a couple of reasons, but the first is to do with the card you see above. As I was going through things on my desk last week I came across some cards I had taken out of my sample boxes as they featured products that were no longer available. One card in particular I had really liked, so I decided to remake it using current product. To mix it up even more, I decided to use mostly retiring colours. I'm sad to say Mellow Moss, Brocade Blue and Close To Cocoa will all be leaving us at the end of August. This card also features two punches that are part of this weeks Deals Of The Week special offer. You can order both the Scallop Oval and the Trio Flower punches for $20.12 each (normally $30.95 each), but only until Wednesday so you only have one day left to take advantage of this great deal! Contact me now to order yours before it is too late.
All supplies by Stampin' Up!
Cardstock:Mellow Moss, Always Artichoke, Close To Cocoa, Whisper White, Brocade Blue
Stamp Sets: Flight Of The Butterfly, Best Yet
Inks: Bashful Blue, Brocade Blue, Always Artichoke
Accessories: 5/8" Brocade Blue grosgrain ribbon, Trio Flower punch, Scallop Oval punch, large oval punch, butterfly punch, 1 3/8" circle punch, scallop edge punch, Pretties Kit, mini glue dots, dimensionals
Friday, May 28, 2010
SU! Convention Swaps
As I mentioned in my last post, I had Stampin' Up! convention coming up. The event was last weekend, and once again it was a fabulous experience (though I could have lived without the two fire alarms that were false alarms at the hotel!). I find swapping is a wonderful aspect of convention, though it can be a frenzy you exchange creative ideas and meet so many other talent people face to face. These are the two cards I swapped:
Many of you have probably noticed that I used the same set. I do have more than one set of stamps! I just love this set so much and the styles are so different that some people even swapped for both cards. Both are pretty simple to make, if you'd like to see how and have a go at making one yourself book a workshop and I can come and show you how it's done.
All supplies by Stampin' Up!
first card
Cardstock: Soft Suede, Confetti White
Stamp Sets: Vintage Vogue, Very Vintage jumbo wheel
Ink: VersaMark, Tempting Turquoise, Cameo Coral, Kiwi Kiss
Accessories: Kiwi Kiss striped grosgrain ribbon, horizontal slot punch, Top Note die, Vintage brads
second card
Cardstock: Sage Shadow, Whisper White, Handsome Hunter, Lavender Lace
Stamp Set: Vintage Vogue
Inks: Almost Amethyst, Lavender Lace, Orchid Opulence, Handsome Hunter
Accessories: scallop border punch, Rich Regals brads
Wednesday, April 28, 2010
En Vogue
One of the many new sets in the Autumn/Winter mini from Stampin' Up! is Vintage Vogue, and I think there is a very strong posibility that it will be the most popular set in the mini! For that reason I chose it as this months Stamp Set Challenge over at the Elite Challenges Blog. Above you can see a snipet of my card for the challenge, for which I also used the new Top Note die for the Big Shot die cutter, both of which are available in the Aut/Wint mini as well. For the rhinestone center of my flower I have used a pumpkin brad from the Fire Circle Rhinestone pack, however I have removed the rhinestone from the brad and attached it with a mini glue dot as I felt the whole brad backing would make things a little too bulky.For complete product info and a full image of the card, head over to the Elite Challenges blog.
Tuesday, April 27, 2010
Dancing Medallion
This months colour challenge over at the Elite Challenges blog is "Mambo Kisses Tango", hence the title of this post Sunday, April 11, 2010
Cinema Saturday #74
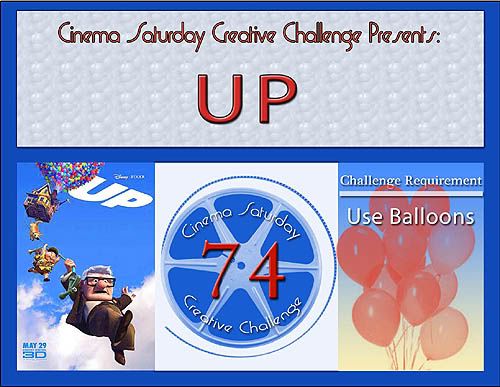
The Cinema Saturday Creative Challenge #74 is Up! I was lucky enough to have my "13 Going On 30" card receive the Audrey so I got to be a guest designer for UP.
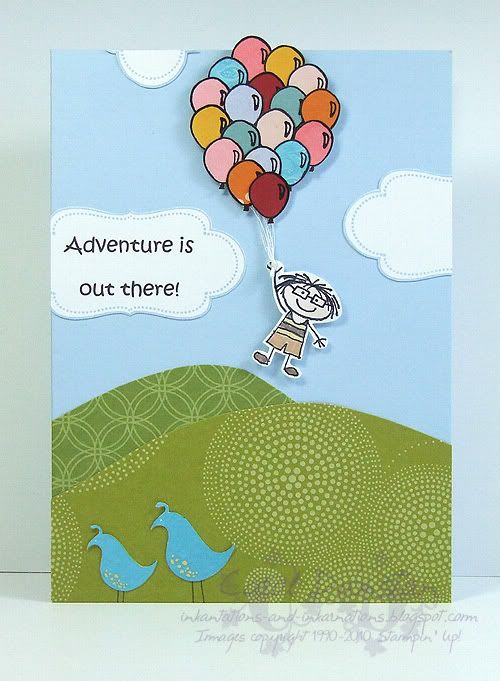
While I think Pixar make good movies, the premise of this one had me a little dubious (it just didn’t sound as fun as toys or monsters), so I was pleasantly surprised when I did get to see UP! If you are ever around me and my girls you may hear random “Squirrel!” comments, heh heh heh. Anyway, when I found out what movie I would be designing for the basic idea for the card was in my head straight away. I did struggle with the sentiment though… I had a few stamps that were appropriate for the movie (inspired by Ellie’s passion for life) but I just didn’t feel they were right for the card. I decided to print out the “Adventure is out there!” catch-phrase because it can bring together the idea of grand and simple adventures of life.
Most Supplies by Stampin' Up!
Cardstock: Bashful Blue, Whisper White
Stamp Sets: All In The Family, Frames With A Flourish
Inks: StazOn Jet Black, Blush Blossom (watercolouring)
Accessories: aquapainter, Creamy Caramel marker, Close To Cocoa marker, So Saffron marker, dimensionals, Basic Black marker, white cotton thread, computer-generated sentiment, 1 3/8" circle punch (to stick balloons to), various DSP's most notably Good Morning Sunshine, Haiku and Pink Flamingo
Show watched While Creating: UP
Thursday, March 25, 2010
Happy Moments
When discussing this set with a customer recently, I mentioned I had a few simple ideas come to mind just while we were talking about. However, it's taken me a while to get around to acting on those ideas. Here's one very simple idea: stamp the image randomly in the background with VersaMark, then use the same image for the focal point of the card. I've coloured the main image with an aquapainter - picking up ink from the lids of my inkpads - and I have jazzed it up a little by using some ribbons but it is still a very simple card that takes no time to put together.
The Happy Moments stamp set is one of four available free as part of the Sale-A-Bration promotion. Sale-A-Bration, and the Summer mini catalogue, end on March 31st so you have less than a week to get them.
All supplies by Stampin' Up!
Cardstock: Real Red, Summer Sun, Cameo Coral, Whisper White
Stamp Set: Happy Moments
Inks: StazOn; Pretty In Pink, Cameo Coral, Summer Sun used for watercolouring
Accessories: aquapainter, Real Red marker, Pretty In Pink 1 1/4" grosgrain ribbon, Real Red 3/4" polkadot grosgrain ribbon, dimensionals
Show watched while creating: The Philadelphia Experiment
Monday, March 22, 2010
Cinema Saturday #71
This week's Cinema Saturday movie was 13 Going On 30 (which I think was called something else here in Australia). I hadn't seen it before, but was glad I got a shove in that direction from Brooke & Sankari... otherwise I never would have seen Gollum on the dancefloor! I had completely forgotten Andy Serkis was in this, and could not stop laughing when he joined in on the Thriller dance, moonwalk and all! Anyway, for my card I chose to base it on Jenna's dress from that party. The requirement for this challenge was to include geometric shapes, so I stuck with the stripes of the dress, and punched my images out in circles for good measure. There's one item on this card that is a sneak peek from the up-coming Autumn/Winter mini - can you tell what it is?
If I could have one do-over, I don't think I would have VersaMarked the wheel int he background, I think it looked better with just the stripes!
All supplies by Stampin' Up!
Cardstock: Tempting Turquoise, Real Red, Orchid Opulence, Rich Razzleberry, Baja Breeze, Green Galore, Taken With Teal, Pink Passion, Whisper White
Stamp Sets: Cheers To You, Cheers standard wheel
Inks: VersaMark, StazOn, Pixie Pink (watercolouring), Baja Breeze (watercolouring)
Accessories: 1 3/8" circle punch, 1 3/4" circle punch, aquapainter, Green Galore marker, Real Red marker, Taken With Teal marker, Pink Passion Marker, Orchid Opulence marker, dimensionals
Show Watched While Creating: 13 Going On 30
Sunday, March 21, 2010
I'll Owl-ways Have Punches
Yes I know, more punch art! But at least there is a bit of stamping this time!
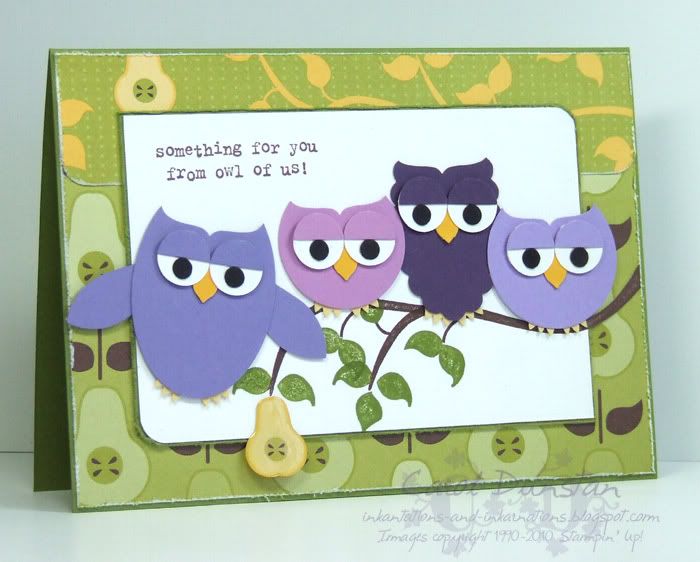
It's been a while since I have done someone else's challenge (for those of you who don't know, I create the monthly challenges over on the Elite Challenges blog), so when I finally got caught up on my Google Reader and saw a couple of challenges freshly posted I thought I'd take some time out and put something together. This card is based on Taylor's sketch #105 and Keesh's Inspiration Challenge #19. After seeing a few comments that Keesh's challenge would result in a lot of flower cards I decided to do things differently, so I just took the colours. I didn't stick to the colours completely, just wanted a lot of green and purple. The owls were inspired by some fabric I saw the other day, where I had a lightbulb moment and realised the Round tab punch could be used to shape the top of other punches for owls. The Curly Label punch can be used too, however it has wider curves so I think he works better on larger shapes (ie the 1 3/4" circle and larger). For something I pretty much just winged, the branches worked out perfectly with a pretty seamless join... that I then went and covered up! It would have been fine if i had stuffed it and used it for an "embellishment opportunity", but I guess it's always good practise for the next time I want to lengthen that branch...
All supplies by Stampin' Up!
Cardstock: Old Olive, Whisper White, Lovely Lilac, Orchid Opulence, Elegant Eggplant, Lavender Lace, So Saffron, Summer Sun, Basic Black
Stamp Sets: Cheep Talk, Owl Together Now
Inks: Chocolate Chip
Accessories: Wide Oval punch, Scallop Oval punch, 1 3/8" Circle punch, 1 1/4" Circle punch, Round Tab punch, 5-Petal flower punch, Boho Blossoms punch, 1/2" Circle punch, Crop-A-Dile, 3/16" Corner Rounder punch, Cutter Kit, Crystal Effects, dimensionals
Show Watched While Creating: Four Feathers
Thursday, March 18, 2010
It's In The Bag
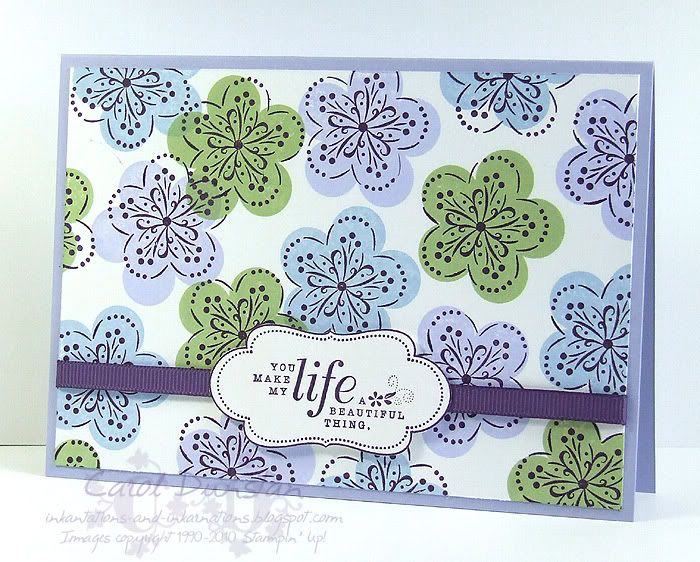
Monday night was the Inklings Cyberstamp for March, hosted by Ryn. The first challenge she presented to us was to create something inspired by a reusable shopping bag from Target. She didn't mention what she felt were the closest colours, so I erred on the side of purple and went with Almost Amethyst, Bashful Blue and Certainly Celery. The bag had butterfly designs on it but I felt like something different so I went back to an old favourite and pulled out A Beautiful Thing and didn't worry about getting the outline image remotely close to the solid colour as the original bag had the outlines well and truly offset... in fact it was almost a challenge in itself to not automatically try and line the limages up closely!
All supplies by Stampin' Up!
Cardstock: Almost Amethyst, Whisper White
Stamp Sets: A Beautiful Thing, Frames With A Flourish
Inks: Almost Amethyst, Bashful Blue, Certainly Celery, Elegant Eggplant
Accessories: Elegant Eggplant 1/4" grsograin, dimensionals
Show watched While Creating: Picnic At Hanging Rock (ah the memories!)
Wednesday, March 10, 2010
I {heart} Punches
A few years back when my kids were in playgroup, one of the craft activities I organised was from DLTK. Since the heart punches came out in the Stampin' Up! catalogue I have been dying to replicate some of these creations substituting punches for a lot of cutting. Here is the first one of these, a made largely from heart punches - ain't it just the cutest?! The tail was even made by punching a scrap with the Full Heart punch twice to make just a sliver, but with a nice curve to it. I have a few more of these punch critters to share with you over the next few days, so don't forget to come back and check them out!
All supplies by Stampin' Up!
Cardstock: Bordering Blue, Whisper White, Pink Pirouette, Regal Rose, Basic Black
Stamp Set: Think Happy Thoughts
Ink: Bordering Blue
Accessories: Full Heart Punch, Heart to Heart punch, 1/2 circle punch, Crop-A-Dile, 1 1/4" circle punch, 1 3/8" circle punch, Pink Pirouette taffeta ribbon, Flower designer brads
Tuesday, March 09, 2010
Elite Sketch Challenge #29 Redux
Back in January I enjoyed playing with Sketch Challenge 29 from the Elite Challenge blog that I wanted to use it again. It worked so easily with this set I'm surprised I didn't use it the first time! I took the opportunity to indulge in a lot of purple with this card too, which is always fun 
All supplies by Stampin' Up!
Cardstock: Lavender Lace, So Saffron, Whisper White
Stamp Set: Butterfly Prints
Inks: Laender Lace, Bashful Blue
Accessories: Tea Part DSP, Butterfly punch, So Saffron striped grosgrain, 3/16" corner rounder, mini glue dots.
All supplies by Stampin' Up!
Cardstock: Lavender Lace, So Saffron, Whisper White
Stamp Set: Butterfly Prints
Inks: Laender Lace, Bashful Blue
Accessories: Tea Part DSP, Butterfly punch, So Saffron striped grosgrain, 3/16" corner rounder, mini glue dots.
Monday, March 08, 2010
Better Late Then Never
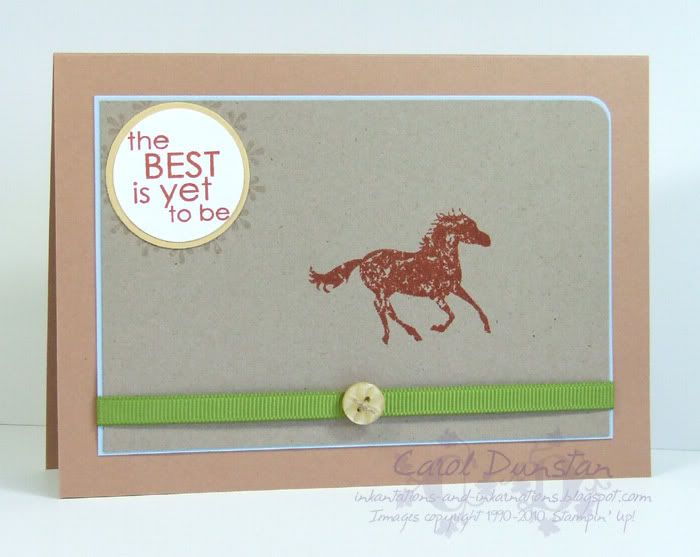
Some weeks ago, the Cinema Saturday Creative Challenge was Australia. I made my card, on Australia Day to boot, photographed it but just never got around to uploading it... so here it is! I hadn't seen this movie before, so I was happy to see it come up. I knew it had got a bit of a bagging but that doesn't always match our own personal views does it? I actually found it very funny, though that suddenly stopped about half way though (understandably, but then it would have been nice for it to be revived more at the end), it did seem a bit long but that may just have been because it seemed like the film was wrapping up and then there is another half hour to come! I also had no idea that David Wenham was in it so that was a nice surprise (even if he doesn't play the nicest of characters). Anyway, while I naturally had the temptation to base my card on a costume, the required element was to use the colour "Kraft" which lead me to do a more masculine card. I did sneak some ribbon on, but kept it all pretty simple. I did have a point behind picking that particular quote but it was so long ago I have forgotten it now!
All supplies by Stampin' Up!
Cardstock: Creamy Caramel, Bashful Blue, Kraft, So Saffron, Whisper White
Stamp sets: Wanted, Best Yet
Inks: Really Rust, VersaMark
Accessories: Old Olive 1/4" grosgrain, Button Latte designer buttons, linen thread, 3/16" corner rounder, 1 1/4 circle punch, 1 3/8" circle punch
Show watched while creating: Australia, cricket
Friday, March 05, 2010
Colour Challenged Bird
This morning I have uploaded another card over at the Elite Challenges blog, this time for the "Barely a Breeze" colour challenge. In quite a contrast to yesterdays card that was full of colour, todays card has a lot of white space. In the above snippet you can see the little bird that I paper pieced, by first stamping it on patterned paper, trimming, then sticking it over the same image stamped on white. To see the full card and product details, check it out at the Elite Challenges blog.
Tuesday, March 02, 2010
Wonderful Challenge
Thursday night was the Inklings February Cyberstamp, hosted by Kari Hughes. Challenge 1 was a colour challenge, to use Baja Breeze, Chocolate Chip and Kiwi Kiss - you could also include a neutral (White or Vanilla). Well, I guess I cheated a little as I used both Whisper White and Very Vanilla but never mind! Went with a style I haven't done a lot of lately and I like how this turned out.
All products by Stampin' Up!
Cardstock: Kiwi Kiss, Chocolate Chip, Very Vanilla
Stamp Set: Occasional Greetings
Ink: Whisper White
Accessories: Dots & Designs Rub-Ons, Kiwi Kiss/Very Vanilla satin ribbon, Blooms II die-cuts, Antique Brass Build-a-brad, Urban Oasis DSP, Flower Fusion II
All products by Stampin' Up!
Cardstock: Kiwi Kiss, Chocolate Chip, Very Vanilla
Stamp Set: Occasional Greetings
Ink: Whisper White
Accessories: Dots & Designs Rub-Ons, Kiwi Kiss/Very Vanilla satin ribbon, Blooms II die-cuts, Antique Brass Build-a-brad, Urban Oasis DSP, Flower Fusion II
Friday, February 26, 2010
Cinema Saturday #67
Life has been so busy lately! There is just not enough hours in the day, particuarly when you are trying to get over a cold. After talking all weekend at the CraftExpo my kids have taken to calling me Croaky Carol! At least I can speak at a normal volume now.
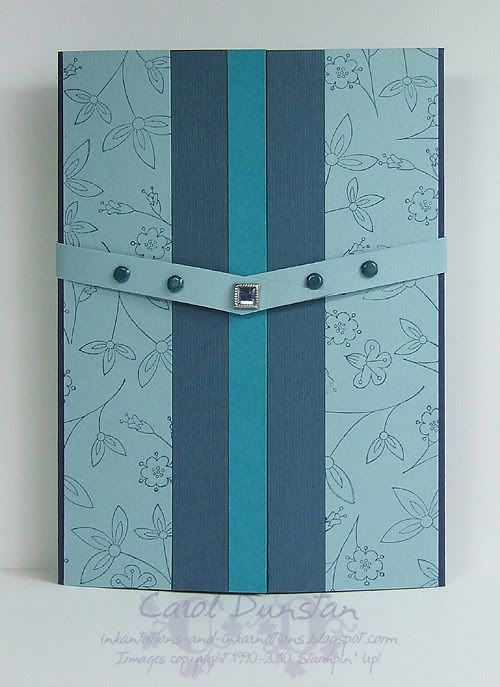
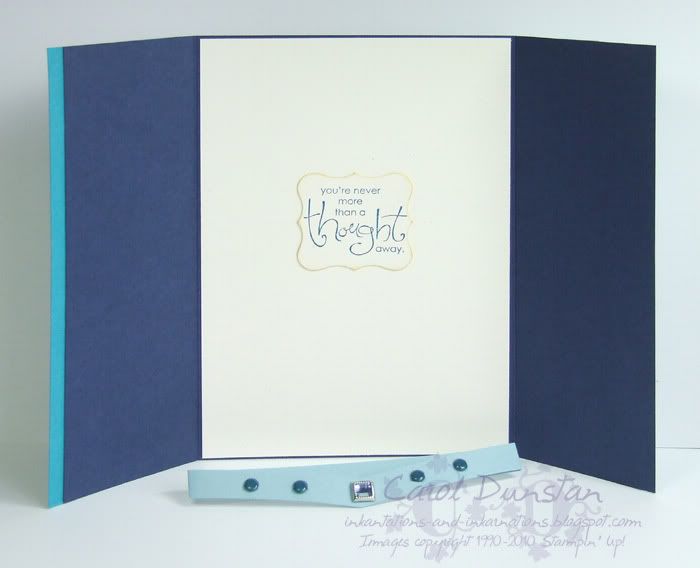
Anyway, on to the fun stuff! This weeks Cinema Saturday challenge movie was Tristian + Isolde, an old favourite of mine. As usual, I shose to base my card on a costume. Sweet Stems was a perfect match for patterned sections on the dress, and I used some textured cardstock to give the look of the rough weave of most of the fabrics in the film. I had already been thinking of making it a gate-fold card before I double checked what the required element was, so that was no problem this week. I put the sentiment on the inside, hidden from the outside and close to the heart
All products by Stampin' Up!
Cardstock: Night of Navy, Baja Breeze, textured Not Quite Navy, Taken With Teal, Very Vanilla
Stamp Sets: Sweet Stems, Whimsical Words
Inks: Not Quite Navy, So Saffron (for sponging)
Accessories: Square Ice Rhinestone brads, Earth Elements brads, Curly Label punch
Show watched while creating: Tristian + Isolde
Tuesday, February 16, 2010
Taken With Butterflies & CraftExpo
Yes I know, it's been another long break between posts. After days of thinking "I'll update my blog later" and it never happening, I've taken time out from preparing for CraftExpo to finally share something. This is a snippet of the card I have made for this months Elite Challenges colour challenge "Point Taken". While these colours just scream "peacock" to me, I thought they'd work well with butterflies. And I'm just a little obsessed with butterflies at the moment! Hope over to the Elite Challenge blog to read all the details.What was that I said about CraftExpo? Fellow demonstrators and myself will be there with displays, demonstrations, a Make & Take and daily lucky door prizes. Drop by to check it out!
Where & When: Friday February 19th to Sunday February 21st at the Newcastle Entertainment Centre (a short walk from Broadmeadow train station).
Open: 10am - 4:30pm daily.
Tickets: Entry is $14 for adults, $12 for Seniors/Pensioners, $7 for Children (5-16yrs), Children under 5 are free. A family ticket (2 adults and 2 children) is available for $34.
Find us at stand F13
Subscribe to:
Posts (Atom)