Showing posts with label punch art. Show all posts

Friday, February 13, 2015

Punch Art Letters

A few weeks ago I attended Stampin' Up!'s Partytime event in Sydney. Attendee's are encouraged to make a name badge, which I of course left to do like the day before. Not having any current alphabet stamps, or the alphabet thinlets, and not wanting to be as straight forward as write or print my name... I really was scratching my head about how I could make a creative name badge. Then it suddenly occured to me that I have a bit of a rep for my use of punches, so how about making my name by using punches. I got a number of comments about my badge so thought it would be a good idea to show how I made my letters.

My approach was pretty boring in a way - I started with the letter C because it's the first letter in my name...

From past experience I knew I needed to start from the inside and work out. This isn't always necessary but it often makes things much easier.
So I started with the 1 1/4" scallop circle on the edge of a piece of Wisteria Wonder.

I then lined up the 1 3/4" scallop circle around this...

...and punched it out. Looks like a mouth wanting to eat the frosting off a cupcake, hehehehe.

For the A I started by lining up the postage stamp punch from the Little Lables punch pack. The bottom notches of the punch edge are below the edge, but of course this really wouldn't have mattered since I wasn't using the square... might make it a little easier to ensure it's straight though.

Next I lined up the Tree punch around the stamp shape...

...and punched it out.

The R was probably the trickiest of the lot, I realised pretty quickly that I'd have to be piecing together multiple pieces. For the round part at the top of the R, I trimmed a piece of cardstock to a little under 1.9cm and put it into the 3/4" circle from the bottom of the punch so instead of a circle it will just be rounding one end. When doing this I find it easier to fit the cardstock in if it is just a little smaller than the width of the punch shape you are putting the cardstock into.

The diagonal leg of the R was a piece from the Chevron border punch, for the straight back I just trimmed a strip of cardstock to match the width of the chevron. I then fiddled around with the pieces till I figured out how big I wanted the round part and trimmed the pieces to size.

The O was an easy one. Could've gone for a smaller circle for the middle but liked the slightly different look of having the Small Oval on the inside and punching the 1 1/4" circle around it.

When re-doing my letters to take these photos I mistakenly used the 1 3/8" circle, oops!

Making an interesting L was probably the hardest letter of all. After a lot of thinking and a few failed attempts, I settled on punching the Artisan Label to create the inside shape of the L, then off-setting the Curly Label punch...

...and punching it out. I really loved the shape this gave to the ends of the L.

As you can see I tilted the Curly Label punch quite a bit to get the final shape.

Well I hope that has given you some ideas if you ever find yourself stumped with lettering! Also note that I some of these punches are the old "whale" design, any you buy from Stampin' Up! now will not look like this!


Built for Free Using: My Stampin Blog

Thursday, October 09, 2014

TBT - Happy Days


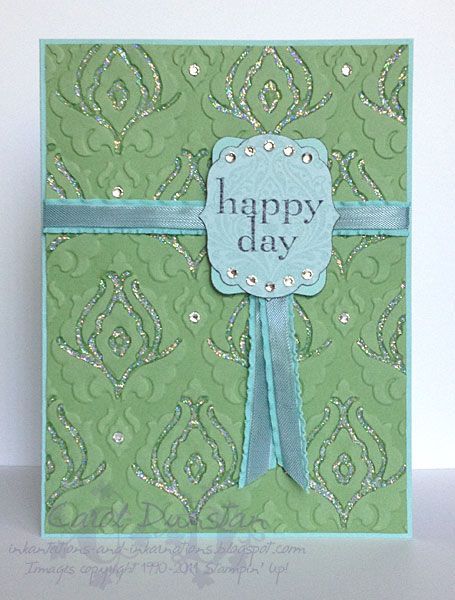
Time for more ye olde cards. Both of these were made so long ago it's a struggle remembering what I used on them! The Happy Day card was another case of products I loved but hadn't used a lot. I love old style patterns like what was used in the Beautifully Baroque stamp and embossing folder. I wanted to give the background a fuzzy velvet look and feel, so once it had been through the embossing folder I went over it with the sanding block. I've seen a lot of people do it since, particuarly with this embossing folder - great minds think alike! I then went over the indented parts of each motif with the Dazzling Details glitter glue and added some rhinestones for a luxurious sparkly effect. If there had been matching patterend paper I probably would have stamped my sentiment on that, but since there wasn't I basically made my own.

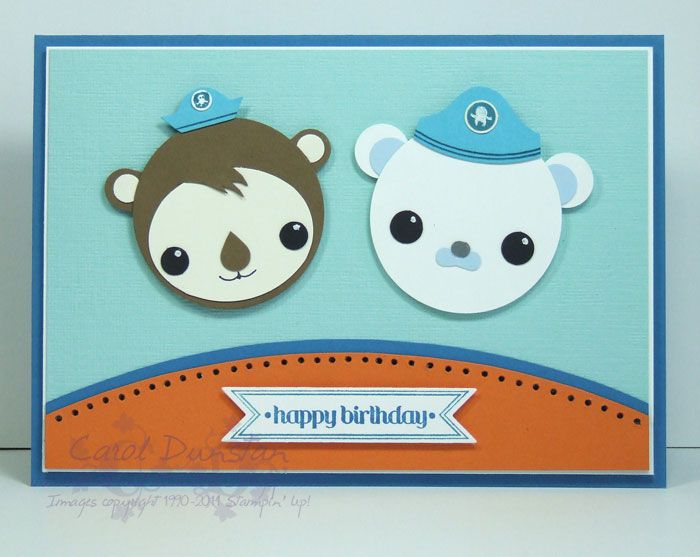
The Octonauts card was easier in some respects, as it was to accompany a present of Octonaut bath toys. So the decision of what to make the card was easy, the how was a little harder. After some experimentation (how most punch art goes!) I came up with reasonably simple ways of creating the faces, but there weren't really any short cuts I could take with the hats so they were hand cut.


Happy Day card
All supplies by Stampin' Up!
Cardstock: Pool Party, Pear Pizzazz, Baja Breeze
Stamp sets: Beautifully Baroque, Happy Day
Ink: VersaMark, StazOn Jet Black
Accessories: sanding block, Pool Party ruffled ribbon, Baja Breeze seam binding ribbon, Decorative Label punch, Beautifully Baroque embossing folder, Labels Collection die, Dazzling Details glitter glue, Rhinestone Basic Jewels

Octonauts punch art card
All supplies by Stampin' Up!
Cardstock: Pacific Point, Bashful Blue, Pool Party texturedSoft Suede, Very Vanilla, Tempting Turquoise, Basic Black, Pumpkin Pie, Basic Grey, Whisper White
Stamp sets: Itty Bitty Banners
Ink: Pacific Point
Accessories: 1 3/4" circle punch, Large Oval punch, Itty Bitty Shapes punch pack, Small Heart punch, Slot punch, Owl Builder punch, Circle Scissors, Bitty Banners Framelits, white gel pen, Pacific Point marker, Basic Black marker

Thursday, October 02, 2014

TBT - The Fox Says...

Time for another TBT, what do you say? ;)


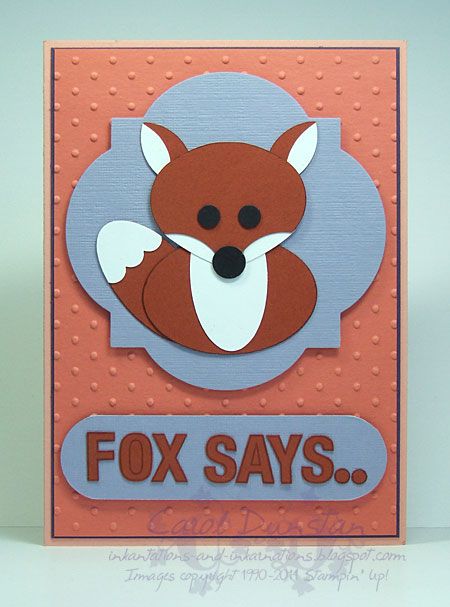
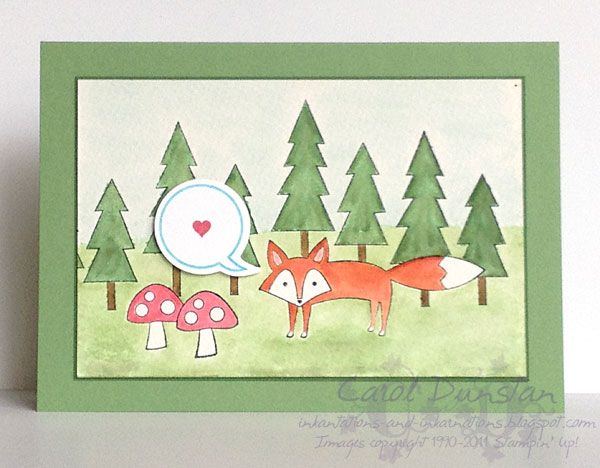
If you are wondering what is with all the foxes, it's a play on the Ylvis song The Fox. There's little retired product on the second card, which was kind of the main idea behind TBT, but it was made quite a few months ago so falls into the theme that way. Like a lot of people I was sad the Ornament punch, as used for the foxes head on the first card, was retired. Aside from being a great shape for Christmas ornaments, it is great for punch art. Pretty sure it's one item I will never part with even if it is no longer current!

Fox punch art card
All supplies by Stampin' Up!
Cardstock: Crisp Canteloup, Concord Crush, Calypso Coral, textured Wisteria Wonder, Cajun Craze, Whisper White, Basic Black
Stamp set: ABC-123 Outline Alphabet & Numbers
Ink: Cajun Craze
Accessories: Ornament punch, Extra-Large Oval punch, Large Oval punch, Scallop Oval punch, Owl Builder punch, Cupcake Builder punch, 5-Petal Flower punch, dimensionals, Perfect Polka Dots embossing folder, Window Frames Collection dies

Forest scene card
All supplies by Stampin' Up!
Cardstock: Wild Wasabi, Gumball Green, Whisper White, watercolour paper
Stamp set: Life In The Forest, Just Sayin'
Ink: StazOn black, Wild Wasabi, Pear Pizzazz, Chocolate Chip, Rose Red, Blushing Bride, Pumpkin Pie (I think!), Soft Sky
Accessories: aquapainter, white gel pen, Tempting Turquoise marker, dimensionals, Word Bubbles dies

Wednesday, May 30, 2012

It's punching Jim, but not as we know it

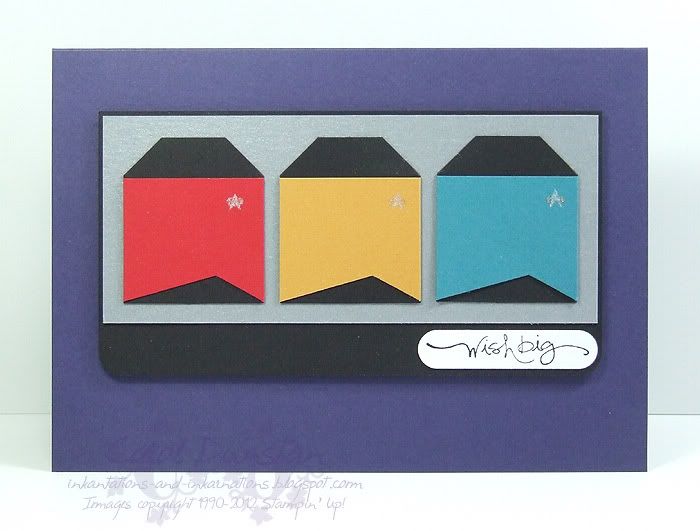
Last week a friend of mine was talking about a card she was making, a punch art Spock, and the following discussion about Red Shirts got me to thinking about doing my own Star Trek card. After a little thinking I realised I had the perfect colours to do the three different shirt colours that they used in the latter series, and with punch art still in my mind I thought of using the tag punch to creat the body of the shirt. And, well, this card was born:
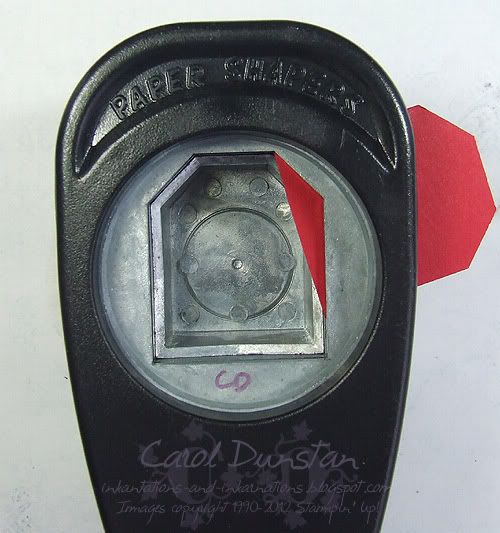
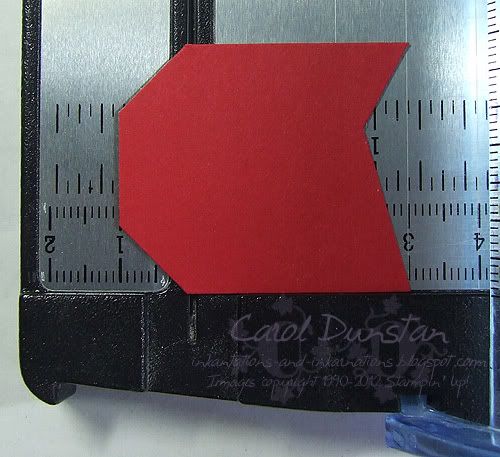
The card is pretty simple, although I suspect some are thinking that it looks like a lot of fiddling around. Creating the shirts was actually really easy, I stamped a Large Tag punch in black and the one in colour for each shirt. To get the triangle of black at the bottom I used the Large Tag punch to cut the section out of the coloured tag, as you can see below:

I then cut about 1cm off the top of the tag, cutting just below the point where the tag tapers to the top.


The communicator badge was painted on using a blender pen and shimmer paint.

All supplies by Stampin' Up!
Cardstock: Whisper White, Concord Crush, Basic Black, brushed Silver, Real Red, More Mustard, Island Indigo
Stamp set: Short & Sweet
Ink: Basic Black
Accessories: Large Tag punch, Word Window punch, 3/16" corner rounder punch, blender pen, white shimmer paint, gold shimmer paint, dimensionals

Friday, June 10, 2011

Hoot If You Are 2

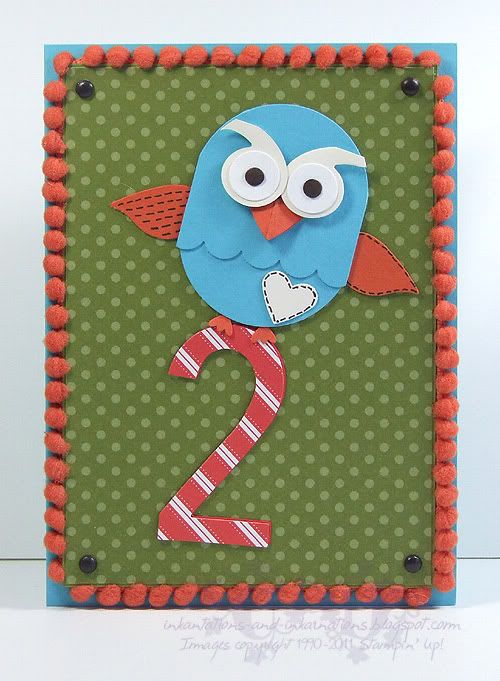
It's been a while since I have done some punch art. I seem to go through phases for it, but sometimes you get an idea in your head and there's no other way to achieve it. This was one of those times.

I have a nephew who is big on Hoot from Giggle & Hoot on the ABC, so I felt compelled to have a go at making a Hoot card. I couldn't just do any old owl in Hoots colours - even to me who doesn't have toddlers and doesn't watch Giggle & Hoot - it would look wrong. I cut a strip of Tempting Turquoise slightly smaller than 1 3/4" and fed it through the back of the 1 3/4" punch so only one end was punched. I then punched the straight edge with the scallop border punch. A full Tempting Turquoise 1 3/4" circle and I had the rest of this body. His eyes had been a problem when I contemplated this in the past, but that problem was solved by using the number 6 in the Timeless Type die set. a bit of a snip to the tops of the 6's and Hoot was looking like Hoot and no ordinary owl. In hindsight the head should be a bit shorter, but I don't think it matters too much - there's no mistaking who it's supposed to be wink

All supplies by Stampin' Up!
Cardstock: Tempting Turquoise, Old Olive, Tangerine Tango, Poppy Parade, Very Vanilla, Whisper White, Early Espresso
Stamp Sets: none!
Inks:none!
Accessories: 1 3/4" circle punch, scallop border punch, two-step owl punch, two-step bird punch, 1/2" circle punch, crop-a-dile, small heart punch, Timeless Type Junior Alphabet die, Simple Numbers Alphabet die, In Colors patterns paper pack, Brights Patterns stack, Neutrals brads, Tangerine Tango pompom trim, dimensionals

Monday, September 20, 2010

Woot(ten)!

Hello again! Yes it's been a while since I posted (yet again!), had a bit of a break from stamping & completely fell out of the habit of taking photos of things when I did create (let alone the editing, uploading & composing...). But I have finally made it back, and tonight I'd like to introduce you to a little friend of mine.

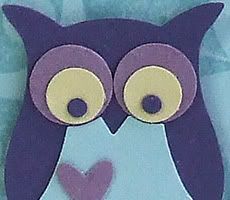
This is Wootten. You may recall me previously mentioning that my Big Shot was named "Barry" the moment I opened his box. Since then I have dubbed my Circle Scissors "Cecil". Well, the latest tool that I am on a first-name basis with is Wootten the two-step owl punch. The punch itself doesn't look that cute, so the name applies more to the owls I make with it (yet to make a girly one, could be in for some adventures there!). This particular owl was made using the colours from this months Elite Challenges Blog colour challenge. To see the full card and product details, head over to the Elite Challenges Blog. If you attend any of my workshops this month you will see me make a very similar card to this, and see how cute he is for yourself!

Thursday, June 17, 2010

Super-sized Elmo

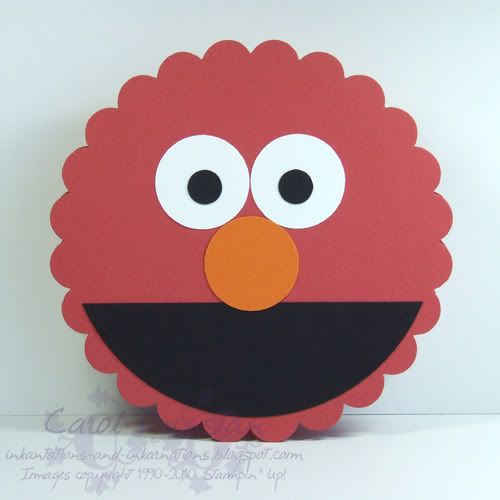
I've recently had to make some birthday cards for my nephews. Wanting to do something a little different for my one-year old nephew I asked my sister what things he liked. She mentioned the Tombliboos from In The Night Garden, Giggle & Hoot (I had to look them up!) and Elmo, basically big happy faces. While my brain did have a few ideas about how to tackle each one, in the end I decided Elmo was going to be the easiest - especially the easiest to make as something BIG!

There has been a punch art Elmo floating around the net for some time, I've made him a few times and he was part of a recent stamp-a-stack class. He's made with the scallop circle punch, which isn't exactly big but I used the same principles and applied it to the Scallop Notes cards. OK, so the Scallop Notes are Ruby Red, not the bright Real Red that I normally use for him, but I think it works!


Word is it was quite a hit!

All supplies by Stampin' Up!
Cardstock: Basic Black, Whisper White, Pumpkin Pie
Ink: none
Stamps: none
Accessories: Scallop Notes II, Circle Scissors Plus, 1 3/4" circle punch (I think... really should have noted that stuff down!), 1/2" circle punch

Tuesday, June 15, 2010

She's Got Dame Edna Eyes

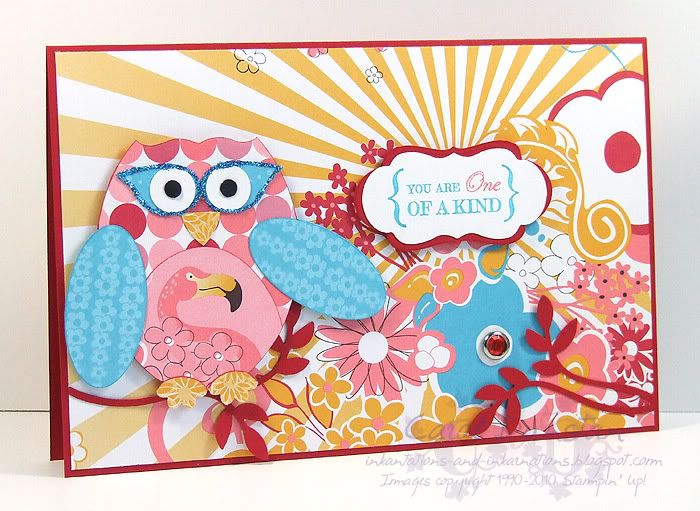
I love owls, and I love creating them with punches. While I've really liked the owls I have created, I wanted to be able to make something larger, an owl that would dominate a card front. So I turned to Barry (my Big Shot) and put him to work with the ovals die. I was obviously going to be making some bigger owls, with bigger ovals for the base, but I looked at my punches and tried to think of some other new features I could make with them. And then I noticed a spare wing on my desk, from using the Two-Step Bird punch on another project.

And Dame Edna Owl was born!

Hello owlies!

Of course I had to use bright colours for the Dame, so I pulled out the Pink Flamingo DSP pack and selected my papers and got Barry to work on them. With the papers all spread out, I spotted the "sun rays" sheet and immediately knew how I wanted the rest of the card to go. When I came to put it together however, I realised that it just wasn't all going to fit on a standard card front. Some years ago I was given a bunch of larger envelopes, and I still have quite a few left (all really bright ones... think Yoyo Yellow). I grabbed one of these envelopes and measure it up and made my card to fit. Now the Dame had space to stretch her wings! And because I loved the effect so much, I once again layered the Lots of Tags die on the similar Frames With A Flourish image for the sentiment.

Remember, Pink Flamingo is one of the 5 DSPs on special this week as part of Deals Of The Week. But tonight is your last chance to order it at the special price, so be quick & don't miss out!

All supplies by Stampin' Up!
Cardstock: Real Red, Whisper White
Stamp Sets: Frames With A Flourish, One Of A Kind
Inks: none
Accessories: Pink Flamingo DSP, Ovals die, Lots of Tags die, Two-Step Bird punch, large oval punch, Curly Label punch, Boho Blossoms punch, 3/4" circle punch, 1/2" circle punch, Crop-a-dile, 5 Petal Flower punch, Circle Fire rhinestone brads, Real Red marker, Tempting Turquoise marker, Cameo Coral marker, Tombow mono glue, fine Supernova glitter, dimensionals
Show Watched While Creating: True Blood (WARNING: there will be season 3 spoilers on this page so careful what you look at or read!)

Friday, March 26, 2010

Again With The Punches

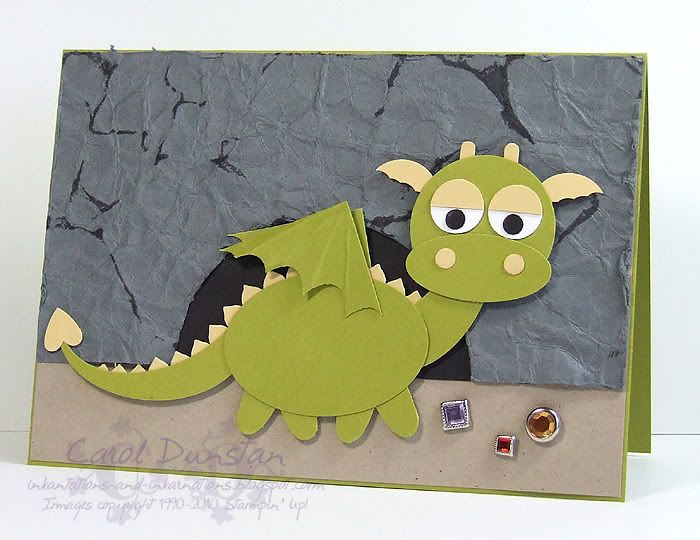
Earlier this week Ryn asked us to challenge her with a punch art request. I suggested a dragon, and it would only be fair if I took on the challenge as well. However, I did cheat a little because I had already made a dragon last weekend! I have been holding off on sharing this with you as I like the recipient to have received the card before I post it here so I don't spoil the surprise, this is for a 2yr old boy though and I don't think he is a regular reader lol. I was also dying to share because he's just so gosh darn it CUTE! After I made him I was a little stumped about what to do for the rest of the card, but Tiarna once again gave me the brilliant idea of a cave.
All supplies by Stampin' Up!
Cardstock: Kiwi Kiss, Kraft, Basic Black, Basic Gray, So Saffron, Whisper White
Stamps: none!
Ink: Basic Gray
Accessories: Wide Oval punch, 1 3/8" square punch, 1 3/8" circle punch, small oval punch, 3/4" circle punch, scallop square punch (for the notches along the bottom of the ears!), Horizontal Slot punch, 1/2" circle punch, Crop-A-Dile, Boho Blosoms punch, Heart To Heart punch, Cutter Kit, Square Ice rhienstone brads, Square Fire rhinestone brads, Circle Fire Rhinestone brads, dimensionals
Show Watched While Creating: Corpse Bride

Sunday, March 21, 2010

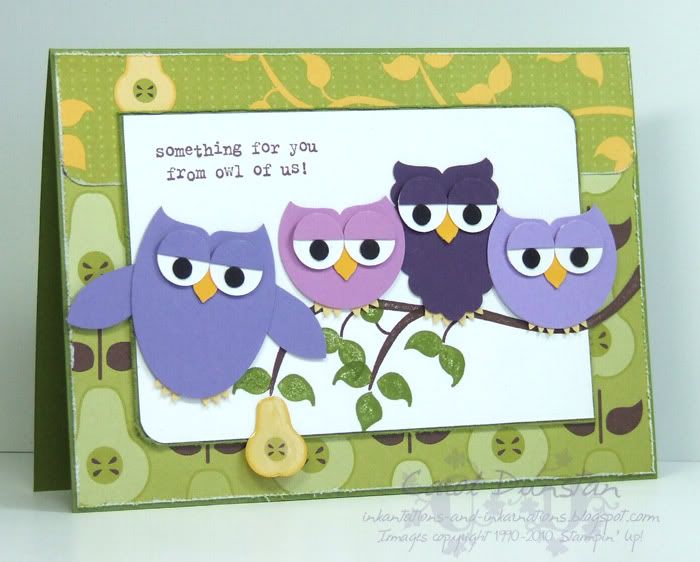
I'll Owl-ways Have Punches

Yes I know, more punch art! But at least there is a bit of stamping this time!

It's been a while since I have done someone else's challenge (for those of you who don't know, I create the monthly challenges over on the Elite Challenges blog), so when I finally got caught up on my Google Reader and saw a couple of challenges freshly posted I thought I'd take some time out and put something together. This card is based on Taylor's sketch #105 and Keesh's Inspiration Challenge #19. After seeing a few comments that Keesh's challenge would result in a lot of flower cards I decided to do things differently, so I just took the colours. I didn't stick to the colours completely, just wanted a lot of green and purple. The owls were inspired by some fabric I saw the other day, where I had a lightbulb moment and realised the Round tab punch could be used to shape the top of other punches for owls. The Curly Label punch can be used too, however it has wider curves so I think he works better on larger shapes (ie the 1 3/4" circle and larger). For something I pretty much just winged, the branches worked out perfectly with a pretty seamless join... that I then went and covered up! It would have been fine if i had stuffed it and used it for an "embellishment opportunity", but I guess it's always good practise for the next time I want to lengthen that branch...

All supplies by Stampin' Up!
Cardstock: Old Olive, Whisper White, Lovely Lilac, Orchid Opulence, Elegant Eggplant, Lavender Lace, So Saffron, Summer Sun, Basic Black
Stamp Sets: Cheep Talk, Owl Together Now
Inks: Chocolate Chip
Accessories: Wide Oval punch, Scallop Oval punch, 1 3/8" Circle punch, 1 1/4" Circle punch, Round Tab punch, 5-Petal flower punch, Boho Blossoms punch, 1/2" Circle punch, Crop-A-Dile, 3/16" Corner Rounder punch, Cutter Kit, Crystal Effects, dimensionals
Show Watched While Creating: Four Feathers

Friday, March 19, 2010

Punch Bunny

Up for some more punch art? Here's a bunny rabbit in the same style as the cat & dog ones I posted last week. Subscribers to my monthly email newsletter received a detailed tutorial on how to create him. I felt the ackground was going to be pretty boring if I just used plain cardstock, so I went to town with the patterned paper, using two papers from the Washington Apple pack for the sky & clouds, one paper from the Good Morning Sunshine pack for the grass (double punched with the scallop edge punch), and papers from Sweet Always, Haiku and Raspberry Tart for the eggs.

All supplies by Stampin' Up!
Cardstock: Tangerine Tango, Going Gray, Pink Pirouette, Whisper White, Basic Black
Stamps: none!
Inks: none!
Accessories: Full Heart punch, Heart to Heart punch, 1/2" circle punch, Crop-A-Dile, small oval punch, large oval punch, scallop edge punch, Going Gray marker, dimensionals

Friday, March 12, 2010

Punchy Scotty

This little guy has been mistaken for a kitten, but he's really supposed to be a Scotty Dog (I thought the short tail and long ears would give it away but maybe not!). Maybe he needs a bone too? He doesn't look too upset about not having one though biggrin

All supplies by Stampin' Up!
Cardstock: Pink Pirouette, Basic Black, Whisper White, Regal Rose
Stamp Set: none
Inks: none
Accessories: Full Heart punch, Heart to Heart punch, 1/2" circle punch, Crop-A-Dile, scallop edge punch, 1/16" circle punch, red gingham ribbon, linen thread, Urban Oasis DSP

Thursday, March 11, 2010

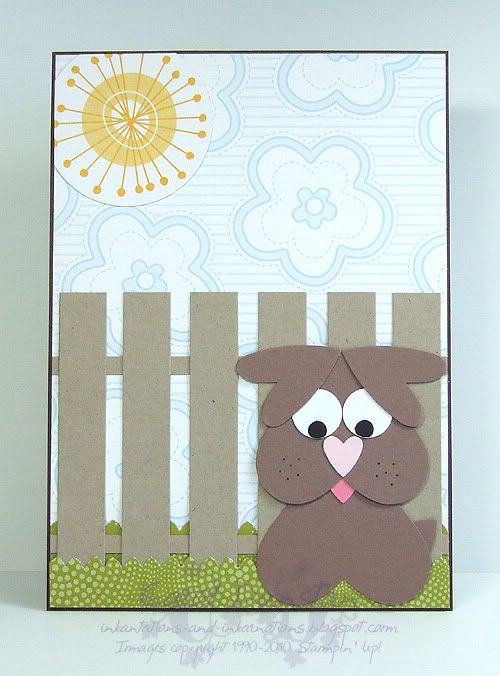
Punchy Dog

Here's my little punch doggie. I've had a few comments about him looking sad, and I didn't mean to make him that way... my kids say he is sad because he doesn't have a bone, and they were even making suggestions about how I could make one with punches! You could easily punch a ball for him to play with and that would perk him up a bit wink . I wanted to make the background different to plain cardstock that I probably normally would have used, so I was rather happy when I came across the Bashful Blue flowers in the Washington Apple DSP pack, the Good Morning Sunshine sun just capped it off!

All supplies by Stampin' Up!
Cardstock: Chocolate Chip, Kraft, Close To Cocoa, Pink Pirouette, Regal Rose, Whisper White, Basic Black
Stamp Set: none
Ink: none
Accessories: Full Heart punch, Heart To Heart punch, 1/2" circle punch, Crop-A-Dile, scallop border punch, 1 3/4" circle punch, Washington Apple DSP, Good Morning Sunshine DSP

Wednesday, March 10, 2010

I {heart} Punches

A few years back when my kids were in playgroup, one of the craft activities I organised was from DLTK. Since the heart punches came out in the Stampin' Up! catalogue I have been dying to replicate some of these creations substituting punches for a lot of cutting. Here is the first one of these, a made largely from heart punches - ain't it just the cutest?! The tail was even made by punching a scrap with the Full Heart punch twice to make just a sliver, but with a nice curve to it. I have a few more of these punch critters to share with you over the next few days, so don't forget to come back and check them out!

All supplies by Stampin' Up!
Cardstock: Bordering Blue, Whisper White, Pink Pirouette, Regal Rose, Basic Black
Stamp Set: Think Happy Thoughts
Ink: Bordering Blue
Accessories: Full Heart Punch, Heart to Heart punch, 1/2 circle punch, Crop-A-Dile, 1 1/4" circle punch, 1 3/8" circle punch, Pink Pirouette taffeta ribbon, Flower designer brads