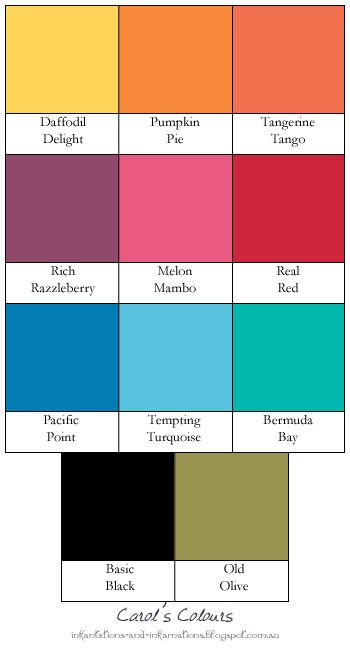
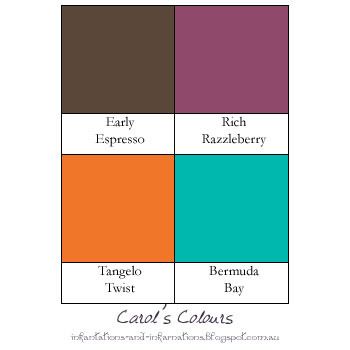
Aw, look at that adorable reindeer... how can you say no to this guy? I still have a few sheets of the old watercolour paper floating around, so I used a full piece for this. I stamped Santa and the reindeer with Basic Black archival ink, then made a little mask for Santa's hand by stamping the image on a sticky note so that when it was cut out I had some of the sticky on the back and it would stay in place while I stamped the gift. Masking is such a nifty little technique! Once I had all of these stamped on the water colour paper I did a wash of Bermuda Bay in the background. Yep, all of that is Bermuda Bay. By using a lot of water and little ink I could achieve a nice pale colour. While I had the Bermuda Bay ink out I did the reindeer's scarf, using a lot less water and a lot more ink to get a more intense colour. For Santa's face I used Blushing Bride ink, which I left out of the colour combo graphic because... well it was such a small bit and doesn't stand out that much. For Santa's suit I used Rich Razzleberry. Such a lovely colour, and true to it's name - rich! It's a nice middle ground between the traitional red for Santa, and my favourite colour of purple. Santa's boots, and belt, along with the reindeer hooves, were done with Early Espresso - lots of ink and little water in the brush for those so the colour is so dark it is nearly black. The body of the reindeer is all Early Espresso. I know I have talked in the past about how brown shades in particular are made up of a mix of colours and tend to separate into these when you watercolour with them. I deliberately made use of that this time, the side taking on a warm reddish-brown tone and the face and inner ear a tan with a tinge of pink where I pulled the colour into areas where I already had a lot of water on the cardstock so the colour became quite diluted. To finish off the watercolouring, and for some real "pop" on the card, I used Tangelo Twist on the present.
Showing posts with label Bermuda Bay. Show all posts
Thursday, December 10, 2015
Santa's Gifts
We are moving ever closer to the end of the year, and the end of the 2015 Holiday catalogue. Remember that many of the products in the catalogue are retiring and are only available while stocks last, so your chance to snap them up is growing smaller every day. Santa's Gifts is on that list, a very cute set that is great for watercolouring, like I did for the card I am sharing today:
Aw, look at that adorable reindeer... how can you say no to this guy? I still have a few sheets of the old watercolour paper floating around, so I used a full piece for this. I stamped Santa and the reindeer with Basic Black archival ink, then made a little mask for Santa's hand by stamping the image on a sticky note so that when it was cut out I had some of the sticky on the back and it would stay in place while I stamped the gift. Masking is such a nifty little technique! Once I had all of these stamped on the water colour paper I did a wash of Bermuda Bay in the background. Yep, all of that is Bermuda Bay. By using a lot of water and little ink I could achieve a nice pale colour. While I had the Bermuda Bay ink out I did the reindeer's scarf, using a lot less water and a lot more ink to get a more intense colour. For Santa's face I used Blushing Bride ink, which I left out of the colour combo graphic because... well it was such a small bit and doesn't stand out that much. For Santa's suit I used Rich Razzleberry. Such a lovely colour, and true to it's name - rich! It's a nice middle ground between the traitional red for Santa, and my favourite colour of purple. Santa's boots, and belt, along with the reindeer hooves, were done with Early Espresso - lots of ink and little water in the brush for those so the colour is so dark it is nearly black. The body of the reindeer is all Early Espresso. I know I have talked in the past about how brown shades in particular are made up of a mix of colours and tend to separate into these when you watercolour with them. I deliberately made use of that this time, the side taking on a warm reddish-brown tone and the face and inner ear a tan with a tinge of pink where I pulled the colour into areas where I already had a lot of water on the cardstock so the colour became quite diluted. To finish off the watercolouring, and for some real "pop" on the card, I used Tangelo Twist on the present.
Saturday, November 14, 2015
Stained Glass-esque Delicate Ornament
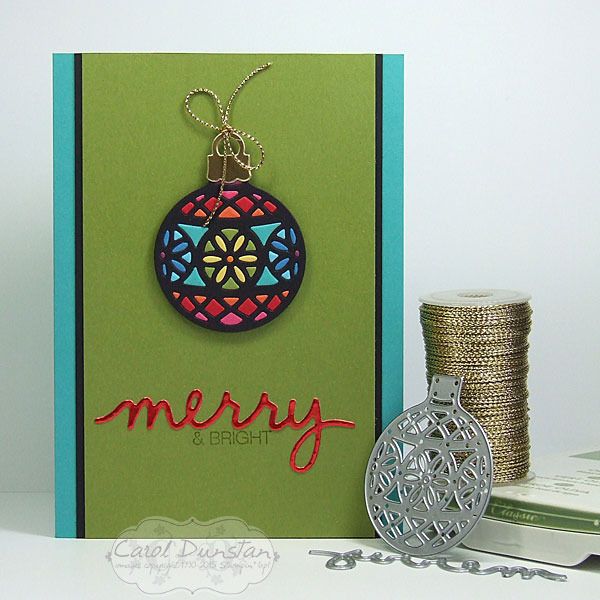
There are many beautiful products in the Stampin' Up! Holiday Catalogue, but the one thing I absolutely knew I would be top of my list was the Delicate Ornaments framelit dies. The coordinating Embellished Ornaments stamp set is of course lovely as well and available in a bundle with the dies for a 15% saving (which is what I bought!), but I was itching to get my hands on the dies in particular so I could play jigsaw with the little pieces, like I have in the past with the Lace Ribbon Punch and Butterfly Thinlets.
I'll be popping this card in to go on the display boards at OnStage Local today, and will have a bit of a tutorial up in a few days showing my process for creating things like this. For now, I am off to enjoy my day of Stampin' Up! activities - including some sneaky peeks at the upcoming Occasions catalogue!
Colours used are:
Saturday, October 31, 2015
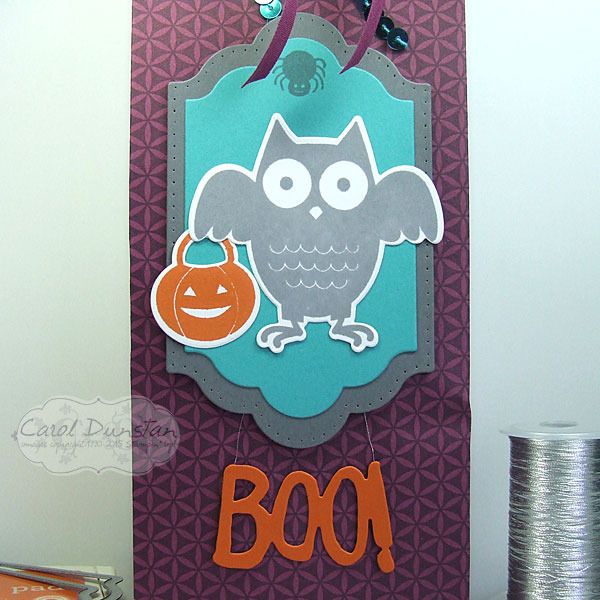
Boo! Howl-o-ween Treat
The other item I made this week were some bags for my kids for Halloween. They are kind of a trick AND treat bag with both chocolates and plastic bats and spiders inside, hehehehe.
It was hard to get a good, full length shot of this as it was made from a full 12x12 sheet of patterned paper. The bag itself was made using the giftbag punch board and following the score lines for the large bag. While the paper was obviously larger than the board, and thus score lines didn't go right to the edge, you can turn it around and line things up to finish each score line, use your paper trimmer or the stampin' score to finish off the score lines, or just not worry about it and carefully fold along the bits that are scored then continue the fold to the edge (just make sure things are lined up at the edge nice and square). Being owl fans I had to use the fab owl image from the Howl-o-ween Treat set for their bags. The sentiment is literally hanging by a thread, being attached only in the middle behind the owl layers so it will swing around on it's silver thread.
Here's a close up
And the colours used were...
Monday, October 05, 2015
Inklings Cyberstamp
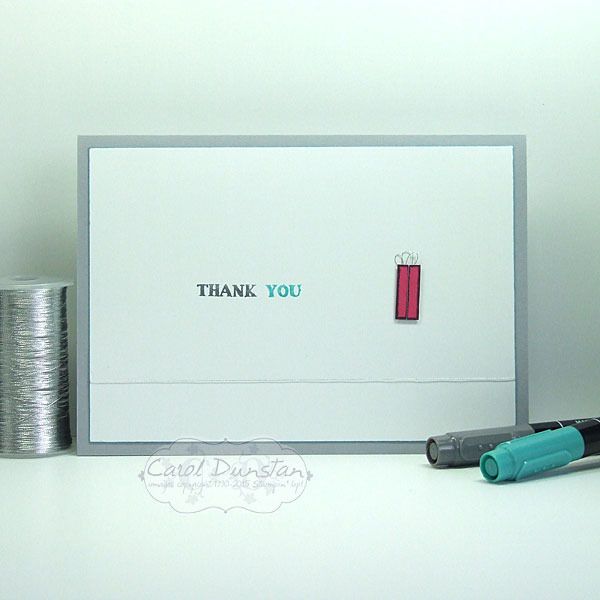
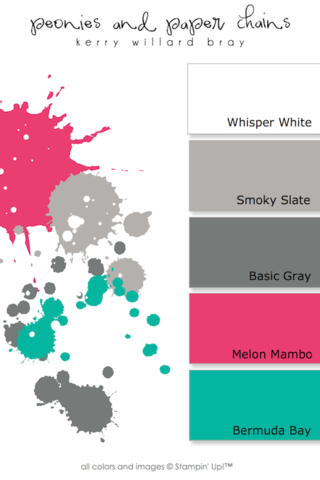
It's been some time since the Inklings team had a cyberstamp, but we had our first one in a while on Friday night. I didn't get a whole lot done as I just wasn't in the right headspace, but I did make one card that combined two challenges. It's become a common thing to make a Christmas card using non-Christmas stamps, but Jayne flipped that on it's head and asked us to make a non-Christmas card using Christmas stamps. I combined that with the second challenge of the night, which was a colour combination from Kerry Willard Bray.
I didn't see a lot of options among the Christmas sets I have, and maybe not the most imaginative of cards, but sometimes super simple is what you need.
Colours were:
I didn't see a lot of options among the Christmas sets I have, and maybe not the most imaginative of cards, but sometimes super simple is what you need.
Colours were:
Saturday, August 29, 2015
Sponged Scallops
I have't quite finished playing with the Striped Scallop die, and have used it in a more expected way for this card (another Father's Day card, but works just as well for a birthday card if you wanted).
Well... a little more expected than using it to embossing the design into cardstock. I did use it to diecut this time, but have used the little cut out pieces to create my background this time. I cut the die out three times from Shimmery White cardstock to give myself plenty of scallops to play with. I then applied some temporary adhesive to my grid paper, laid down the scallop "frame" and placed the scallops back into it and getting them to stick. I then lifted the "frame" up and sponged the scallops. I thought I had taken a photo of the grid paper once I was finished as the effect was equally cool, but alas there was no such photo when I connected my camera to my computer :( After my scallops were all sponged I laid the "frame" onto the cardstock and stuck all the little scallops down before removing the frame and leaving the scallops all perfectly spaced. I was so happy with how this came out! Here's a close up of the scallops so you can see the shimmer better.
And here are the colours I used:
Subscribe to:
Posts (Atom)