Wednesday, December 31, 2008

Ending The Year On A Purple Note

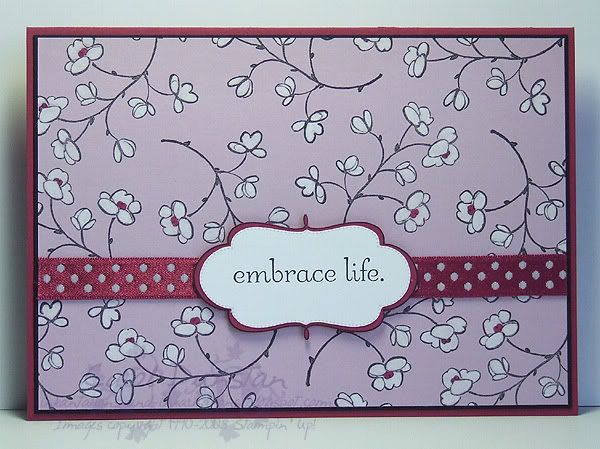
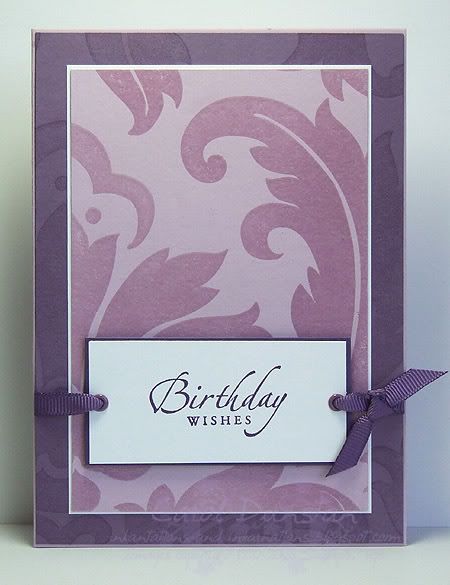
Just in time to post one last card for 2008. Better late than never... which leads to a resolution - to be even more organised in 2009 (so if anything like chicken pox rears it's ugly head again it won't throw quite so big a spanner in the works).

ETA: I should add that the main stamp used on this card, the Baroque background stamp, was what I recieved from my Elite Secret Santa this year. I haven't had a chance to put much thought into who my Santa is (the whole cloak and dagger secrecy is one of my favourite bits of Secret Santa's, especially when you rarely get to see people's faces when they open their pressie) but if you are reading, thank you again!

All supplies by Stampin' Up!
Cardstock: Pale Plum, Perfect Plum, Whisper White, Elegant Eggplant
Stamps: Baroque, Sincere Salutations
Inks: VersaMark, Elegant Eggplant
Accessories: Elegant Eggplant grosgrain ribbon, Soft Subtle eyelets, 1/8" circle punch, clear embossing powder, dimensionals

Monday, December 29, 2008

It's oh so quiet...

So sorry for have left you all without a post for so very long... before Christmas I finally dived into the 12x12 calendar I had planned on making my parents. Planned since the previous Christmas, but only started the week before due to photo issues. Oh my word! I have photos of that I can share with you, I haven't done anything else really as there was all the Christmas activities, some normalising and we also have family visiting from OS. I have some other things that I have fallen behind with and need to attend to those ASAP, so maybe not tomorrow, maybe not the next day... but sometime soon I will be back with a proper post!

Friday, December 19, 2008

KW Colour Inspiration #35


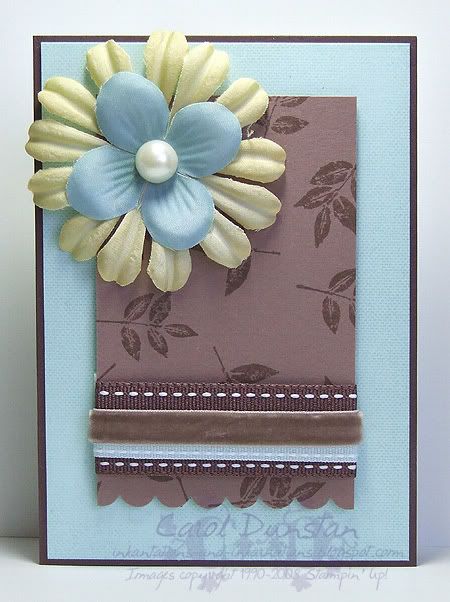
Here's my card for this weeks colour challenge over on Kristina's blog. I based the layout on Lauren's sketch, though as always I have made changes. Initially I struggled with this colour combo as I had done something very similar before, and I didn't want it to seem like I was just re-hashing that card! Initially I intended using more stamps from the Petal Prints set, but in the end just went with the leaves and opted for flowers from the Pretties Kit so it was a bit more textural. Keeping with the textural theme I broke out an old favourite, the Linen background, and stamped it on Sofy Sky using the matching ink.

All supplies by Stampin' Up!
Cardstock: Chocolate Chip, Soft Sky, Close To Cocoa
Stamp Sets: Petal Prints, Linen
Inks: Close To Cocoa, Soft Sky
Accessories: Chocolate Chip 1" double-stitched ribbon, Soft Sky double-stitched ribbon, Theater Ribbon Originals, Pretties Kit, aquapainter, So Saffron marker, Soft Sky "marker" (washed out marker + refill), Sage Shadow marker, mini glue dots, dimensionals

Thursday, December 18, 2008

Happy Christmas Mates

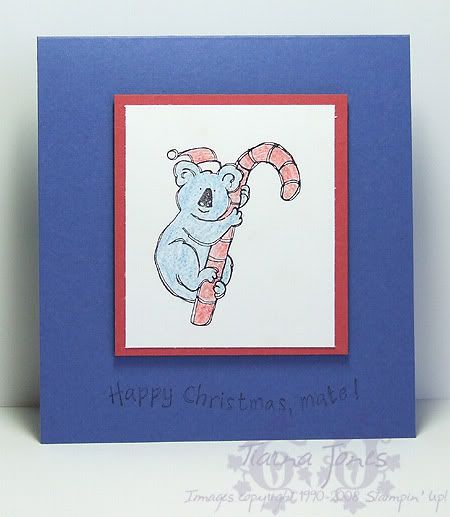
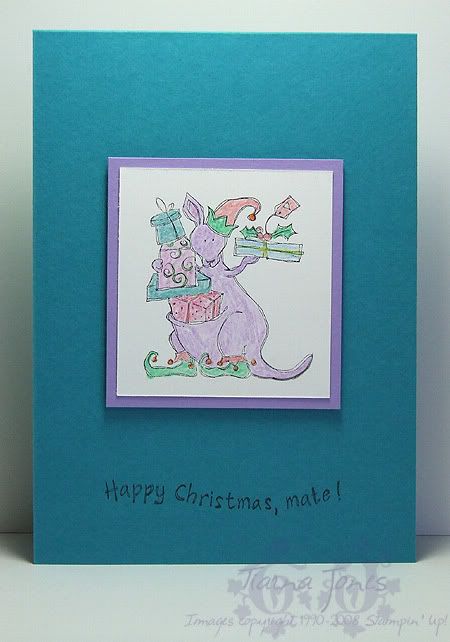
The other day I asked Tiarna if she wanted to hand out Christmas cards to her school friends and she said yes... so the next question was whether she wanted shop bought ones or handmade, and she said handmade - "Handmade is nicer" biggrin. In previous years I have given them pre-stamped images to colour but this year I let her stamp her own (I had other things to do!), she then coloured them, we worked out colours and layering, cut the cardstock and then Tiarna put them all together. These were her cards, the koalas for friends and the roo for her teacher:

Towards the end of card assembly yesterday she asked me if she would have time to play on the computer before dinner. I had to answer no for the BBQ was nearly done, and I was expecting a disappointed girl negotiating card completion after dinner and bath, but instead she replied "that's ok, making cards is fun!" Confirmation I am raising her right wink.

Most supplies by Stampin' Up!
Cardstock: Brilliant Blue, Ruby Red, Taken With Teal, Lavender Lace, Whisper White
Stamp Set: Happy Christmas Mate
Inks: Basic Black, StazOn Jet Black
Accessories: Faber-Castell watercolour pencils, dimensionals

Tuesday, December 16, 2008

Tea For You

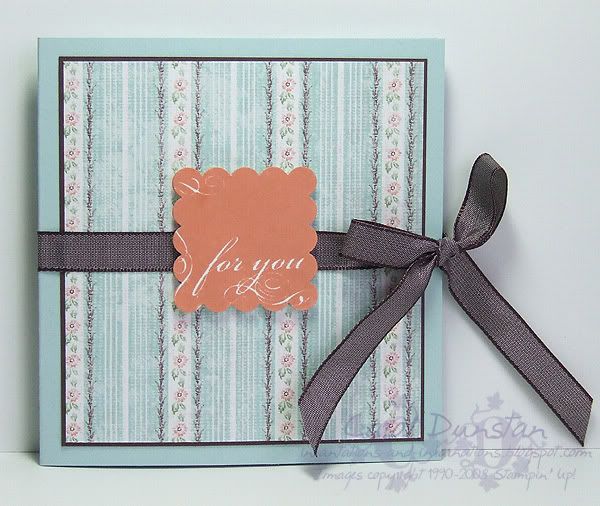
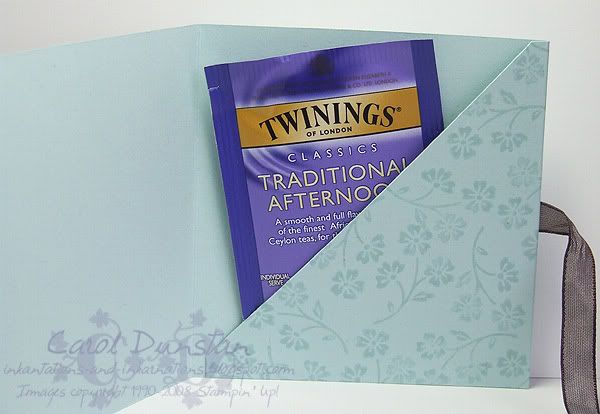
Here is my second piece from the Inklings cyberstamp, a card and a teabag holder. Since I already had the Afternoon Tea paper and matching cardstock out I stuck with it for this one, although I opted for an image from Say It With Scallops for the front of the card.
And inside is the tea... Afternoon Tea to boot, LOL. What was an interesting coincidence to me was that the day that Margaret set this challenge for us and I made this was the same day that one side of the family have a cuppa in the morning, wherever they are in the world, to remember a family member on her birthday, who died in her sleep when she was only 3.

All supplies by Stampin' Up!
Cardstock: Soft Sky, Chocolate Chip
Stamp Sets: Live Your Dream, Say It With Scallops
Inks: Groovy Guava, Soft Sky
Accessories: Afternoon Tea paper, scallop square punch, Chocolate Chip taffeta ribbon, dimensionals, sticky strip (for inside flap)

Monday, December 15, 2008

Afternoon Dream

Last week the Inklings had their December cyberstamp, this month hosted by Margaret. Margaret set our first challenge as a sketch challenge, using a sketch from the SU! demo website. I took some liberty with the sketch, as I tend to do, and the best thing was she posted it early, so I was thinking it over while getting dinner etc so when I actually sat down to make it it all went a lot quicker. I decided to go with the Afternoon Tea paper that matches the Live Your Dream set. I selected papers with just the blue and green colours (omitting Groovy Guava) and added Blue Bayou to the mix by colouring the petals in with my Blue Bayou marker and then layering the flower on Bayou cardstock.

All supplies by Stampin' Up!
Cardstock: Soft Sky, Blue Bayou, Whisper White
Stamp Sets: Live Your Dream
Ink: Chocolate Chip
Accessories: Blue Bayou marker (washed out marker + refill), Soft Sky marker (washed out marker + refill), Wild Wasabi marker (washed out marker + refill), Aged Copper Hodgepodge, Chocolate Chip double-stitched ribbon, cutter kit, dimensionals

Sunday, December 14, 2008

Peaceful Merry


I wanted to share one last Christmas card with you (well, I think it will be the last!). This one was the make & take at a recent workshop, utilising markers (remember, the special ends today!) including the Purely Pomegranate one which I had made myself (using a Rose Red marker). As simple as this card is (and it is a slightly stepped up version of this card) I really like it and if I had thought of doing it in this colour combo earlier I probably would have made this one of my mass-produced cards this year! As well as the change of colours other changes made are to punch out the sentiment and mount it on dimensionals (adding a layer behind for extra interest), and instead of punching holes to tie the ribbon through, this wider ribbon is simply tied trimmed and stuck on with a mini glue dot.

All supplies by Stampin' Up! Cardstock: River Rock, Always Artichoke, Whisper White Stamp Sets: Peaceful Wishes, Many Merry Messages Accessories: Purely Pomegranate double-stitched ribbon, mini glue dot, small oval punch, large oval punch, Always Artichoke marker, Purely Pomegranate marker (washed out marker + refill), dimensionals

Busy Busy

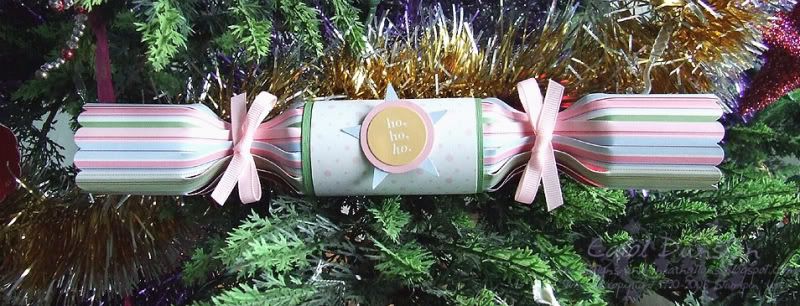
I have had things to post I just haven't really had a chance to blog one let alone schedule some posts. Grabbing a few seconds now before I go and have breaky, see if I can squeeze in some baking before a birthday party and a spot of Christmas shopping. Got a good deal of shopping done yesterday and have most of the kids presents under the tree which feels fabulous! At least my to-do list feels a lot less nw! Anyway, here's something I made during the week, a cracker based on Beate's tut from last year. I used the Winter Bright Simply Scrapping kit and a couple of punched shapes from coordinating cardstock. Inside I had a printed joke and a Cadbury Magical Elf. Yes, after all that work they (for there was two) now lay trashed on the table after the girls pulled them (which was the intention, they had cracker snaps in them after all). I love crackers, such a simple and fun thing - the girls love them too and were impressed to see that I had made some for them. I have a few snaps left so hopefully I'll have some more crackers to share with you in the not too distant future.

All supplies by Stampin' Up!
Cardstock: Bashful Blue, Pretty In Pink, Wild Wasabi textured cardstock
Stamp Set: none
Inks: none
Accessories: Winter Bright Simply Scrappin' Kit, Large Star punch, 1 3/8" punch, Pretty In Pink grosgrain, scallop edge punch, Berry Bliss paper, dimensionals

Friday, December 12, 2008

KW Colour Inspiration #34


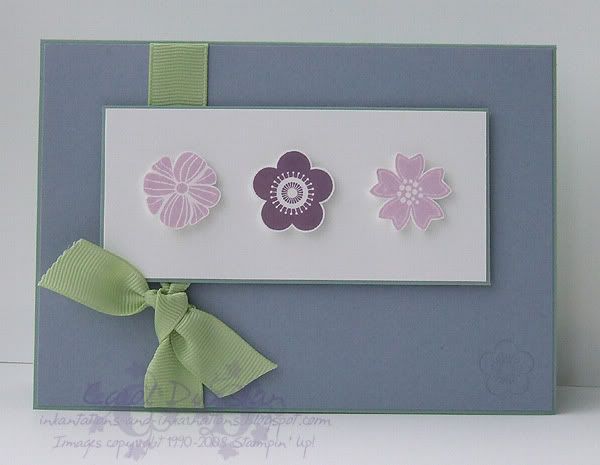
Ooooh, now these are my kind of colours! I was very excited to see Kristina's colours this week (it doesn't seem to take much to get me excited, hey?) but it's taken me a while to have some time to work on it. I had this idea pretty much from the start, got a flower stamped and then didn't get back to it till last night... With the time difference I don't think I have a chance to wait for better light for a photo so this one will have to do for now so I get this in on time.

I based the layout on Amy's sketch #40, though gave my card a landscape orientation. I do really like Bordering Blue, particuarly in combinations like this, so I decided to use a lot of it and have the plums as accent. Very simple card, but I like it.

All supplies by Stampin' Up!
Cardstock: Sage Shadow, Bordering Blue, Whisper White
Stamp Set: Eastern Blooms
Inks: VersaMark, Pale Plum, Perfect Plum
Accessories: Certainly Celery 5/8" grosgrain ribbon, dimensionals
Shows watched while creating: Moonlight, Heroes

Wednesday, December 10, 2008

Kusudama

OK Kari, how about this one then? twisted

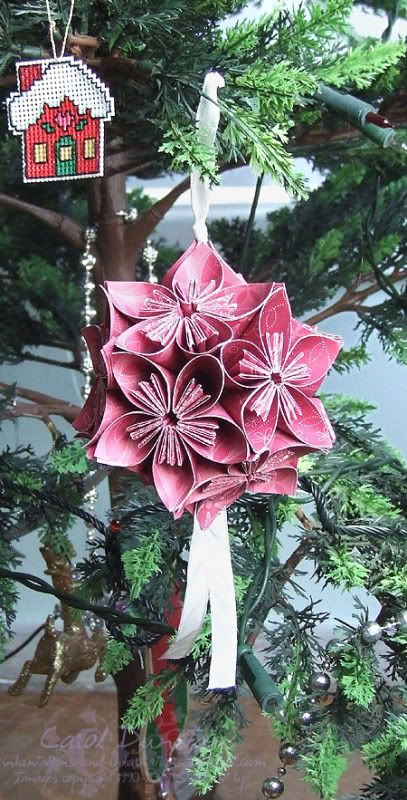
I saw these on Jenn's blog the other day and just had to try one for myself. The tutorial is over at Folding Trees, which I am not even game to look at any further at the moment in case I am tempted into making something else right now! I used 3" squares for mine, using two different designs from the Rose Red Prints paper. From 2 sheets of paper (for half the squares) you'll be left with just 3" x 6" of paper, if you wanted to have all the squares in the same paper you'd need four sheets. The folding is very easy, and I don't think my background in tea-bag folding was responsible for that - each section is easy to make. It's just that there are so darned many of them! It's also quite weighty and I thought I would have to hang it up somewhere else but I managed to find a spot for it on the tree. I really enjoyed making this but I won't be doing another one any time soon as I still have quite a few things to get done before Christmas. But I plan on doing another one next year biggrin. And then I'll have to see what else I can challenge Kari with twisted.

All supplies by Stampin' Up!
Cardstock: none
Stamps: none
Inks: none
Accessories: Rose Red Prints paper, Tombow Multi adhesive, Whisper White taffeta ribbon

Tuesday, December 09, 2008

Embrace Brights

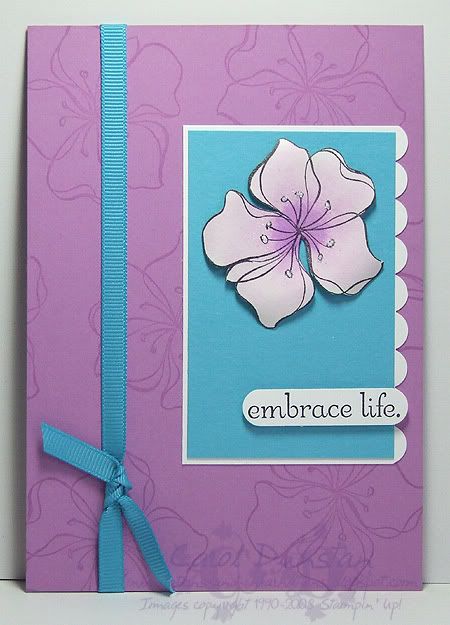
Today I have a card for you! This is the card I made for a recent Inklings swap... Are you sick of this stamp set yet? I hope not, because I think you are going to see a lot of it! Most of the card is pretty straight forward, but I did want to explain how I did the flower (though I probably should have taken a side-on shot to show it better). Firstly, I stamped the flower on Confetti White cardstock using StazOn. I then swiped my clean aquapainter over the flower to moisten the cardstock. Using my aquapainter I picked up colour from the lid of my Orchid pad and coloured the flower in - starting in the middle and working my way out. Once I was happy with the overall colour I let it dry out a bit before coming back and adding more colour to the center. Once it was dry I cut it out and yet again wet the surface with a clean aquapainter. This wasn't to blend the colour more, but so I could shape the petals (I curled them around my paper piercer). Once this was dry I added the Dazzling Diamonds glitter with my 2-way glue pen. To mount the flower I used a mini glue dot in the center and pop-up glue dots under the petals to help them keep their shape.

All supplies by Stampin' Up!
Cardstock: Orchid Opulence, Whisper White, Tempting Turquoise, Confetti White
Stamp Set: Embrace Life
Inks: StazOn Jet Black; Orchid Opulence for watercolouring
Accessories: Scallop Edge punch, Word Window punch, Tempting Turquoise grosgrain, mini glue dots, pop-up glue dots, dimensionals

Monday, December 08, 2008

Berry Bliss Bauble

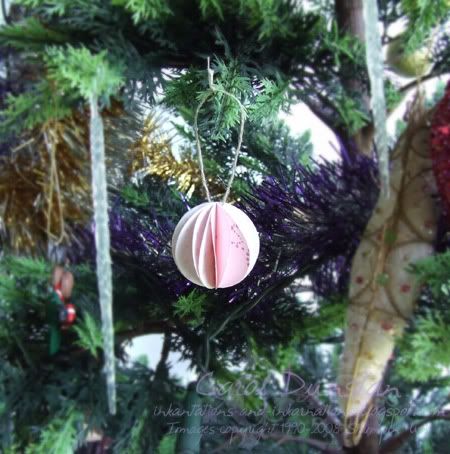
No card again today! I've got a little girl home sick so I decided to make a bauble for her to cheer her up (although after throwing up a second time she is perfectly fine). Now that I have Kari nice and worried about the next ornament challenge I would throw her way (see her German ornament over here) I've gone with the first (and simpler) of the two I recently came across. You can find the directions for this over at Design*Sponge. Rather than trace and cut my circles I punched mine (of course...). For the ornament above I used the 1 3/8" circle punch and I don't think you'd want to use anything smaller or it would be too fiddly.

Most supplies by Stampin' Up!
Cardstock: none
Stamps: none
Inks: none
Accessories: Berry Bliss paper, 1 3/8" circle punch, 1/16" hole punch, linen thread, mini glue dots, staples (non-SU!)
Show watched while creating: A Very Minty Christmas (I was sitting out in the loungeroom with Shaelea...)

Sunday, December 07, 2008

In Color Marker MkII

Sorry no cards today, instead I am going to show you how you can turn a regular SU! marker into an In Color marker.

While using blender pens for In Color markers has made me such a happy stamper (since I could then have stamped images multi-coloured direct to rubber with In Color colours), constantly having to refresh them can be a drag, let alone you are limited to one size of tip. Using a proper marker for the base means you can direct-to-rubber even the most compact of locations (like the "mane" on the seahorses here), you have a nice fine tip for journalling and you will have consistent colour intensity for a very long time.
First, you will need a pair of tweazers, a small glass of water (Winnie the Pooh image optional), and a Stampin' Up! marker. I like to choose whatever I feel is the closest to the In Color I am making it. Here I have Garden Green, this will become my Wild Wasabi marker.
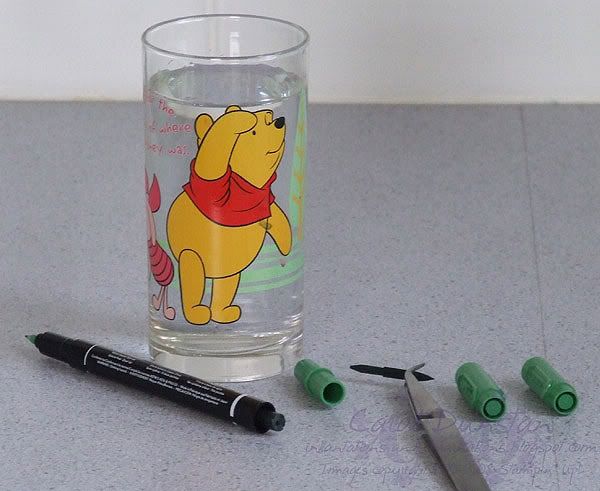
Remove the lids from both ends of the marker, use the tweazers to remove the felt tip (it comes out very easily) and remove the coloured part that holds the felt tip from the rest of the black barrel. You'll need to get your teeth into that, but they aren't so stuck that you'll have sore teeth at all.
Pop the felt tip and the barrel insert into the glass of water. Straight away colour will start coming out. Here you can also see that one end of the insert wasn't fully green. I never actually used this marker as I bought it solely for this purpose (remember, you can still by markers individually till December 14th - just a week away), but as long as the ink is going through the middle it doesn't matter if the whole outside of the insert is not soaked in ink.
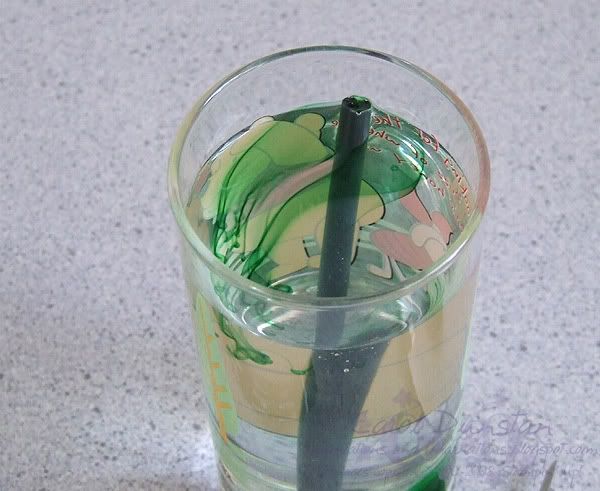
Oooh, pretty swirly patterns!
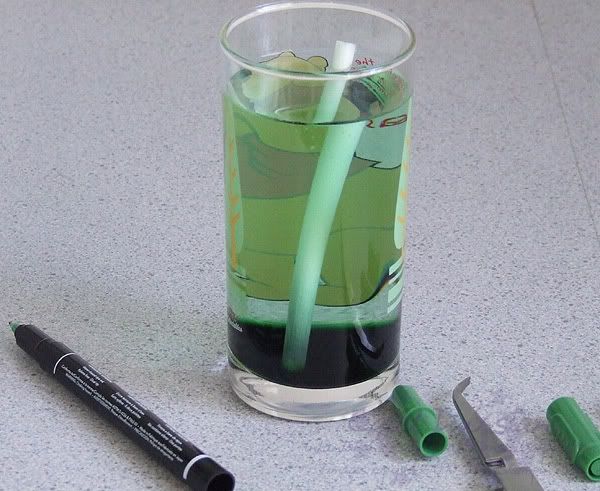
Here we are 2 hours later. You can see that a lot of colour has come out of the insert.
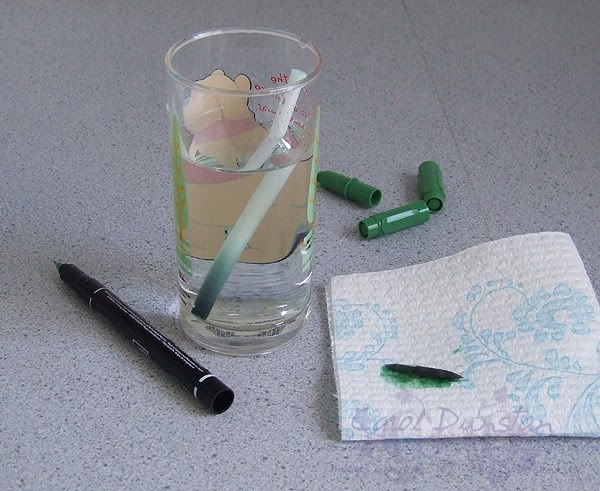
Now, fish the felt tip out, discard water and fill up the glass with nice clean water. I can't stress enough that you need to get the felt tip before turfing the water... if it goes down the drain you are stuffed. Place felt tip on kitchen towel to dry.
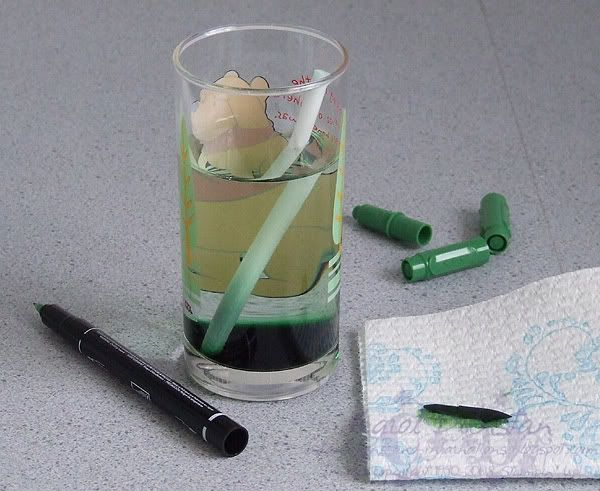
Another 2 hours later. Even though it looked like most of the colour had already come out of the insert plenty more has come out now. Discard water and refill glass.
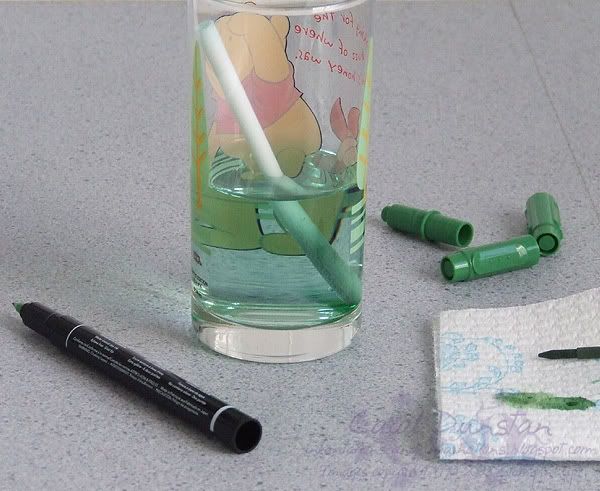
Another 2 hours later. The water is a little discoloured but clearly this is as much colour that is going to come out this way. Discard water.
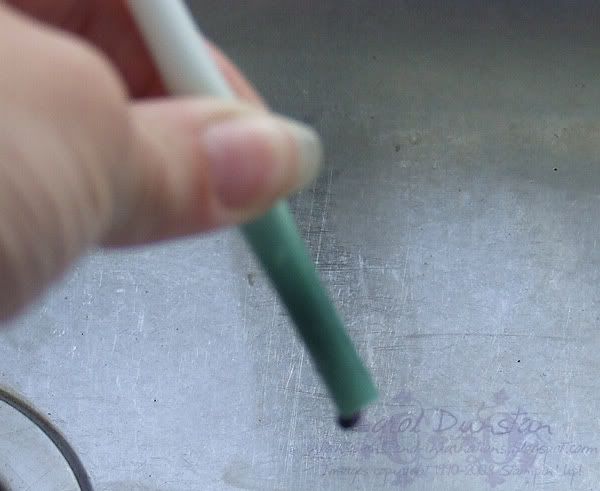
Over the sink, pinch the insert between your fingers and run them down the length of it to squeeze out any remaining colour. I was a little worried before hand that this would crack the plastic around the insert, but Jayne assured me it was fine which was good enough for me. Sorry about the dodgy photo, but I just couldn't get the camera to focus on my hand. I should go clean that sink shouldn't I?
Once you have squeezed out the remaining colour, sit the insert up on kitchen towel to dry. There may be a little more colour come out, but it's no biggie.
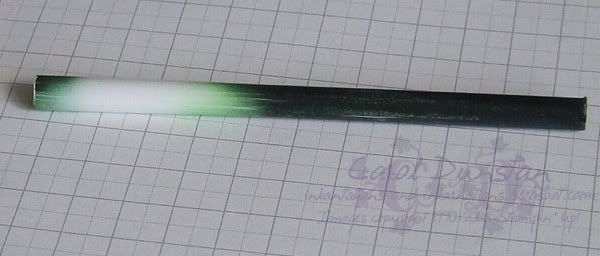
Pop insert into marker barrel and place drops of ink refill on the exposed end. Once the insert has soaked up a bit you will need to leave it longer and longer between drips to soak in. I like to also flip it over and put drops in the other end, but I still ended up with a rather large section of the inert that didn't soak up colour. This is just on the outside, I could see that colour had soaked through the core and when tested both ends worked fine. Once you get the marker insert half coloured it's a good idea to keep a close eye on the fine writing tip at the bottom... you'll probably notice tiny air bubbles coming up the top, but if the ink starts oozing out the fine tip the the insert has soaked up all it can. Once you have finished putting ink in the insert pop the coloured barrel end back into the barrel, reinsert the tip (I like to put a few drops of ink refill on the tip to speed up the ink flow into it) and away you go!

I used my brand new In Color markers on the flowers of this card, Other than needing to do a bit more conditioning of the rubber, the image has stamped really well and I am an even happier stamper now that using In Color markers has become even easier!
Friday, December 05, 2008

Sketchy Thanks

I know, I said I'd be back tomorrow, which was yesterday, and I wasn't back so you are getting yesterday's post today. But you're not getting it all in one hit. I've often mentioned using In Color markers that I have created by using a blender pen to soak up ink from a refill. Well, with the fabulous marker promotion that is running at the moment I took the opportunity to make some new and improved In Color markers for myself. I do want to share with you just how I did that, but it's going to take me a while to edit the photos etc etc, so I thought I could at least share the card with you.

The layout for this card comes from Julee's Mojo #63 sketch. The colours for the card come from the Afternoon Tea paper (Chocolate Chip, Groovy Guava, Soft Sky, Wild Wasabi), 3 of which are In Colors. I knew right from the start that I wanted to colour the flowers with markers, so I grabbed my new In Color markers and coloured the stems and leaves with Wild Wasabi, the petals with Groovy Guava and the center with Close To Cocoa (I wanted something softer than Chocolate Chip for most of the card). The main advantages of my new In Color markers for this technique is that they don't need reinking every other time you use them and you have a consistent colour. Since I had just fixed these up they were very juicy and didn't really need "huffing" to re-moisten the ink prior to stamping. YAY! I'm so happy... it's such a simple thing but it makes my creative life so much easier!

Anyway, I'm hoping to post my marker tutorial later tonight, but if not it will be tomorrow night at the latest so just sit tight... it will be here eventually, LOL.

I've also uploaded another card to the Elite Challenges Blog, this time using Say It With Scallops from the Summer Mini, as well as the new Chunky Sprinkles glitter. Oooh, I do love that stuff!

All supplies by Stampin' Up!
Cardstock: Soft Sky, Close To Cocoa, Whisper White
Stamp Set: Live Your Dream
Inks: Chocolate Chip, Soft Sky
Accessories: Afternoon Tea paper, Wild Wasabi double-stitched ribbon, Aged Copper Hodgepodge, scallop square punch, 1 1/4" square punch, Close To Cocoa marker, Groovy Guava "marker" (washed-out marker + refill), Wild Wasabi "marker" (washed-out marker + refill), dimensionals

Wednesday, December 03, 2008

KW Colour Inspiration #33

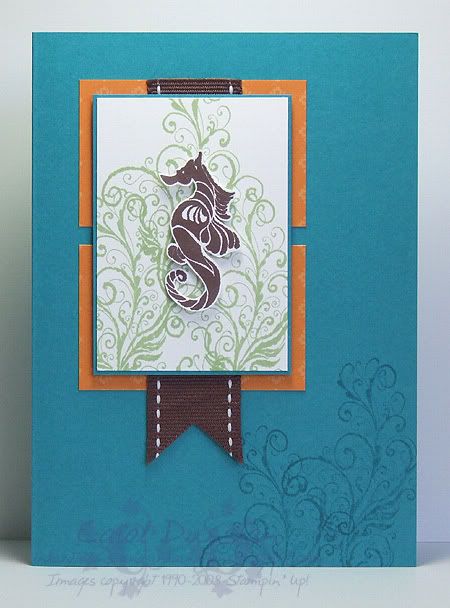
Here's my card for Kristina's latest colour challenge. I based it on a sketch by Lauren Meader, and I did plan on having a sentiment where it is placed in the sketch, but I had the paper and ribbon stuck down before I remembered and I didn't like my chances of getting it to stamp nicely then (let alone it then being too close to the top). Still, I like how it turned out and in fact I am glad I didn't stamp the sentiment now!

When I first saw the colours I had no idea what I was going to do with them. I decided to rule flowers out, and have lots of Teal because I am on a real kick lately, and then started looking at my remaining stamp sets... as soon as I saw Ocean Commotion and thought of Guylian chocolates and it was a done deal lol. Hmm, this is becoming a trend isn't it, being inspired by chocolate... but there are worse things so it's all good, hehehehe.

All supplies by Stampin' Up!
Cardstock: Taken With Teal, Whisper White
Stamp Set: Ocean Commotion
Inks: Taken With Teal, Certainly Celery, Chocolate Chip
Accessories: Bali Breeze paper, Chocolate Chip 1" Double-stitched ribbon, dimensionals
Show watched while creating: Terminator: The Sarah Connor Chronicles (Aussies, there are bound to be spoilers there (as with most I link to) but the page was taking that long to load I didn't see anything to worry about... but be warned!)

Embrace Frames

Still playing with Embrace Life... in fact it's exactly the same stamps as I used on yesterdays card. On the previous Embrace Life card I coloured the flowers with the white gel pen to get a very full and stack white. On todays card I used a blender pen to colour the flowers with Whisper White craft ink so I could vary the intensity.

This morning I have uploaded another card to the Elite Challenges blog, this time using the Eastern Blooms set. If you note my comment about the Soft Sky marker, I'll have more about that tomorrow.

All supplies by Stampin' Up!
Cardstock: Purely Pomegranate, Basic Black, Pale Plum, Whisper White
Stamp Sets: Frames With a Flourish, Embrace Life
Inks: StazOn Jet Black; Whisper White for colouring
Accessories: blender pen, Purely Pomegranate "marker" (blender pen + refill), Sherbet Ribbon Originals, dimensionals

Tuesday, December 02, 2008

Embrace Scallops

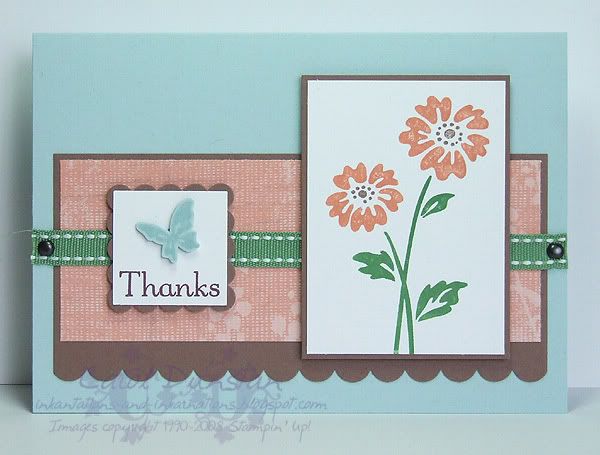
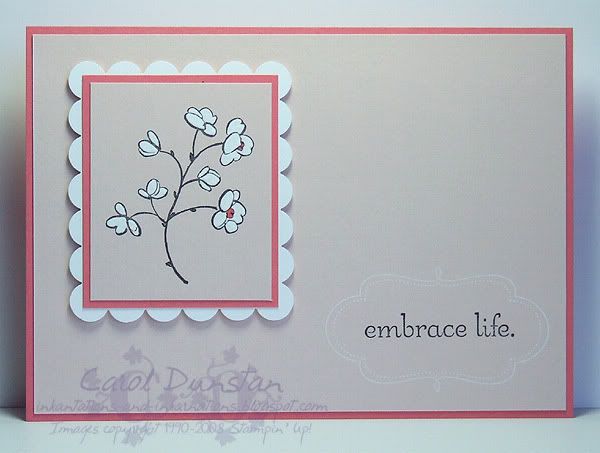
This card features another new set from the Summer Mini - Embrace Life. The scallop rectangle is not another new punch, I simply used the Scallop Edge punch to create that... with one punch you can make scallop squares and rectangles in a heap of different sizes! I love me some versatile products biggrin As for the rest of the card, I went back to a neglected colour for this one - Cameo Coral, which has had to make room for Groovy Guava this year. I know Cameo Coral doesn't have a wide fan base, but I really like it so it was about time it came out to play again.

I also wanted to mention I uploaded a card to the Elite Challenges blog yesterday. I used the new Ocean Commotion set for it, which I totally love... seahorses and swirly seaword - what's not to love?

All supplies by Stampin' Up!
Cardstock: Cameo Coral, Blush Blossom, Whisper White
Stamp Sets: Embrace Life, Frames With A Flourish
Inks: Whisper White, StazOn Jet Black
Accessories: scallop edge punch, white gel pen, Cameo Coral marker, dimensionals

Monday, December 01, 2008

Summer Mini Starts Today!

Do you hear that sound?

That's the sound of corner rounders all over Australia breathing a sigh of relief.

Stampin' Up!'s Scallop Edge Punch is here!

Now your poor, over-worked corner rounder can take a well earned rest and just do what it was made to do - round corners. The Scallop Edge Punch is here to make the job of scalloping an edge so much quicker and easier. And as if that wasn't good enough, it has stamps to match!

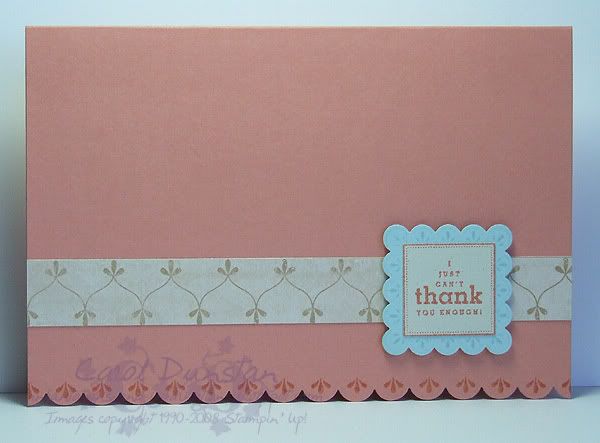
The Summer Mini (which can be viewed online here, or contact me and I can send you a hard copy (the real-life paper version is always so much nicer to flick through over a cuppa, plus you can stick post-it notes on all the things you like without them covering your monitor)) also sees the introduction of another punch - the Scallop Square Punch. It too has a matching stamp set, how cool is that! This very simple card uses both new punches and matching stamp sets along with a bit of Outlaw paper... and would you look at that, it matches too!

The Summer Mini runs from December 1st to March 31st, but could you really wait another minute to get your hands on those punches and stamp sets? Contact me now to place your order.

All supplies by Stampin' Up!
Cardstock: Groovy Guava, Soft Sky, Naturals Ivory
Stamp Sets: All Scallops (coordinates with the Scallop Edge punch), Say It With Scallops (coordinates with the Scallop Square punch)
Inks: Groovy Guava, Soft Sky
Accessories: Scallop Edge punch, Scallop Square punch, Outlaw paper, dimensionals