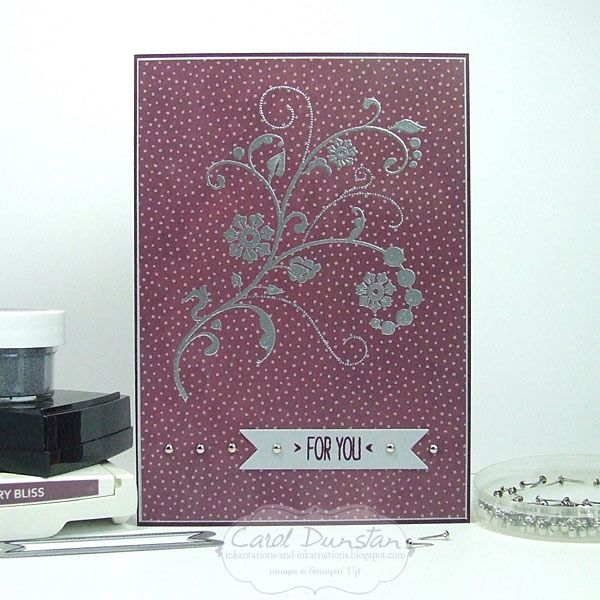
Another Flowering Flourishes card for you today, this time a more simple one than yesterday.
For this card I stamped the large image using VersaMark and heat embossed in silver towards the top of a piece of Farmers Market DSP. The sentiment is from the You're So Lovely set, which I stamped on Smoky Slate with Blackberry Bliss ink and cut it out using the large straight die from the Bitty Banners framelits. I used a couple of mini silver brads to attach it to the card front, and used a few more mini brads to create a line across the card.
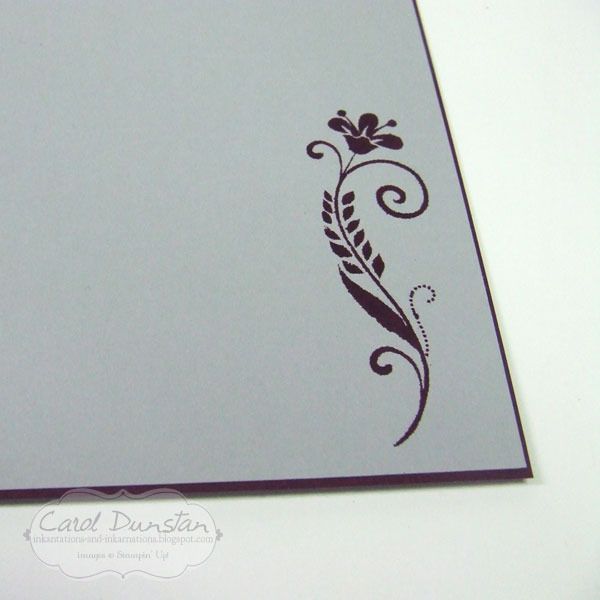
I again stamped the smallest image from Flowering Flourishes on the inside to dress it up a little.
There's quite a bit of retired product on this card, and some of it is already sold out in some format. The Blackberry Bliss A4 cardstock is completely sold out, however you still get Blackberry Bliss in some mixed colour packs. The Flowering Flourishes stamp set is sold out in clear-mount, but still available in wood-mount. You're So Lovely stamp set, Farmers Market DSP, mini brads, and Bitty Banners framelits are all still currently available
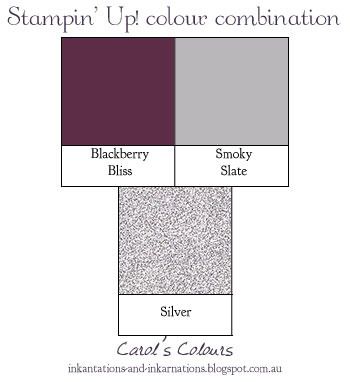
131998 Flowering Flourishes woodmount stamp set, 140762 You're So Lovely photopolymer stamp set, 133687 2014-2016 In Color A4 cardstock, 131291 Smoky Slate A4 cardstock, 138448 Farmers Market DSP, 133642 Blackberry Bliss stamp pad, 102283 VersaMark stamp pad, 109131 silver embossing powder, 122941 mini brads, 129267 Bitty Banner frameit dies
Showing posts with label heat embossing. Show all posts
Saturday, April 23, 2016
Thursday, December 03, 2015
Lighthearted Christmas
We still have a month left of the Holiday catalogue, but the items on the Holiday catalogue retiring list are only available while stocks last. Today I am sharing a card using two of the retiring sets, Santa's Gifts and Lighthearted Leaves.
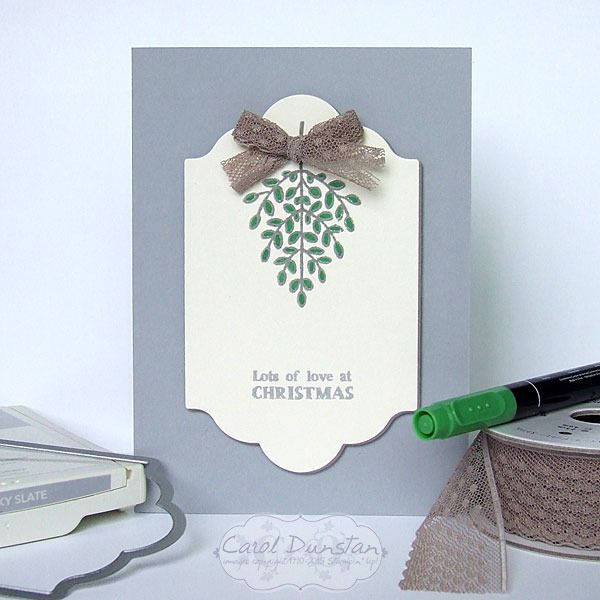
If it hasn't been said enough before, I'm adding another voice to the chorus: Lighthearted Leaves is such a versatile set! While the set comes with sentiments, the leaf images can easily be used for a wider variety of occasions. For this card I have used one of the images as mistletoe. For something different, I wanted the outline to be Smoky Slate. So the colour wouldn't run, I stamped the image in Smoky Slate first, then stamped over the top with VersaMark and then embossed the image with clear embossing powder. One of the great things about photo-polymer stamps, as this set is, is being able to see through and see exactly where you are stamping. This is a little complicated when you are stamping with VersaMark as you can't see the clear ink! So to make it all easier, the Smoky Slate image was stamped with the assistance of the Stamp-a-ma-jig, which I left in place while cleaning the stamp and reinking with VersaMark. By keeping the Stamp-a-ma-jig in position when stamping both images it makes it even easier to have things line up exactly.
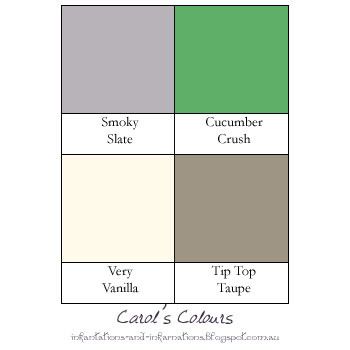
Todays colours are...
If it hasn't been said enough before, I'm adding another voice to the chorus: Lighthearted Leaves is such a versatile set! While the set comes with sentiments, the leaf images can easily be used for a wider variety of occasions. For this card I have used one of the images as mistletoe. For something different, I wanted the outline to be Smoky Slate. So the colour wouldn't run, I stamped the image in Smoky Slate first, then stamped over the top with VersaMark and then embossed the image with clear embossing powder. One of the great things about photo-polymer stamps, as this set is, is being able to see through and see exactly where you are stamping. This is a little complicated when you are stamping with VersaMark as you can't see the clear ink! So to make it all easier, the Smoky Slate image was stamped with the assistance of the Stamp-a-ma-jig, which I left in place while cleaning the stamp and reinking with VersaMark. By keeping the Stamp-a-ma-jig in position when stamping both images it makes it even easier to have things line up exactly.
Todays colours are...
Tuesday, December 16, 2014
Beautiful Berry Season
I did warn you you hadn't seen the last of the Blackberry/Razzleberry combo from me! This years Stampin' Up! Holiday catalogue really did have a wide variety of styles in it, but as always there are some lush and gorgeous sets like Bright & Beautiful. For an even richer look I swapped the white of my last Blackberry/Razzleberry card for gold. Gotta have a bit of gold at Christmas right?
All supplies by Stampin' Up!
Cardstock: Blackberry Bliss, Rich Razzleberry, brushed gold, Crumb Cake
Stamp set: Bright & Beautiful
Ink: Blackberry Bliss, VersMark
Accessories: Gold Glory embossing powder, Labels Collection die, Stars dies, dimensionals, Lucky Star embossing folder
All supplies by Stampin' Up!
Cardstock: Blackberry Bliss, Rich Razzleberry, brushed gold, Crumb Cake
Stamp set: Bright & Beautiful
Ink: Blackberry Bliss, VersMark
Accessories: Gold Glory embossing powder, Labels Collection die, Stars dies, dimensionals, Lucky Star embossing folder
Sunday, November 16, 2014
Wisteria Season
This time of year in Australia wisteria trees are well in bloom. It such a sign of summer, and from living in Queensland it makes me think of test cricket at the Gabba, closely followed by Christmas. And clearly, I have a thing for purple on Christmas cards ;) I was still wanting to play with the scroll look of the Letterpress Winter set, and since it shares this style with the Wintertime set I decided it was time to combine them. To make this card I inked the pattern of the Wintertime set with VersaMark, carefully avoiding the words, stamped it on Wisteria Wonder and embossed it in white. I then stamped the greeting from the Letterpress Winter set between in Wisteria Wonder ink. The largest die in the Apothecary Accents set fits this design well, though it is longer. To help fill the void I thought a pierced edge would work well. The background was done the same way as with the Flowering Filigree card.
All supplies by Stampin' Up!
Cardstock: Wisteria Wonder, Vellum, Whisper White
Stamp set: Letterpress Winter, Wintertime
Ink: Wisteria Wonder, VersaMark
Accessories: Wisteria Wonder Ruffled Ribbon, Scallop Trim Border punch, Apothecary Accents die, dimensionals, white embossing powder, paper piercing tool, Essentials Paper-Piercing Pack, Filigree Frame embossing folder
Saturday, November 08, 2014
Winter Pool Party
While it is Summer in Australia at Chritsmas time, and for some much of Christmas day is spent in the pool, there are still a lot of people who enjoy wintery Christmas cards. I also have a confession to make: I can be pedantic at times, and often baulk at snowflakes with eight "spokes" because this isn't accurate, snowflakes have six "spokes". That said, I loved the style of the Letterpress Winter and Wintertime sets that I completely didn't notice the snowflakes in this set indeed have eight spokes until I sat down to use the set! So, moving right along...
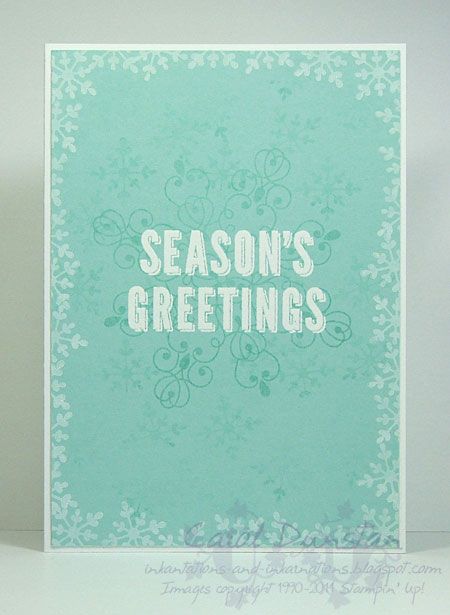
So for this card I wanted a cool and fresh look, minimalist in colours. To create some interest in what might otherwise have been a plain card I played with intensity of colour. The large snowflake was stamped in Pool Party ink, as were the smaller ones around it, but for the smaller ones I "stamped off" on scrap paper before stamping on my cardstock. This way what goes on the cardstock isn't the normal, full load of ink and you get a softer image. Over the top of this I embossed the sentiment in white, and around the edge I stamped the small snowflake again though this time using the Whisper White craft ink. My Whisper White ink pad could use some reinking, but I didn't want the outside snowflakes to compete for attention with the stark white sentiment in the middle so just used it as is to get a softer look for these snowflakes too.
All supplies by Stampin' Up!
Cardstock: Pool Party, Whisper White
Stamp set: Letterpress Winter
Ink: Pool Party, VersaMark, Whisper White
Accessories: white embossing powder
Shows watched while creating: Bones, Hawaii Five-0
So for this card I wanted a cool and fresh look, minimalist in colours. To create some interest in what might otherwise have been a plain card I played with intensity of colour. The large snowflake was stamped in Pool Party ink, as were the smaller ones around it, but for the smaller ones I "stamped off" on scrap paper before stamping on my cardstock. This way what goes on the cardstock isn't the normal, full load of ink and you get a softer image. Over the top of this I embossed the sentiment in white, and around the edge I stamped the small snowflake again though this time using the Whisper White craft ink. My Whisper White ink pad could use some reinking, but I didn't want the outside snowflakes to compete for attention with the stark white sentiment in the middle so just used it as is to get a softer look for these snowflakes too.
All supplies by Stampin' Up!
Cardstock: Pool Party, Whisper White
Stamp set: Letterpress Winter
Ink: Pool Party, VersaMark, Whisper White
Accessories: white embossing powder
Shows watched while creating: Bones, Hawaii Five-0
Saturday, October 04, 2014
Flowering Filigree
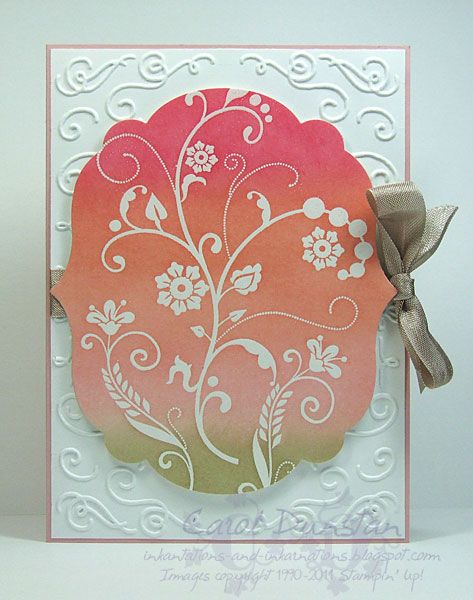
After loving the result of my Wildflower Meadow card last week, I thought I would do another using the emboss resist technique. For this card I teamed some of the Flowering Flourishes stamps with the Filigree Frame embossing folder. Frame designs might seem a little restrictive in that they give set dimensions to work with, and some times you will come across things that are more suited to the standard size of card in America (cardstock sizes are different, so standard card sizes are different). However, you can often work around such apparent limitations. In this case, for the background layer, I only embossed half of the cardstock, then ran it through the Big Shot a second time to emboss the other half. To do this I positioned the top plate so the end of it was halfway down the cardstock. Alternatively you can cut the panel in half and just run each one through without worrying about positioning the plates in a special way.
All supplies by Stampin' Up!
Cardstock: Crisp Canteloupe, Whisper White
Stamp set: Flowering Flourishes
Ink: Strawberry Slush, Crisp Canteloupe, Blushing Bride, Crumb Cake
Accessories: Crumb Cake seam binding ribbon, clear embossing powder, dimensionals, sponges, Filigree Frame embossing folder, Labels Collection die
All supplies by Stampin' Up!
Cardstock: Crisp Canteloupe, Whisper White
Stamp set: Flowering Flourishes
Ink: Strawberry Slush, Crisp Canteloupe, Blushing Bride, Crumb Cake
Accessories: Crumb Cake seam binding ribbon, clear embossing powder, dimensionals, sponges, Filigree Frame embossing folder, Labels Collection die
Wednesday, January 13, 2010
Cinema Saturday #61
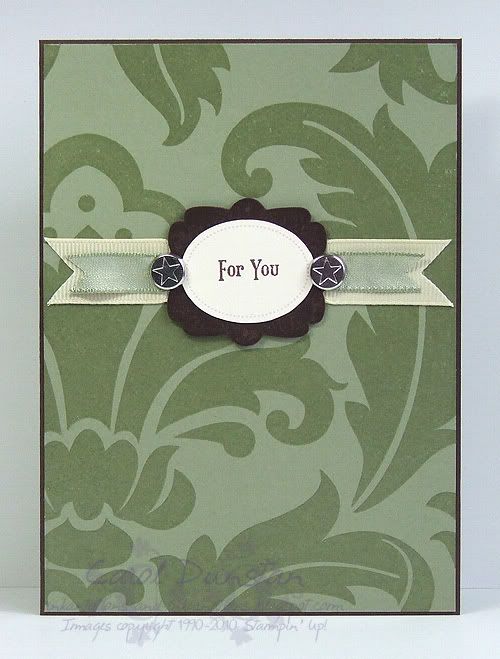
This week's Cinema Saturday is another favourite of mine, A Knight's Tale. I've been a Heath Ledger fan since the good ol' Roar days, and while I initially had issues with the historical inaccuracy of the costumes when this movie came out, I had no such issue with the modern music - go figure! Anyway, I had planned on putting a modern spin on this card, but my "Rock on" rub-on stuffed up, so I had to go with plan B (resulting in another sneak peek at a SAB set). Colours are inspired by Williams banquet outfit (I don't think those wooden toggles ended up on it!), and I have included the required element of stars in the form of a few brads.
I had plans for a scrap page featuring a pic of my girls at the medieval fair, but my darn sinuses are playing up so I'm not sure I'll get to it in time.
All supplies by Stampin' Up!
Cardstock: Chocolate Chip, Mellow Moss, Very Vanilla
Stamp Sets: Baroque, Framed With Love, Vintage Labels
Ink: VersaMark, Chocolate Chip, Pale Plum
Accessories: Very Vanilla 5/8" grosgrain ribbon, Mellow Moss taffeta ribbon, clear embossing powder, Styled Silver hodgepodge
I had plans for a scrap page featuring a pic of my girls at the medieval fair, but my darn sinuses are playing up so I'm not sure I'll get to it in time.
All supplies by Stampin' Up!
Cardstock: Chocolate Chip, Mellow Moss, Very Vanilla
Stamp Sets: Baroque, Framed With Love, Vintage Labels
Ink: VersaMark, Chocolate Chip, Pale Plum
Accessories: Very Vanilla 5/8" grosgrain ribbon, Mellow Moss taffeta ribbon, clear embossing powder, Styled Silver hodgepodge
Monday, November 09, 2009
Butter-Moth-Flies
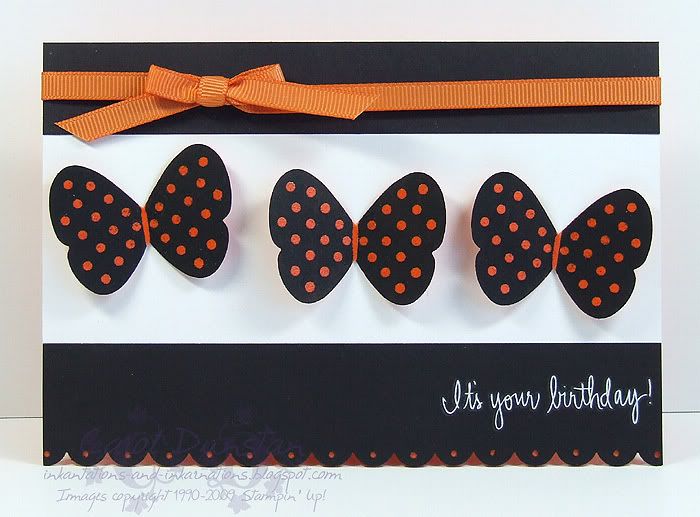
On Friday night Clare hosted this months Inklings Cyberstamp. Her first challenge was a sketch challenge based on a poster for the movie The Shining, the second challenge was a colour challenge of black, white and orange. I was late to the party so I decided to speed things up by combining the challenges (after all, orange can be a bit scary...
). The colours would have been great for a Halloween card, but since that was past I was a little stuck for inspiration until I thought of all the Tiger Moths we have around at the moment. I used the emboss resist technique to create my moths with the Flight of the Butterfly set, so they may be a little confused as to what species they really are but I'm really happy with how they turned out. And yes, I actually used Only Orange!

All products by Stampin' Up!
Cardstock: Only Orange, Basic Black, Whisper White
Stamp Set: Flight of the Butterfly
Ink: VersaMark
Accessories: clear embossing powder, Basic Black marker, Scallop edge punch 1/16" circle punch, Pumpkin Pie grosgrain ribbon, Fashion District rub-ons, mini glue dots
Plus a mystery item from the up-coming Summer mini catalogue
All products by Stampin' Up!
Cardstock: Only Orange, Basic Black, Whisper White
Stamp Set: Flight of the Butterfly
Ink: VersaMark
Accessories: clear embossing powder, Basic Black marker, Scallop edge punch 1/16" circle punch, Pumpkin Pie grosgrain ribbon, Fashion District rub-ons, mini glue dots
Plus a mystery item from the up-coming Summer mini catalogue
Thursday, November 05, 2009
Merry Tree Trimmings
I haven't managed to get many of the Elite Challenges challenges completed in recent times, but here is one I finished before I went away (I just didn't get the photos editted until now). The snippet you see above is actually looking through a window punched into the front of the card. The bauble in the snippet was embossed using black embossing powder before I coloured inside it using a Pink Passion marker and my Kiwi Kiss marker. The other baubles on the card were embossed with clear powder before being coloured in with a Basic Black marker. For the full card and product details see it over at the Elite Challenges blog.
Sunday, September 13, 2009
Cinema Saturday 49
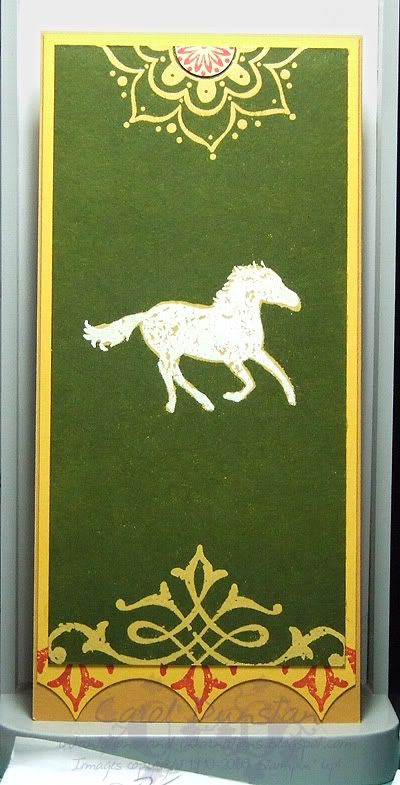
I'm sure you can imagine that I was exstatic to be asked to guest design for Cinema Saturday's Lord of the Rings: The Two Towers challenge. Those of you who have seen the Extended Edition dvd sets will have noticed that each one has a different style - FOTR is Elvish, TT is Rohirric (if that isn't a word it is now!) and ROTK... well maybe I will save that for when the girls nominate that as the weeks challenge! Anyway, it seemed that the thing to do would be to make something for The Two Towers that had a Rohan theme. One thing that really stood out for me was all the banners that are displayed in Meduseld, so I selected one and based my piece on that. I also have a bookmark of one of these banners, so I decided to make one of my own.
Thank you to my lovely assistant Karl Urban for helping me to present my bookmark to you.
Here's a closer shot of it. I used the emboss resist technique for most of this card as I wanted details in yellow on a green background. The horse was embossed with white, and I then went over it with my VersaMarker to fill the gaps and create a border and then embossed in clear. The base has a fold along the top so it will fold over your page.
Most supplies by Stampin' Up!
Cardstock: More Mustard, Summer Sun, So Saffron
Stamp Sets: Carte Postale, Wanted, One Of A Kind
Inks: VersaMark, Ruby Red, Garden Green (I think... it's been a while)
Accessories: white embossing powder, clear embossing powder, 1 3/8" circle punch (again I think, it's been a while), brayer
PS For the curious... I knew there would eventually be a CSCC for The Two Towers, and when working on cards for Fellowship I had ideas sparking for this. I then found out that Karl Urban would be attending the SupaNova convention in Sydney, so I made the bookmark and took it along and got him to pose with it. Squee!
Thank you to my lovely assistant Karl Urban for helping me to present my bookmark to you.
Here's a closer shot of it. I used the emboss resist technique for most of this card as I wanted details in yellow on a green background. The horse was embossed with white, and I then went over it with my VersaMarker to fill the gaps and create a border and then embossed in clear. The base has a fold along the top so it will fold over your page.
Most supplies by Stampin' Up!
Cardstock: More Mustard, Summer Sun, So Saffron
Stamp Sets: Carte Postale, Wanted, One Of A Kind
Inks: VersaMark, Ruby Red, Garden Green (I think... it's been a while)
Accessories: white embossing powder, clear embossing powder, 1 3/8" circle punch (again I think, it's been a while), brayer
PS For the curious... I knew there would eventually be a CSCC for The Two Towers, and when working on cards for Fellowship I had ideas sparking for this. I then found out that Karl Urban would be attending the SupaNova convention in Sydney, so I made the bookmark and took it along and got him to pose with it. Squee!
Saturday, August 22, 2009
Lovely As Tree Trimmings
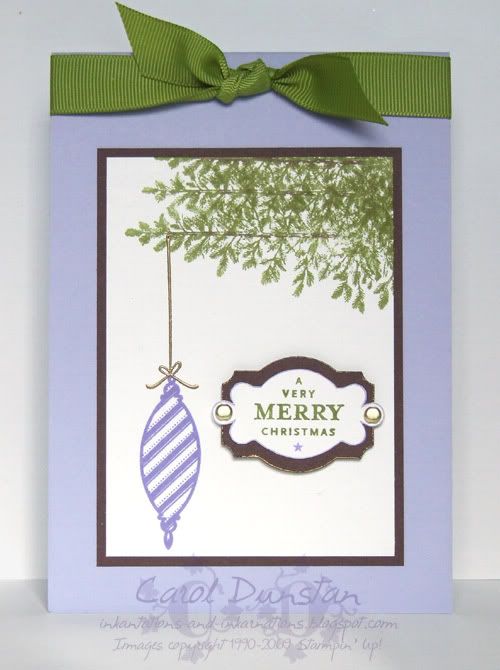
Two Christmas cards in two days and it's only August! It's a bit crazy, but that's all that I have photographed at the moment sorry! This card uses another set from the Spring mini, Tree Trimmings, which features three ornaments and the string/tie image for hanging. With Peaceful Wishes retiring in April, I had to think or another set with greenery I could hang my ornament from for this card. It suddenly hit me that by stamping "the" Lovely As A Tree tree sideways, I could make a branch without a branch stamp! I say "the" Lovely As A Tree tree as this tree gets used a lot on Christmas cards and is quite possibly the most used stamp from that set. I embossed my ornament 'string' in gold, and to compliment this I used gold brads on the sentiment. I also edged the Chocolate layer under the sentiment with my VersaMarker and embossed that with gold too.
It hasn't come up well in the photograph, but the tips of the leaves are a lighter colour than the rest of the branch. After inking the image with Old Olive, and going over the wood part with the Chocolate marker, I stamped off the edges onto scrap paper, then touched them up with the Celery marker.
Most supplies by Stampin' Up!
Cardstock: Almost Amethyst, Chocolate Chip, Whisper White
Stamp Sets: Tree Trimmings, Lovely As A Tree, Punches Three
Inks: Lovely Lilac, VersaMark, Old Olive
Accessories: Chocolate Chip marker, Certainly Celery marker, Lovely Lilac marker, Designer Label punch, gold embossing powder, gold brads, 5/8" Old Olive grosgrain ribbon, dimensionals, VersaMarker (not available through SU!)
It hasn't come up well in the photograph, but the tips of the leaves are a lighter colour than the rest of the branch. After inking the image with Old Olive, and going over the wood part with the Chocolate marker, I stamped off the edges onto scrap paper, then touched them up with the Celery marker.
Most supplies by Stampin' Up!
Cardstock: Almost Amethyst, Chocolate Chip, Whisper White
Stamp Sets: Tree Trimmings, Lovely As A Tree, Punches Three
Inks: Lovely Lilac, VersaMark, Old Olive
Accessories: Chocolate Chip marker, Certainly Celery marker, Lovely Lilac marker, Designer Label punch, gold embossing powder, gold brads, 5/8" Old Olive grosgrain ribbon, dimensionals, VersaMarker (not available through SU!)
Thursday, August 20, 2009
Embossed Circus
Sorry I've been AWOL again. I haven't been stamping much (not having a desk light is putting a huge crimp on my mojo), and completely forgot that I had some stuff already photographed, some even editted!The above snippet is from a card I've just uploaded over at Elite Challenges, for last months Circle Circus stamp set challenge. While the set hasn't been used much on the card, it is the feature. The colours (and bling!) were inspired by Tina's first Traveler's Inspiration Challenge. This card is also one that we'll be making at my embossing class on Tuesday night (2 spots left if you're around Newcastle and interested!).
Friday, June 12, 2009
KW Colour Inspiration #54
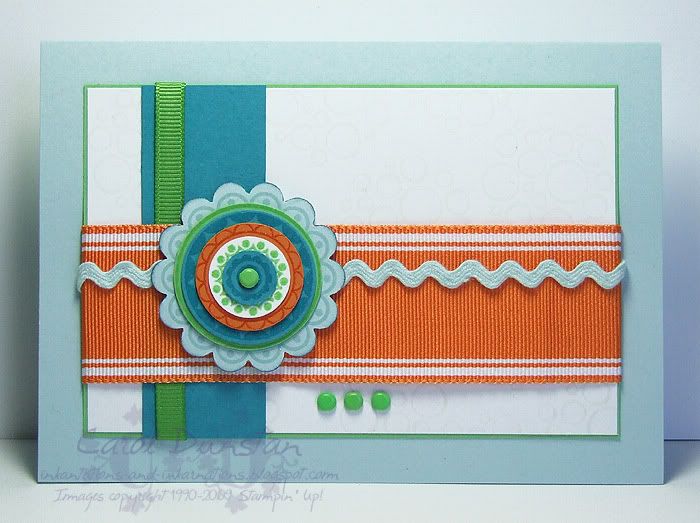
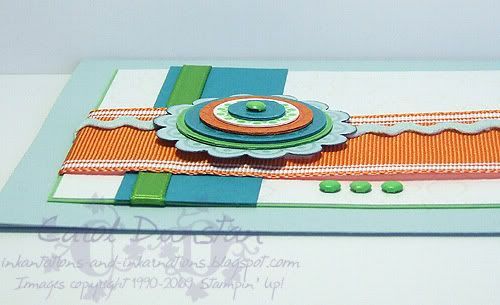
Kristina's latest colour challenge had my eyes bugging out of my head as soon as I saw it - they're an awesome combination! While I was tempted to make another boys card, I went with something non-descript, using another set that hasn't seen enough ink since I got it. I went back to some retired colours and accessories for this one too: Soft Sky for the blue because it worked much better than Bashful Blue (too blue) or Baja Breeze (too dark); and all ribbons are actually retired ones! All stamping is clear embossed, and I had intended to get the bleach out again and remove colour in a few areas, but in the end I let things be. The layout is based on AmyR's latest sketch, and below I have included a side-on shot so you can see how I built up the main motif to give it dimension without too much bulk.
All supplies by Stampin' Up!
Cardstock: Soft Sky, Green Galore, Whisper White, Taken With Teal, Pumpkin Pie
Stamp Set: Circle Circus
Ink: VersaMark, Green Galore
Accessories: scallop circle punch, 1 3/8" circle punch, 1 1/4" circle punch, 1" circle punch, 3/4" circle punch, 1/2" circle punch, Bold Brights brads, Flirty Ribbon Originals, District Ribbon Originals, Apple Green 1/4" grosgrain ribbon, clear embossing powder, dimensionals
Thursday, June 11, 2009
Bird of Friendship
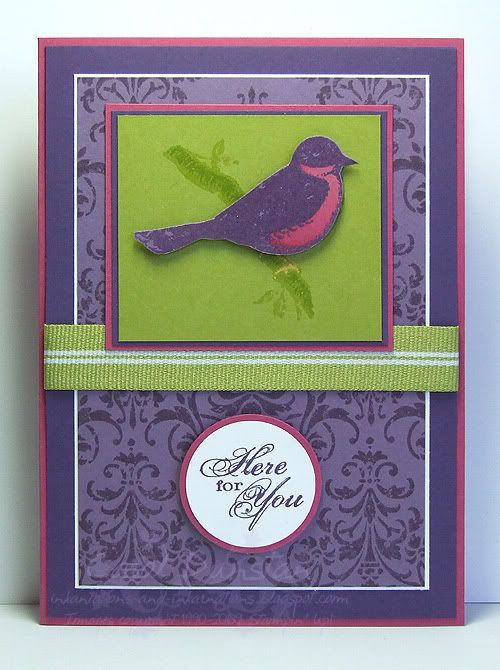
Freinds 24-7 was one of those sets I fell in love with as soon as I saw it, and got in my first order from teh new catalogue, but I haven't taken time out to play with it yet. I've seen some very lovely things done with it, but I decided to be a bit different and use some strong colours with it. The bird was stamped and clear embossed once on Perfect Plum and once on Kiwi Kiss. I used some Exit Mould in an aquapainter to bleach out the chest of the bird on the Plum one, and the birds legs on the Kiwi Kiss one. I only did the Kiwi one once, as I wanted to retain a bit of colour, but the Plum one I bleached 3 or 4 times to remove practically all the colour. I very nearly left it as it was after the first bleaching though, because it was a very similar colour to Rose Red, but I decided to go ahead with my original idea. Once the cardstock was dry I cut out the Plum bird and then flooded the bleached area with water before dipping the aquapainter into ink on the lid of my inkpad and then into the flooded area. I did this a couple of times, concentrating the colour on the birds tummy. While that was drying I stamped the sentiment and lovely damask style image for a background (anyone spot an error?), then put the card all together. I based the cards layout on Jen's latest sketch.Most supplies by Stampin' Up!
Cardstock: Rose Red, Elegant Eggplant, Perfect Plum, Kiwi Kiss, Whisper White
Stamp Set: Friends 24-7
Ink: VersaMark, Perfect Plum, Elegant Eggplant
Accessories: clear embossing powder, aquapainter, 1 1/4" circle punch, 1 3/8" circle punch, Kiwi Kiss striped grosgrain, dimensionals, Exit Mould (non-SU, lol...)
Wednesday, June 10, 2009
Cinema Saturday #35
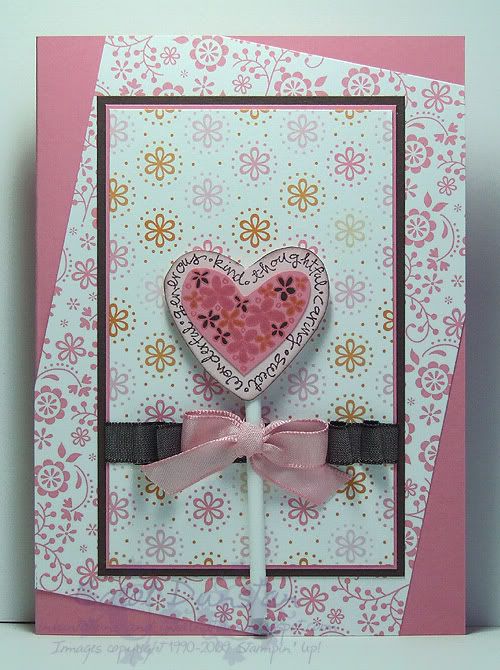
This week's Cinema Saturday movie is Some Like It Hot. Lollipops were a common reference in the movie, so the basic idea for this card came pretty quickly. The stick for my lollipop was a real-life lollipop stick... I was going to use an empty pen bit but felt it would be too thick, so Shaelea had to have this lollipop for the sake of Mummy's art. Card layout is based on Taylor's latest sketch.Most supplies by Stampin' Up!
Cardstock: Regal Rose, Chocolate Chip, Pink Pirouette
Stamp Set: Simply Said
Inks: VersaMark, Chocolate Chip
Accessories: sponge dauber, clear embossing powder, Pretty In Pink taffeta ribbon, Chocolate Chip taffeta ribbon, Sweet Always DSP, dimensionals, lollipop stick (non-SU!...)
Show watched while creating: Some Like It Hot
Sunday, May 17, 2009
The Card That Started It All
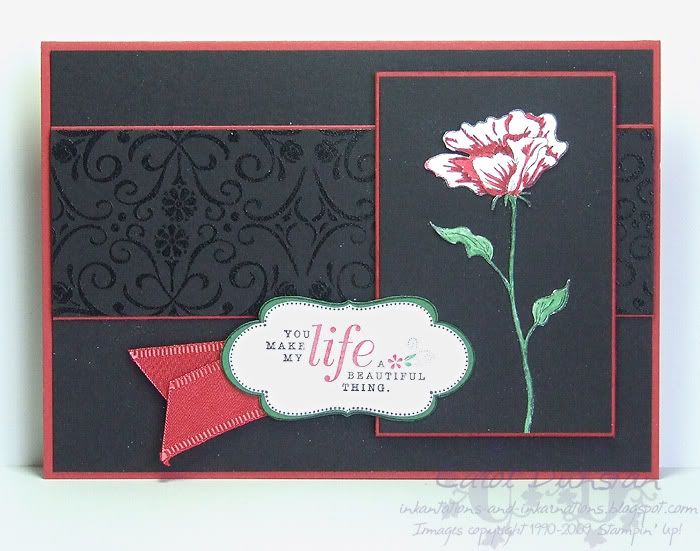
This card was made weeks ago, for Taylor's sketch challenge #64, but I kept it under wraps because I very quickly decided that I had to use these elements again for convention swaps and didn't want to spoil the surprise. You may notice a lot of white flecks on the card: that's not white embossing powder or anything like that, it's just dust and fluff that collected on the card over the weeks it sat here waiting to be photographed and a quick brush didn't get them off (I was in a rush as I needed to attend to dinner!). The main image is the Bloomin' With Beauty flower stamped on Whisper White and cut out just as I did for the bookmark swaps (though the others are coloured much nicer). The black strip across the middle has Bella's Border embossed in black just as I did for the "Bella & Edward/Jacob" cards, although here I did it twice (turning the wheel around the second time and trying to get a mirror image effect but I didn't quite line it up perfectly). The sentiment comes from yet another set, A Beautiful Thing, which I inked with my Basic Black, Riding Hood Red and Garden Green markers. I was quite happy with how this turned out!All supplies by Stampin' Up!
Cardstock: Riding Hood Red, Basic Black, Garden Green, Whisper White
Stamp Sets: Bloomin' With Beauty, Bella's Border, A Beautiful Thing, Frames With A Flourish
Inks: StazOn Jet Black, VersaMark
Accessories: Basic Black marker, Riding Hood Red "marker", Garden Green marker, Dress Up Ribbon Originals, aquapainter, dimensionals
Show watched while creating: Twilight
Tuesday, May 05, 2009
Convention Swaps Part I
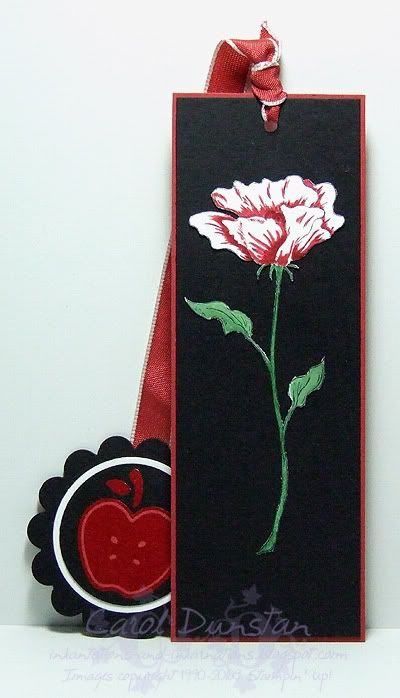
Caroline was correct, the inspiration for this piece was Twilight. I actually got the idea for the flower while working on a sketch challenge last week and loved how it turned out so much I decided to make it for a swap. The flower was stamped in StazOn on Whisper White cardstock then watercoloured with the aquapainter picking up ink from the lids of the inkpads, and then the flower was cut out. The apple was clear embossed on Riding Hood Red cardstock, punched out, and then I went around the outside twice with a Basic Black marker. You need to go over the black a second time to get it really black. I loved how these turned out, they came up better than I had imagined... but I am sure the non-Twilighters that swapped with me were thinking "what's an apple got to do with the flower???"All supplies by Stampin' Up!
Cardstock: Riding Hood Red, Basic Black, Whisper White
Stamp Sets: Bloomin’ With Beauty, Tart & Tangy
Inks: StazOn Jet Black, VersaMark; Riding Hood Red, Garden Green for watercolouring
Accessories: Aquapainter, Riding Hood Red taffeta ribbon, scallop circle punch, 1 3/8” circle punch, 1 ¼” circle punch, clear embossing powder, Basic Black marker
Show watched while creating: Twilight
Friday, May 01, 2009
How do you like these apples?
Sunday, April 19, 2009
Cinema Saturday #27
This weeks movie over at Cinema Saturday is The Lion King, and I am lucky enough to be guest designer!The Lion King has been a long-time favourite for me, so I was thrilled when asked to be guest designer for it. I was about 18 when I first saw TLK, and initially thought "urgh, a kids movie?" but Timon & Pumbaa won me over, particularly with their distraction of the hyenas during the fight to regain Pride Rock. I'll quite often start singing this at random, and have got my kids hooked on it too - so this just had to be the scene I was going to base my card on.
While my sister has both a realistic meerkat stamp and some Lion King stamps I decided that nothing would really satisfy me, I had to have a big Timon in "drag"... I merged a few images in Photoshop, printed them out and then cut out the various sections for templates to create a paper-pieced Timon. The flower was created with bits and pieces from the Pretties Kit, the skirt is a lot of frayed Old Olive grosgrain ribbon and the lei is a whole heap of Trio Flower punchies. I had no idea what I was going to do for the background until my new catty order arrived with it's Urban Garden paper... this pattern reminded me of the "I just can't wait to be king" scene, where Simba pokes his head through a bunch of long grassy stuff to make it look like he has a bigger mane. I finally squeezed some stamping in with "luau", clear embossed on Bali Breeze paper, cut out and edged with a Basic Black marker.
All supplies by Stampin' Up!
Cardstock: Orchid Opulence, Naturals Ivory, Creamy Caramel, Whisper White
Stamp Set: Big Deal
Inks: VersaMark
Accessories: Basic Black marker, Chocolate Chip marker, Close to Cocoa marker, Tangerine Tango "marker", Rose Red marker, Regal Rose marker, Summer Sun marker, Pretties kit, Old Olive 5/8" grosgrain ribbon, Urban Garden DSP, Bali Breeze DSP, clear embossing powder, sticky strip
Show watched while creating: The Lion King
Monday, March 30, 2009
KW Colour Inspiration #47
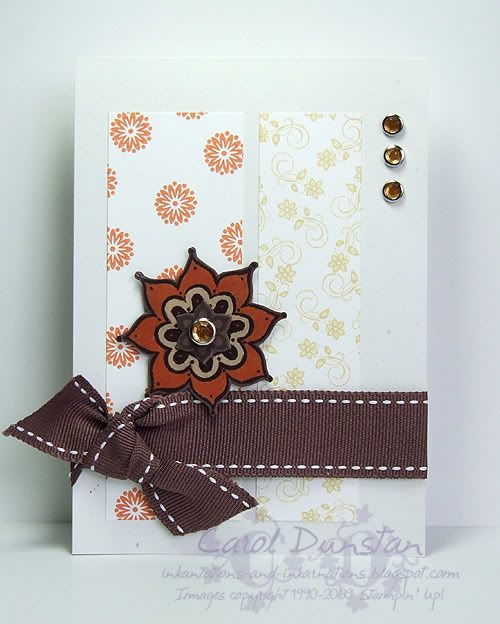
Woot, I got a challenge done in time! Admittedly there were a number of other things I should have been doing but I just had to have a play this afternoon. This card is a combination of Kristina's latest colour challenge and AmyR's latest sketch (it's been an age since I have done one of those!). I pulled out one of my favourite sets, Boho Backgrounds, and teamed it with One of a Kind. I think these two sets make a great pair, so it is nice to see One of a Kind return for the new Idea Book & Catalogue (only a couple of days away now!). The only thing of note on this card is the big flower, which I inked in VersaMark and clear embossed on Chocolate Chip cardstock. I then put some bleach (Exit Mould) in an aquapainter and painted over the sections that I wanted to remove colour from. I had a little too much bleach in the tip of the aquapainter and it soaked under the embossing a little bit but it's not too bad. I went over the outer bleached section with my Tangerine Tango marker and left the inner section plain since the bleach changed the cardstock to something very close to So Saffron.Most supplies by Stampin' Up!
Cardstock: Confetti White, Whisper White, Chocolate Chip
Stamp Sets: Boho Backgrounds, One of a Kind
Inks: Tangerine Tango, So Saffron, VersaMark, Chocolate Chip
Accessories: Boho Blossoms punch, Fire Circle Rhinestone brads, Chocolate Chip 1" double-stitched ribbon, dimensionals
Show watched while creating: Goldfinger
Subscribe to:
Posts (Atom)